

- Origin of solid walls and development of cavity walls
- Further advancements
- Solid wall insulation
- Solid wall insulation - externally
- Expanded Polystyrene (EPS)
- Mineral Wool
- Kingspan K5
- Wood Fibre
- Benefits of external wall insulation
- Drawbacks of external wall insulation
- Solid wall insulation - EWI and the damp problem
- Costs of solid wall insulation
- How do we install solid wall insulation?
- Insulating old stone walls
- Solid wall insulation - internal
- Is EWI better than IWI for solid wall insulation?
- Can you also insulate cavity walls?
Solid wall insulation is a critical component in the energy efficiency framework of older buildings, which often feature solid walls as a fundamental aspect of their construction. Unlike newer buildings that typically employ cavity walls, which consist of two layers with a space in between, solid walls are composed of a single solid layer that does not naturally offer an insulative barrier. This characteristic makes solid walls significantly less efficient at retaining heat, leading to higher energy consumption and heating costs.
Origin of solid walls and development of cavity walls
Solid walls have been a fundamental construction method for thousands of years. Traditionally, these walls were built using locally available materials such as stone or brick, laid in thick, sturdy layers to provide structural integrity and some level of thermal mass. In historical contexts, the thickness of these walls served not only as a means of support but also to retain heat in cooler weather. However, solid walls are inherently inefficient at maintaining indoor temperatures without additional insulation, as they allow heat to pass through easily. Most properties built before 1920 in the UK will have solid walls instead of cavity walls. The move towards cavity walls was prompted around the 1920s and 1930s due to the problems with damp. Once damp seeps into the exterior of a solid wall, it'll migrate through the wall and affect the structural integrity and indoor air quality. With the adoption of brick and stone in construction, various methods were attempted to combat dampness, including applying render on pre-1920 buildings to protect the underlying brick. This approach was partially successful but failed in extreme wet conditions as dampness would seep through the saturated walls. To counteract this, walls were constructed thickly, though this was not always effective. The Victorian era introduced a slate damp-proof course, preventing moisture from rising from the ground. However, this solution was prone to failure due to the brittle nature of the slate and the possibility of it cracking if the building moved. Cavity walls began to be widely adopted in the early 20th century, particularly in regions like the UK and other parts of Europe, where damp and variable weather conditions could severely affect buildings. A cavity wall design includes two 'skins' separated by a hollow space (cavity). The cavity is a barrier to reduce moisture penetration into the building’s interior and was initially not intended for thermal benefits. It wasn’t until the energy crises of the 1970s that the cavity began to be seen as a valuable zone for inserting insulation material.
Further advancements
The mid-20th century marked a significant shift with new insulation materials such as fibreglass, foam, and, later, more advanced aerogels and vacuum insulation panels. These materials could be placed within the cavity of walls or added to solid walls internally or externally, greatly enhancing a building's energy efficiency. This period also saw the rise of energy awareness and the development of building regulations that emphasised thermal efficiency's importance in reducing energy consumption and minimising environmental impact.
Today, the choice between using solid or cavity walls often depends on climatic conditions, aesthetic considerations, historical preservation, and energy standards. In some cases, older buildings with solid walls are retrofitted with insulation to improve energy efficiency without compromising their structural integrity or historical value. New building technologies have also enabled the construction of thinner, more energy-efficient solid walls that incorporate insulation materials within their structure.
Solid wall insulation
Solid walls are commonly constructed from brick, stone, concrete, or timber, each chosen for their robust structural qualities. However, one of the drawbacks of these materials is their inherently poor thermal resistance. Unlike cavity walls, solid walls lack this space, which features a gap between two layers that can be filled with insulating material. This absence means that any insulation must be applied directly to the surfaces of the walls, either on the inside or the outside. Two primary approaches address this issue: External Wall Insulation (EWI) and Internal Wall Insulation (IWI). External wall insulation involves adding a protective layer to the outside of the building. This method improves thermal performance, revamps the exterior appearance, and protects the underlying structure from weather-related damage. Conversely, internal wall insulation is applied to the inside surfaces of the walls. While this technique is often less disruptive to the building's external appearance and can be implemented regardless of external space limitations, it does reduce the internal floor area. It requires careful installation to avoid issues with moisture and ventilation.
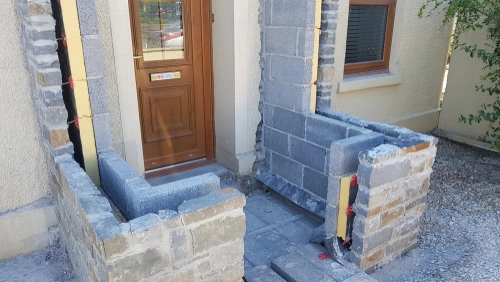
Solid wall insulation - externally
External Wall Insulation (EWI) is a system used to enhance the thermal performance of buildings with solid walls, which are typically less efficient at insulating against heat loss than cavity walls. EWI involves attaching a layer of insulation material to the exterior walls of a building, which is then covered with a protective render or cladding. This improves energy efficiency and refreshes the building's exterior appearance.
Expanded Polystyrene (EPS)
EPS is one of the most widely used materials for external wall insulation due to its cost-effectiveness and excellent insulating properties. It is lightweight and easy to cut and shape, making it versatile for various building contours and shapes. EPS boards are typically available in different densities, offering varying thermal resistance and strength levels. However, EPS is combustible at higher temperatures, so it must be adequately covered and treated to meet fire safety regulations.
Mineral Wool
Mineral wool insulation is made from rock or slag and is known for its fire-resistant properties, making it a safer option for fire safety. Rockwool has a fire rating of A1, which is top of the class. It offers good thermal performance and excellent sound insulation, which can be particularly beneficial in urban environments or buildings near busy roads. Mineral wool is denser than EPS, providing better thermal mass and a more stable indoor temperature throughout the day.
Kingspan K5
Kingspan K5 boards are made from phenolic foam, which offers one of the highest levels of thermal efficiency among insulation materials. Phenolic foam has a closed-cell structure that provides excellent moisture resistance and thermal performance. Kingspan K5 boards are also thinner than other types of insulation for the same level of thermal resistance, making them an effective solution where maintaining the building's profile is essential. However, they tend to be more expensive than EPS or mineral wool and must be carefully installed to avoid issues with moisture ingress.
Wood Fibre
Wood fibre insulation is an eco-friendly option made from natural wood fibres.It is breathable, which helps manage moisture within the building structure, making it particularly suitable for older buildings where condensation might be a concern. Wood fibre boards also have good thermal mass, helping to reduce overheating in summer and keeping warmth in winter. This type of insulation is often chosen for buildings where environmental sustainability is a priority or for use in conservation areas where maintaining the aesthetic with natural materials is essential.
Benefits of external wall insulation
- Reduced heat loss and energy bills
- Fewer draughts and increased sense of comfort
- No disruption to the house while being installed
- Does not reduce internal floor area
- Walls to contribute to thermal mass
- Improves weatherproofing and sound resistance
- Increases the life of the wall
- Reduces condensation on internal walls
Drawbacks of external wall insulation
Most drawbacks associated with external wall insulation revolve around incorrect installation. For example, any gaps or cracks, irrespective of size, will invite water penetration; once damp becomes trapped within insulated walls, it will continue inwards. Potential rot and mould can affect the home's structural integrity and indoor air quality. Given that external wall insulation significantly alters the appearance of your home, you may require planning permission. There may also be problems with insulating listed buildings or those in Conservation Areas, where insulating internally may be required.
Solid wall insulation - EWI and the damp problem
Historically, walls were designed either to be impermeable to prevent moisture penetration from both sides or to be breathable, allowing some moisture ingress but enabling it to evaporate away. The advent of the cavity wall introduced a design where the cavity acts as a barrier to moisture. The cavity prevents direct moisture penetration through the outer wall, with any moisture that does enter being evaporated away by air movement within the cavity itself. This design effectively manages moisture by keeping the inner wall surface dry.
However, many modern external wall insulation (EWI) materials are non-permeable and are finished with render or cladding to prevent rainwater penetration. While these materials effectively keep out rain, they do not address internal moisture produced from daily activities like cooking, washing, and breathing. This internal moisture can accumulate, necessitating increased ventilation within the home to prevent it from condensing on wall surfaces.
Detailing is crucial in preventing damp problems when installing EWI. Regulations about verge trims are patchy and insufficient; however, they should be used. The primary guidance for roofs is to extend the soffits. Water penetration is a huge issue, so taking steps to prevent it is essential.
Managing details at critical junctions, such as around windows and doors and the damp-proof course level, is vital to prevent thermal and moisture bridging. Extending the rafters may be necessary at the roof level to accommodate the added thickness of insulated walls.
[caption id="attachment_68175" align="aligncenter" width="1000"]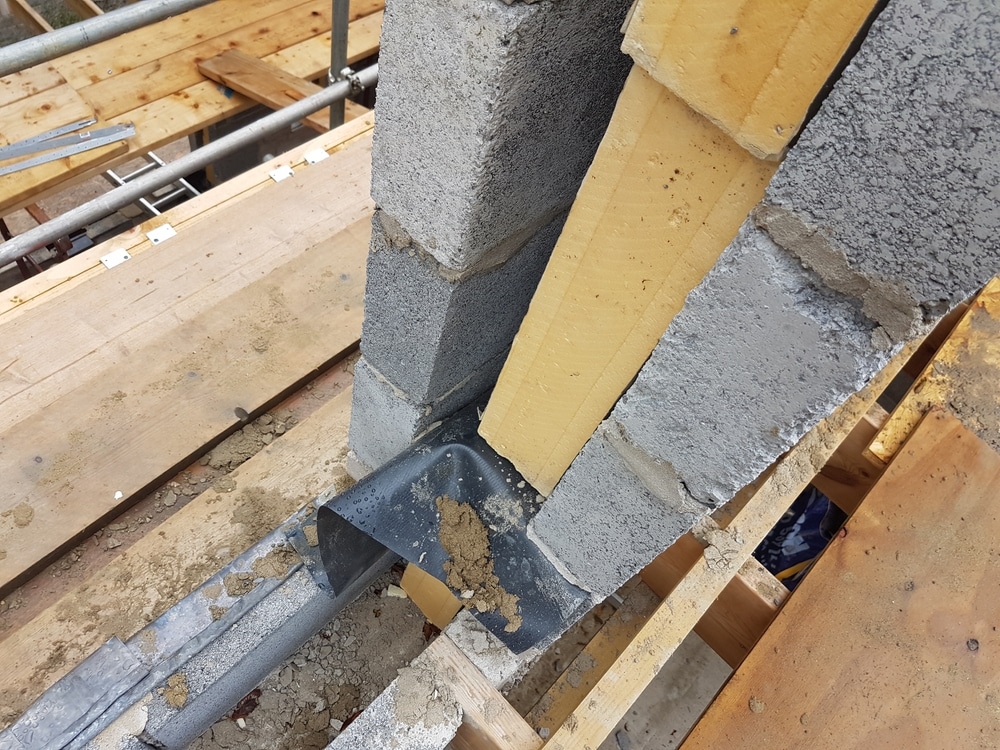 A DPC in place in a cavity wall[/caption]
Moreover, installing insulation changes the location of the dew point—the temperature at which air condenses into water. External insulation warms the internal wall, pushing the dew point outward toward the colder external air, which reduces the risk of condensation inside. However, if the dew point falls within these areas, condensation might occur between the insulation and the wall or within the insulation itself. To counter this, most EWI systems include a vapour barrier between the wall and the insulation to manage condensation risks.
A DPC in place in a cavity wall[/caption]
Moreover, installing insulation changes the location of the dew point—the temperature at which air condenses into water. External insulation warms the internal wall, pushing the dew point outward toward the colder external air, which reduces the risk of condensation inside. However, if the dew point falls within these areas, condensation might occur between the insulation and the wall or within the insulation itself. To counter this, most EWI systems include a vapour barrier between the wall and the insulation to manage condensation risks.
Costs of solid wall insulation
Solid wall insulation is not the cheapest option; however, it is the most effective. Below, we've drawn up rough costs for different property types, but these can vary depending on the type of insulation and render chosen.
| Type of home | Size (sqm) | Bedrooms | Cost | Savings | Payback |
| Detached | 147 | 4 | £15,000 - £20,000 | £1,000 | 20 years |
| Semi-detached | 96 | 3 | £8,000 - £10,000 | £700 | 15 years |
| Mid-terraced | 64-100 | 2-3 | £6,000 - £8,000 | £500 - £700 | 12-15 years |
| Bungalow | 77 | 1-2 | £6,000 - £8,000 | £700 | 12-15 years |
How do we install solid wall insulation?
Our primary focus is on external wall insulation when it comes to solid wall insulation. However, some materials, especially the insulation boards, can be used in both. For example, when you build a stud wall and insulate the stud cavity, you can use mineral wool or sheep's wool. The process of installing solid wall insulation starts with assessing the substrate. Depending on the state of the wall, you may need to consider certain things and take certain steps.
- Wall Preparation: Begin by assessing the condition of the external walls. Depending on their state, you might simply need a thorough scrub or, in some cases, a complete removal of the existing external coating. If walls are smooth, apply EWI-310 Universal Primer to enhance adhesive bonding. For uneven surfaces, use EWI-260 Levelling Mortar to create a smooth base. Additionally, treat any organic growth with a fungicidal wash.
- Starter Tracks Application: Install the starter tracks above the damp-proof course once the walls are prepped. These tracks facilitate the installation of insulation panels and protect the bottom edge of the insulation from weather and moisture damage. Aluminium starter tracks are recommended for their durability and neat finish.
- Insulation Application: Attach the insulation boards using the modified dot-and-dab method—three dots in the centre and a continuous layer around the perimeter. EWI-220 EPS Basecoat can serve as the adhesive. Apply the basecoat with a notched trowel to ensure uniform thickness, and use mechanical fixings (6 per square meter) to secure the insulation to the wall. Allow the basecoat to set for 2-3 days before proceeding.
- Beading and Verge Trims Application: Apply different beads before the final basecoat to reinforce the insulation system at vulnerable points. Corner beads protect external corners, movement beads seal vertical joints, and bellcast beads deflect water from the wall base.
- Basecoat and Mesh Layer Application: Another basecoat layer is applied after the initial setting period. With a flat-edged trowel, embed fibreglass mesh into this layer, ensuring 10-15 cm overlaps between strips to increase tensile strength and prevent cracking.
- Render Primer Application: Though optional, applying a render primer can enhance the adhesion and durability of the final render coat. Select a primer suited to the type of render being used.
- Render Application: Apply the chosen render (e.g., Silicone Render) at the specified thickness to provide a durable, flexible, and breathable external layer to the EWI system. The render should be no thicker than prescribed to maintain the system’s efficiency and aesthetic appeal.
Insulating old stone walls
The choice of insulation material is critical for properties with breathable masonry, such as those built with certain types of stone or older brick that require ventilation to manage moisture. One effective solution is to use natural, breathable materials like wood-fibre insulation. This can be coated with a moisture-permeable lime render and finished with breathable paint. This approach maintains the wall's ability to "breathe" by allowing moisture to evaporate.
The quality and condition of the masonry also play significant roles in deciding the appropriate insulation strategy. For example, spalling—where the brick's surface flakes off—often indicates freeze-thaw cycles. This occurs when moisture penetrates the brick, freezes, and causes flaking. This not only affects the brick's appearance but also its structural integrity.
[caption id="attachment_64040" align="aligncenter" width="1024"]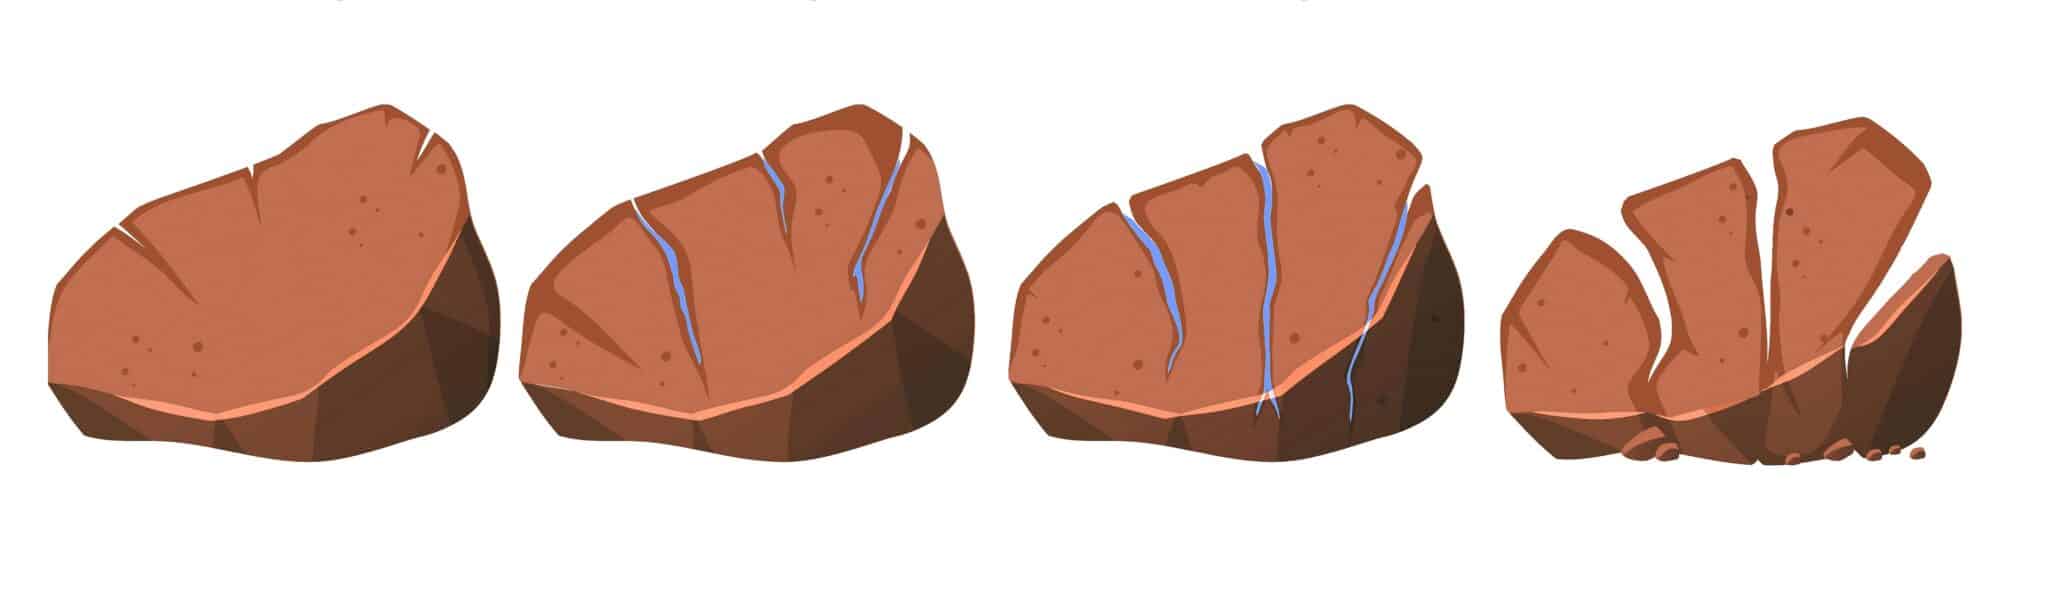 Freeze-thaw cycle[/caption]
Contrary to stone, a typical brick wall is not inherently breathable. In such cases, rigid foam insulations are appropriate as they don't rely on the wall's ability to expel moisture. These insulations can be mechanically fixed to the wall and then covered with various finishes such as render, timber, or other claddings. This method ensures that the external insulation has little impact on the structural performance of the wall but significantly enhances its thermal performance.
Freeze-thaw cycle[/caption]
Contrary to stone, a typical brick wall is not inherently breathable. In such cases, rigid foam insulations are appropriate as they don't rely on the wall's ability to expel moisture. These insulations can be mechanically fixed to the wall and then covered with various finishes such as render, timber, or other claddings. This method ensures that the external insulation has little impact on the structural performance of the wall but significantly enhances its thermal performance.
Solid wall insulation - internal
Internal Wall Insulation improves the thermal efficiency of buildings with solid walls, particularly when external modifications are impractical or undesirable. This approach involves applying insulation materials directly to the inner surfaces of external walls and can be implemented using several different methods.
One common method is rigid insulation boards made from polystyrene, polyurethane, or phenolic foam. These boards are attached directly to the walls using adhesive or mechanical fixings and provide a high level of insulation with a relatively slim profile. Another approach is stud wall insulation, which involves constructing a metal or wooden frame fixed to the wall. The gaps between the studs are filled with insulating material such as mineral wool or fibreglass. This method is particularly versatile as it allows for easy integration of services like electrical wiring and plumbing within the stud cavity. Flexible thermal linings, though less common, are another option where minimal changes to the wall structure are preferred.
Internal wall insulation has several advantages. It is generally less expensive than external wall insulation since it does not require extensive scaffolding or external modifications. It also allows for control over the interior finish, offering the opportunity to simultaneously upgrade a room's aesthetics.
However, there are significant challenges to consider. Installing IWI reduces the available interior space due to the thickness of the insulation and any framing used. This can be particularly problematic in smaller rooms. Thermal bridging at floors, ceilings, and around windows can also diminish the insulation’s effectiveness and needs careful attention during installation. Moisture management is another critical concern; improper installation can lead to condensation issues within the wall, potentially causing damp and mould. Furthermore, the installation process can be quite disruptive, often necessitating the temporary removal of room features like skirting boards, electrical outlets, and radiators.
[caption id="attachment_63631" align="aligncenter" width="1024"]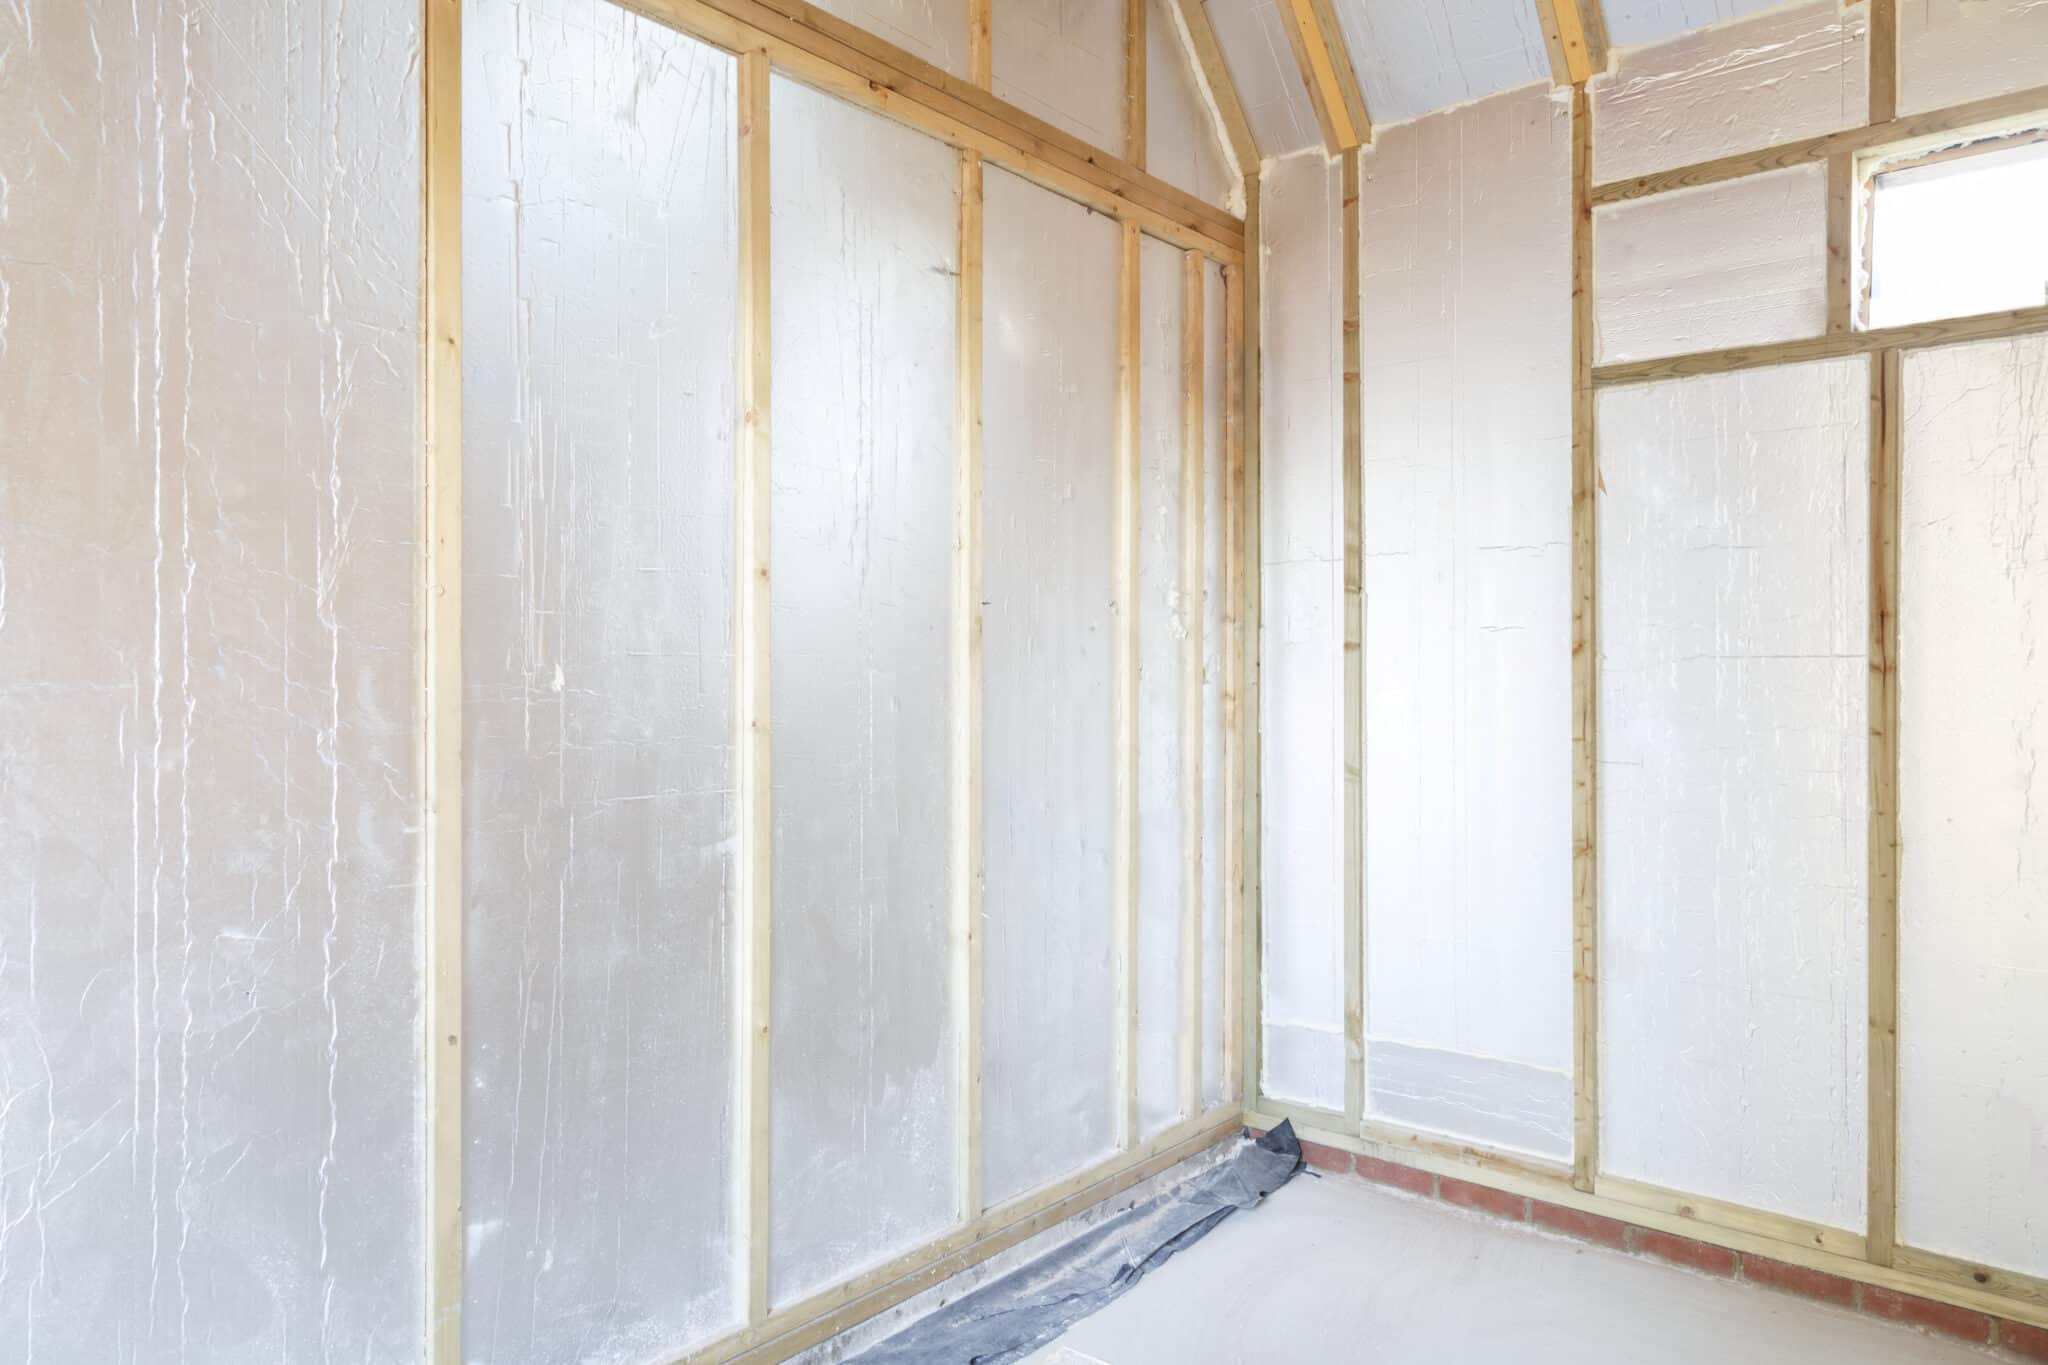 Internal wall insulation, specifically between timber frames[/caption]
Is EWI better than IWI for solid wall insulation?
This is a complicated answer, but we believe that it is! There are a few reasons for this:
- Bigger savings - The Energy Savings Trust states that EWI can save you up to £700 annually on your energy bills, whereas IWI saves less.
- No loss of internal floor space - Because the walls are insulated externally, you don't lose valuable floor space within your home.
- Less disruptive - IWI installation involves working from room to room, disrupting the day-to-day. Installing EWI does none of that, as no work is done internally.
- Improved aesthetics - EWI allows you to improve the external facade with attractive render finishes. We can tint our render to any shade or colour, so the choice of customisation is almost endless.
- Weatherproofing and acoustic insulation - Combining mineral wool and our silicone renders results in reduced noise from outside and a more weather-resistant facade. Silicone render is hydrophobic and resistant to corrosion.
Can you also insulate cavity walls?
Yes, you can! Typically, the cavity in these walls is ventilated to allow moisture within the cavity to evaporate and to prevent damp issues in the interior. This ventilation, while crucial for moisture management, can inadvertently reduce the effectiveness of EWI. The heat from the house's interior can escape into the ventilated cavity and then be lost to the outside atmosphere before reaching the external insulation. This can render the EWI less effective, as much of the heat it is supposed to retain has already been dissipated. Moreover, problems can arise if the cavity-fill insulation within the walls fails. Failure often occurs when the insulation material allows rainwater to penetrate across the cavity, leading to damp problems inside the building. However, adding EWI with a weatherproof render can address this issue by preventing rainwater from entering the walls in the first place. This resolves the water ingress issue and ensures that the cavity-fill insulation functions effectively as a thermal barrier. A practical approach to optimising cavity wall insulation is combining cavity fill with EWI. Doing so allows you to split the necessary insulation thickness between the internal cavity and the external surface, thus enhancing overall insulation without relying solely on one method. For instance, if the typical cavity width is about 50mm, adding 20mm of external insulation can significantly improve the wall's U-value, making it more thermally efficient.