How and When to Remove Render
When renovating or restoring your home, removing render from walls is a task that often needs careful consideration. Render, typically made from a mixture of cement, sand, lime, and water, is applied to the exterior of buildings to provide aesthetic appeal and protection. However, there are times when this protective layer needs to be removed, either due to damage, for aesthetic updates, or to address underlying issues.
How to identify when you need to remove render
Before installing external wall insulation, it’s crucial to assess whether the existing render on a building needs to be removed. This step is essential to ensure the new insulation system adheres properly and functions effectively, providing the intended energy efficiency and protection. External wall insulation is a significant upgrade that can improve a building’s thermal performance but requires a solid and stable surface for installation.
Removing old or damaged render before installing external wall insulation ensures that any underlying issues are addressed. This prevents potential problems such as moisture ingress, structural damage, or insulation failure due to incompatible or compromised surfaces. By carefully evaluating the condition of the render, you can determine if removal is necessary to achieve a successful insulation project and enhance the building’s overall performance and appearance.
Cracks and damage
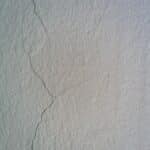
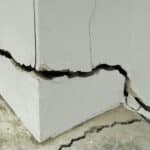
One of the primary reasons for removing render is the presence of cracks and damage. These imperfections can lead to moisture infiltration, which may cause further structural issues. Small hairline cracks might seem superficial but can widen over time, allowing water to seep into the wall. This moisture can freeze and thaw in colder months, exacerbating the cracks and potentially leading to more significant structural damage.
More severe cracks, especially those around windows and doors, can indicate deeper issues. These might be due to the settling or shifting of the building’s foundation or improper application of the render itself. In such cases, addressing these problems promptly is crucial to prevent further deterioration.
When inspecting cracks, look for patterns that suggest more than superficial damage. Horizontal or diagonal cracking often indicates structural movement, while a network of fine cracks might suggest that the render is reaching the end of its useful life. Removing the damaged render not only allows you to repair these issues but also allows you to inspect the underlying wall for any hidden problems that need attention.
Damp issues
Render can sometimes trap moisture against the wall, leading to damp problems inside the property. This is particularly problematic in older buildings where the walls need to ‘breathe’ to allow moisture to evaporate naturally. If render prevents this, signs of rising damp can become evident, such as peeling wallpaper, mould growth, or a persistent musty smell. These symptoms not only affect the aesthetic appeal of your home but can also have health implications, especially for those with respiratory issues.
In cases where damp is present, it’s essential to consider the source of the moisture. It could be due to external factors like poor drainage or internal issues like condensation. Removing the render allows for a thorough inspection of the wall’s condition and helps identify necessary repairs to prevent future moisture ingress. Once the render is removed, allowing the wall to dry out completely before applying any new finishes or treatments is important. This step is crucial in ensuring that the damp issues are resolved and do not recur.
Poor application
If the render was poorly applied or the wrong type of render was used for your building, it might fail to adhere correctly, leading to bulging or detachment. This often occurs when the materials used are incompatible with the underlying wall or when the application process is rushed, resulting in uneven layers or inadequate bonding. Such unsightly issues can compromise the render’s protective function, leaving the wall vulnerable to environmental damage.
When render is not correctly applied, it can cause many problems. For example, if the mixture is too rigid for the type of wall it covers, it can crack under natural building movements. Conversely, a render that is too soft might erode quickly under harsh weather conditions. The render’s poor performance in both scenarios can lead to further issues, such as moisture penetration and thermal inefficiency.
The first step in rectifying these issues is removing the faulty render. This allows for a detailed inspection of the wall to assess any damage and prepare it properly for a new application. Choosing the right type of render and ensuring it is applied in optimal conditions by experienced professionals will help avoid future problems and ensure the longevity and efficacy of the new coating.
Updating the aesthetic
Sometimes, the removal of render is purely for aesthetic reasons. Homeowners may wish to reveal and restore the original brickwork or stonework beneath, especially in older properties where these features add significant character and value. Over time, tastes and styles evolve, and what was once fashionable may now appear dated or out of sync with the surrounding architecture. Removing the render can transform the appearance of a building, exposing its historical elements and enhancing its charm.
In some cases, the render may have been applied to modernise the property or to cover up previous imperfections. However, as appreciation for authentic materials and traditional craftsmanship grows, many remove these layers to showcase the original masonry. This enhances the property’s visual appeal and can increase its market value, particularly if the original features are in good condition and of historical significance.
Updating the aesthetic by removing render should be approached carefully, especially in historic buildings. It’s important to assess the condition of the underlying structure and ensure that any exposed materials are treated and preserved correctly. This might involve repairing damaged bricks or stones and applying suitable sealants to protect them from future weathering.
How to remove render from substrates
Before you begin, protect the surrounding area with dust sheets and remove any obstacles. Wear protective gear, including gloves, goggles, and a dust mask to protect yourself from debris and dust.
Start by choosing a less visible section of the wall. This approach will help you understand how well the render is bonded to the wall and the best method for its removal.
A hammer and chisel can be effective for smaller areas or when dealing with particularly stubborn render. An SDS drill with a chisel attachment for larger areas can speed up the process. Always start from the top and work down to prevent the render from supporting its weight and pulling away larger sections than intended.

Consider hiring a professional if the render is extensive or the building is old or fragile. They will have the experience and tools to remove the render without damaging the underlying structure.
When should you not remove render from walls?
Removing render from a building can be beneficial in many cases, but it might not be advisable or necessary in certain situations.
- Structural integrity: If the render is providing essential structural support or stability to the building, removing it could compromise the integrity of the walls. This is particularly relevant for older buildings where the render may hold weakened or damaged masonry together.
- Historical value: The render may have heritage value in historic properties, especially if it is part of the original construction or a significant period of the building’s history. Removing it could erase important architectural details and reduce the property’s historical significance.
- Good condition: If the render is in good condition, well-maintained, and providing effective protection against the elements, there might be no need to remove it.
- Insulation and protection: Render often plays a crucial role in insulating and protecting a building from weather damage. If removing the render exposes the building to significant thermal loss or increased risk from weather conditions, it’s better to repair or upgrade the existing render rather than remove it.
- Cost and complexity: If the aesthetic or functional gains are minimal compared to the effort and expense involved, maintaining or repairing the existing render might be more practical.
- Environmental impact: Removing the render and then applying a new finish involves a lot of materials and energy. If the environmental impact of such work is a concern, and the current render is performing adequately, it might be more sustainable to leave it in place.
- Regulations and permissions: In some areas, especially in conservation zones or for listed buildings, strict regulations may govern changes to the building’s exterior. Removing the render could require special permissions, and failure to comply could lead to legal issues.
Rendering over existing render?
Rendering over existing render can be a viable option under certain conditions, but it requires careful consideration to ensure the integrity and longevity of the new finish. The most critical factor is the condition of the current render. It must be stable, adhered firmly to the wall, and free from major cracks or damage. If the existing render is loose, crumbling, or has significant moisture issues, it should be removed before applying a new layer.
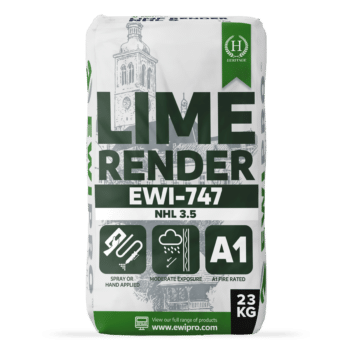
Ensure that the new render is compatible with the existing one. Different types of render have varying levels of flexibility, breathability, and bonding capabilities. Heritage options like lime render are suitable for maintaining the aesthetic.
Lime Render NHL 3.5 (EWI-747) – 23kg
Rated 5.00 out of 5
£19.94 Incl. VAT£16.62 Excl. VAT
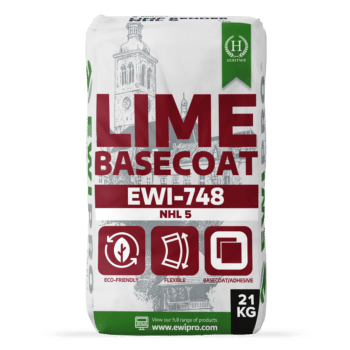
Lime Basecoat NHL 5 (EWI-748) – 21kg
£27.94 Incl. VAT£23.28 Excl. VAT
Proper preparation is essential for a good bond between the old and new render. This may include cleaning, repairing minor cracks, and applying a suitable primer or bonding agent to ensure the new render adheres well. Considering the total thickness of the render layers is essential. Adding new render over old can increase the wall’s weight, potentially affecting its structural capacity. Ensure the wall can support the additional weight without risk of damage.
Facebook
Twitter
LinkedIn
Your cart
Trade Account Login

We use cookies on our website to give you the most relevant experience by remembering your preferences and repeat visits. By clicking “Accept All”, you consent to the use of ALL the cookies. However, you may visit "Cookie Settings" to provide personalised consent.
Manage consent
Privacy Overview
This website uses cookies to improve your experience while you navigate through the website. Out of these, the cookies that are categorized as necessary are stored on your browser as they are essential for the working of basic functionalities of the website. We also use third-party cookies that help us analyze and understand how you use this website. These cookies will be stored in your browser only with your consent. You also have the option to opt-out of these cookies. But opting out of some of these cookies may affect your browsing experience.
Necessary cookies are absolutely essential for the website to function properly. These cookies ensure basic functionalities and security features of the website, anonymously.
| Cookie | Duration | Description |
|---|---|---|
| __stripe_mid | 1 year | This cookie is set by Stripe payment gateway. This cookie is used to enable payment on the website without storing any patment information on a server. |
| __stripe_sid | 30 minutes | This cookie is set by Stripe payment gateway. This cookie is used to enable payment on the website without storing any patment information on a server. |
| _GRECAPTCHA | 5 months 27 days | This cookie is set by the Google recaptcha service to identify bots to protect the website against malicious spam attacks. |
| apbct_cookies_test | session | CleanTalk sets this cookie to prevent spam on comments and forms and act as a complete anti-spam solution and firewall for the site. |
| apbct_page_hits | session | CleanTalk sets this cookie to prevent spam on comments and forms and act as a complete anti-spam solution and firewall for the site. |
| apbct_prev_referer | session | Functional cookie placed by CleanTalk Spam Protect to store referring IDs and prevent unauthorized spam from being sent from the website. |
| apbct_site_landing_ts | session | CleanTalk sets this cookie to prevent spam on comments and forms and act as a complete anti-spam solution and firewall for the site. |
| apbct_site_referer | 3 days | This cookie is placed by CleanTalk Spam Protect to prevent spam and to store the referrer page address which led the user to the website. |
| apbct_timestamp | session | CleanTalk sets this cookie to prevent spam on comments and forms and act as a complete anti-spam solution and firewall for the site. |
| apbct_urls | 3 days | This cookie is placed by CleanTalk Spam Protect to prevent spam and to store the addresses (urls) visited on the website. |
| AWSALBCORS | 7 days | This cookie is managed by Amazon Web Services and is used for load balancing. |
| cookielawinfo-checkbox-advertisement | 1 year | Set by the GDPR Cookie Consent plugin, this cookie is used to record the user consent for the cookies in the "Advertisement" category . |
| cookielawinfo-checkbox-analytics | 11 months | This cookie is set by GDPR Cookie Consent plugin. The cookie is used to store the user consent for the cookies in the category "Analytics". |
| cookielawinfo-checkbox-functional | 11 months | The cookie is set by GDPR cookie consent to record the user consent for the cookies in the category "Functional". |
| cookielawinfo-checkbox-necessary | 11 months | This cookie is set by GDPR Cookie Consent plugin. The cookies is used to store the user consent for the cookies in the category "Necessary". |
| cookielawinfo-checkbox-others | 11 months | This cookie is set by GDPR Cookie Consent plugin. The cookie is used to store the user consent for the cookies in the category "Other. |
| cookielawinfo-checkbox-performance | 11 months | This cookie is set by GDPR Cookie Consent plugin. The cookie is used to store the user consent for the cookies in the category "Performance". |
| ct_checkjs | session | CleanTalk–Used to prevent spam on our comments and forms and acts as a complete anti-spam solution and firewall for this site. |
| ct_fkp_timestamp | session | CleanTalk sets this cookie to prevent spam on the site's comments/forms, and to act as a complete anti-spam solution and firewall for the site. |
| ct_pointer_data | session | CleanTalk sets this cookie to prevent spam on the site's comments/forms, and to act as a complete anti-spam solution and firewall for the site. |
| ct_ps_timestamp | session | CleanTalk sets this cookie to prevent spam on the site's comments/forms, and to act as a complete anti-spam solution and firewall for the site. |
| ct_sfw_pass_key | 1 month | CleanTalk sets this cookie to prevent spam on comments and forms and act as a complete anti-spam solution and firewall for the site. |
| ct_timezone | session | CleanTalk–Used to prevent spam on our comments and forms and acts as a complete anti-spam solution and firewall for this site. |
| elementor | never | This cookie is used by the website's WordPress theme. It allows the website owner to implement or change the website's content in real-time. |
| viewed_cookie_policy | 11 months | The cookie is set by the GDPR Cookie Consent plugin and is used to store whether or not user has consented to the use of cookies. It does not store any personal data. |
Functional cookies help to perform certain functionalities like sharing the content of the website on social media platforms, collect feedbacks, and other third-party features.
| Cookie | Duration | Description |
|---|---|---|
| __zlcmid | 1 year | This cookie is used by Zendesk live chat and is used to store the live chat ID. |
| bcookie | 2 years | LinkedIn sets this cookie from LinkedIn share buttons and ad tags to recognize browser ID. |
| bscookie | 2 years | LinkedIn sets this cookie to store performed actions on the website. |
| lang | session | LinkedIn sets this cookie to remember a user's language setting. |
| lidc | 1 day | LinkedIn sets the lidc cookie to facilitate data center selection. |
| UserMatchHistory | 1 month | LinkedIn sets this cookie for LinkedIn Ads ID syncing. |
Performance cookies are used to understand and analyze the key performance indexes of the website which helps in delivering a better user experience for the visitors.
| Cookie | Duration | Description |
|---|---|---|
| __utma | 2 years | This cookie is set by Google Analytics and is used to distinguish users and sessions. The cookie is created when the JavaScript library executes and there are no existing __utma cookies. The cookie is updated every time data is sent to Google Analytics. |
| __utmb | 30 minutes | Google Analytics sets this cookie, to determine new sessions/visits. __utmb cookie is created when the JavaScript library executes and there are no existing __utma cookies. It is updated every time data is sent to Google Analytics. |
| __utmc | session | The cookie is set by Google Analytics and is deleted when the user closes the browser. It is used to enable interoperability with urchin.js, which is an older version of Google Analytics and is used in conjunction with the __utmb cookie to determine new sessions/visits. |
| __utmt | 10 minutes | Google Analytics sets this cookie to inhibit request rate. |
| __utmv | 2 years | The __utmv cookie is set on the user's device, to enable Google Analytics to classify the visitor. |
| __utmz | 6 months | Google Analytics sets this cookie to store the traffic source or campaign by which the visitor reached the site. |
| sib_cuid | 6 months | Purechat uses this cookie to send data to purechat.com, to connect visitors to the reservation team and track visitors to stay on portal. |
| SRM_B | 1 year 24 days | Used by Microsoft Advertising as a unique ID for visitors. |
Analytical cookies are used to understand how visitors interact with the website. These cookies help provide information on metrics the number of visitors, bounce rate, traffic source, etc.
| Cookie | Duration | Description |
|---|---|---|
| _ga | 2 years | The _ga cookie, installed by Google Analytics, calculates visitor, session and campaign data and also keeps track of site usage for the site's analytics report. The cookie stores information anonymously and assigns a randomly generated number to recognize unique visitors. |
| _gat_gtag_UA_61069204_2 | 1 minute | Set by Google to distinguish users. |
| _gat_UA-61069204-2 | 1 minute | A variation of the _gat cookie set by Google Analytics and Google Tag Manager to allow website owners to track visitor behaviour and measure site performance. The pattern element in the name contains the unique identity number of the account or website it relates to. |
| _gcl_au | 3 months | Provided by Google Tag Manager to experiment advertisement efficiency of websites using their services. |
| _gid | 1 day | Installed by Google Analytics, _gid cookie stores information on how visitors use a website, while also creating an analytics report of the website's performance. Some of the data that are collected include the number of visitors, their source, and the pages they visit anonymously. |
| _uetsid | 1 day | This cookies are used to collect analytical information about how visitors use the website. This information is used to compile report and improve site. |
| CONSENT | 2 years | YouTube sets this cookie via embedded youtube-videos and registers anonymous statistical data. |
Advertisement cookies are used to provide visitors with relevant ads and marketing campaigns. These cookies track visitors across websites and collect information to provide customized ads.
| Cookie | Duration | Description |
|---|---|---|
| _fbp | 3 months | This cookie is set by Facebook to display advertisements when either on Facebook or on a digital platform powered by Facebook advertising, after visiting the website. |
| ANONCHK | 10 minutes | The ANONCHK cookie, set by Bing, is used to store a user's session ID and also verify the clicks from ads on the Bing search engine. The cookie helps in reporting and personalization as well. |
| fr | 3 months | Facebook sets this cookie to show relevant advertisements to users by tracking user behaviour across the web, on sites that have Facebook pixel or Facebook social plugin. |
| MUID | 1 year 24 days | Bing sets this cookie to recognize unique web browsers visiting Microsoft sites. This cookie is used for advertising, site analytics, and other operations. |
| NID | 6 months | NID cookie, set by Google, is used for advertising purposes; to limit the number of times the user sees an ad, to mute unwanted ads, and to measure the effectiveness of ads. |
| test_cookie | 15 minutes | The test_cookie is set by doubleclick.net and is used to determine if the user's browser supports cookies. |
| uuid | 6 months | MediaMath sets this cookie to avoid the same ads from being shown repeatedly and for relevant advertising. |
| VISITOR_INFO1_LIVE | 5 months 27 days | A cookie set by YouTube to measure bandwidth that determines whether the user gets the new or old player interface. |
| YSC | session | YSC cookie is set by Youtube and is used to track the views of embedded videos on Youtube pages. |
| yt-remote-connected-devices | never | YouTube sets this cookie to store the video preferences of the user using embedded YouTube video. |
| yt-remote-device-id | never | YouTube sets this cookie to store the video preferences of the user using embedded YouTube video. |
| yt.innertube::nextId | never | This cookie, set by YouTube, registers a unique ID to store data on what videos from YouTube the user has seen. |
| yt.innertube::requests | never | This cookie, set by YouTube, registers a unique ID to store data on what videos from YouTube the user has seen. |
Other uncategorized cookies are those that are being analyzed and have not been classified into a category as yet.
| Cookie | Duration | Description |
|---|---|---|
| _clck | 1 year | No description |
| _clsk | 1 day | No description |
| _uetvid | 1 year 24 days | No description available. |
| AnalyticsSyncHistory | 1 month | No description |
| apbct_pixel_url | session | No description |
| apbct_visible_fields_0 | session | No description |
| apbct_visible_fields_1 | session | No description |
| apbct_visible_fields_10 | session | No description |
| apbct_visible_fields_2 | session | No description |
| apbct_visible_fields_3 | session | No description |
| apbct_visible_fields_4 | session | No description |
| apbct_visible_fields_5 | session | No description |
| apbct_visible_fields_6 | session | No description |
| apbct_visible_fields_7 | session | No description |
| apbct_visible_fields_8 | session | No description |
| apbct_visible_fields_9 | session | No description |
| ct_checked_emails | session | No description |
| ct_has_scrolled | session | No description |
| ct_mouse_moved | session | No description |
| ct_screen_info | session | No description |
| ictf_master | never | No description available. |
| li_gc | 2 years | No description |
| m | 2 years | No description available. |
| SM | session | No description available. |
| testinfinitycookie | session | No description |
| woocommerce_show_tax | 7 days | No description available. |
| wp_woocommerce_session_c5ac76b408021294cb56bcc27eddf8a1 | 2 days | No description |


