Top Tips for Rendering in Winter
Estimated reading time: 6 minutes
As we approach Christmas in the UK, the nights are long, and the weather can get painfully cold. As such, you might be starting to think about the thermal capability of your property. Winter weather can slow a lot of construction projects due to cold temperatures and short days. These conditions slow the curing time and make it difficult for installers to work outside.
So, you might be considering what this means for the rendering process. Thankfully, there are options available for you when it comes to rendering in cold weather. In this blog, we will outline some of our top tips for rendering in winter and the various options you have available!
We’ll answer some other questions you might have, including the products you should use, minimum temperature for rendering in winter, and how to go about applying the products.
Read on to find out more about our top tips for rendering in winter!
Can you render in the winter?
Before discussing our best tips for rendering in winter, we should address a common question we get from our customers: ‘can you render in the winter?’
You might be surprised to learn that yes; you can render in winter – if you have the correct products!
At EWI Store, we have a range of products specifically geared towards winter installation, so you can be assured that your rendering project can still go ahead during the winter months!
Some products that make rendering possible in winter include winter adhesive, render accelerator, and silicone paint. We’ll discuss each of these in more detail throughout this blog!
-
Silicone Paint (EWI-005) – 15 Litres
From £108.79 Incl. VATFrom £90.29 Incl. VATFrom £75.24 Excl. VAT -
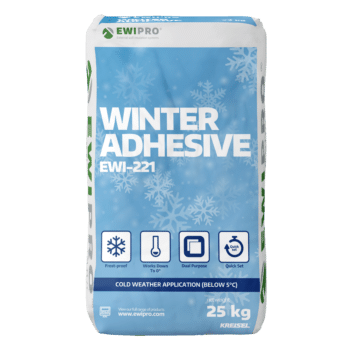
Winter Adhesive (EWI-221) – 25kg
Rated 5.00 out of 5£15.00 Incl. VAT£12.50 Excl. VAT£19.01 Incl. VAT£15.84 Excl. VAT -
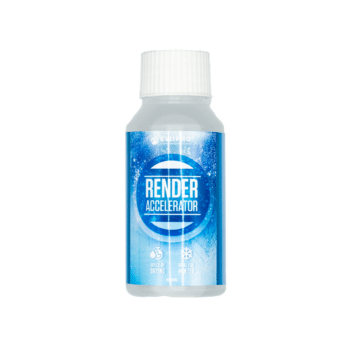
Render Accelerator (EWI-020) – 100ml
Rated 4.50 out of 5£6.72 Incl. VAT£5.60 Excl. VAT£8.30 Incl. VAT£6.92 Excl. VAT
Minimum rendering temperature
While the recommended temperature range for rendering projects varies across manufacturers, the EWI Pro range should generally not be used below +5oC and above +25oC. The reason why you should not use it in colder temperatures than +5oC is that for silicone render to cure, the water needs to evaporate out of it. The cold, often wet, weather can prolong this process by as long as 5 days (sometimes more).
Another point to consider is that silicone renders contain water. This makes them susceptible to freezing in extremely cold weather.
That said, we know sometimes jobs must be completed regardless of weather conditions. And, there are still viable options for rendering in temperatures that dip below the recommended (which is often the case in the UK!). We will outline some of these options below.
Use the best products for rendering in winter
Our biggest tip for rendering in winter, is to use the correct products. There are several products available that have been designed specifically for rendering in cold weather. These ensure that it dries correctly and limits cracking on the surface.
Mineral Render
Firstly, we would advise that you opt for a mineral-based render when rendering in the cold. For example, the EWI-060 Mineral Render. This is ideal for very cold conditions because it is the fastest drying render mix that we offer. This is because mineral render is cementitious and dries chemically, rather than water having to evaporate out of it.
We often get asked about the finish you can achieve from mineral render. The answer is that it is the same as silicone renders!
However, unlike silicone renders, mineral renders produce a dull white colour. We always recommend that you apply a silicone paint over mineral render to achieve your desired coloured finish.
-
Silicone Paint (EWI-005) – 15 Litres
From £108.79 Incl. VATFrom £90.29 Incl. VATFrom £75.24 Excl. VAT
Render Accelerator
Alternatively, you can opt to use a render accelerator. This works with silicone silicate, silicone, and acrylic renders. Render accelerator is ideal for rendering in cold conditions because it speeds up the drying process. This allows you to achieve a protective barrier on your external wall surface, which minimises cracking and water ingress.
The faster drying time gives you the chance to install the render before any adverse weather conditions arise. However, you should ideally ensure the few days after application are dry as this avoids render wash-off. Read more about render accelerator here!
-
Render Accelerator (EWI-020) – 100ml
Rated 4.50 out of 5£6.72 Incl. VAT£5.60 Excl. VAT£8.30 Incl. VAT£6.92 Excl. VAT
Winter Adhesive
Finally, as the name suggests, our Winter Adhesive is ideal for rendering in cold temperatures. Winter Adhesive can be used as both a basecoat layer and an adhesive. It allows you flexibility within the rendering process as it can be used in temperatures as low as 0o C. This way, you can be assured that your rendering process can still go ahead in the winter.
But what is winter adhesive?
Winter adhesive is EWI Store’s own type of cold weather construction adhesive. It is ideal for use in cold weather as it is extremely quick drying. This type of adhesive is not recommended for use in temperatures above +12oC, as it actually dries too quickly in these conditions!
Winter adhesive can be used to embed mesh into the basecoat layer and add a durable layer to your insulation system. What’s great about this product is that you only need a paddle mix to bind the dry mix with water. Then, you can apply it to your substrate.
-
Winter Adhesive (EWI-221) – 25kg
Rated 5.00 out of 5£15.00 Incl. VAT£12.50 Excl. VAT£19.01 Incl. VAT£15.84 Excl. VAT
How to apply render in cold weather
Another important tip we can offer when it comes to rendering in winter, is that you ensure it is applied correctly!
So, if you’re wondering how to go about applying render in the winter this section will explain the process according to different options.
As mentioned, we recommend using a mineral render in temperatures that are likely to dip below 0 degrees. This is useful as it is a fast-drying render. Apply using a trowel and work the render with a plastic float to get the desired finish. Then, ensure that you apply EWI-005 silicone paint afterwards to seal it and provide a decorative finish.
You should always avoid using silicone-based render in temperatures below 5-degrees. However, so long as the weather stays relatively dry, you can use a render accelerator alongside them to speed up the curing process.
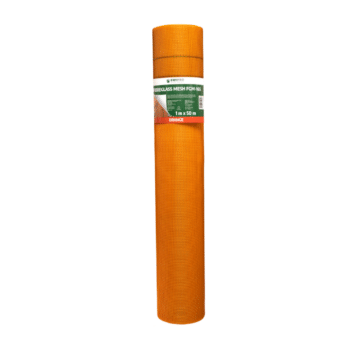
When applying winter adhesive as a basecoat reinforcement layer, you should embed it with fibreglass mesh. Use a paddle mix to combine the mixture with 6.3L of water. Use a notched trowel to apply the adhesive to the back of the insulation board. Then, once the adhesive has completely dried, you can install the fixings. You can then apply the adhesive and embed it with fibreglass mesh to protect the system from harsh winter weather and UV rays.
Another useful application tip for rendering in winter is to make sure you use coverings to protect the surface from frost overnight. This allows the render to set properly and protects it from the elements.
-
Orange Fibreglass Mesh – 50m²
Rated 5.00 out of 5£57.48 Incl. VAT£47.90 Excl. VAT
Find out more!
In this blog, we outlined EWI Store’s top tips for rendering in winter. We found that you can render in winter if you have the correct products. Your options include:
- Using a mineral-based render.
- Applying a render accelerator alongside a silicone-based render to speed up the drying process.
- Using a winter adhesive to create a protective barrier against harsh weather and UV rays.
If you found our tips for rendering in winter interesting, you can find out which render we recommend for spring here!
You can shop all the products we’ve mentioned in our shop. If you have any questions, don’t hesitate to contact our sales team on 0203 034 0022.
Facebook
Twitter
LinkedIn
Your cart
Trade Account Login

We use cookies on our website to give you the most relevant experience by remembering your preferences and repeat visits. By clicking “Accept All”, you consent to the use of ALL the cookies. However, you may visit "Cookie Settings" to provide personalised consent.
Manage consent
Privacy Overview
This website uses cookies to improve your experience while you navigate through the website. Out of these, the cookies that are categorized as necessary are stored on your browser as they are essential for the working of basic functionalities of the website. We also use third-party cookies that help us analyze and understand how you use this website. These cookies will be stored in your browser only with your consent. You also have the option to opt-out of these cookies. But opting out of some of these cookies may affect your browsing experience.
Necessary cookies are absolutely essential for the website to function properly. These cookies ensure basic functionalities and security features of the website, anonymously.
| Cookie | Duration | Description |
|---|---|---|
| __stripe_mid | 1 year | This cookie is set by Stripe payment gateway. This cookie is used to enable payment on the website without storing any patment information on a server. |
| __stripe_sid | 30 minutes | This cookie is set by Stripe payment gateway. This cookie is used to enable payment on the website without storing any patment information on a server. |
| _GRECAPTCHA | 5 months 27 days | This cookie is set by the Google recaptcha service to identify bots to protect the website against malicious spam attacks. |
| apbct_cookies_test | session | CleanTalk sets this cookie to prevent spam on comments and forms and act as a complete anti-spam solution and firewall for the site. |
| apbct_page_hits | session | CleanTalk sets this cookie to prevent spam on comments and forms and act as a complete anti-spam solution and firewall for the site. |
| apbct_prev_referer | session | Functional cookie placed by CleanTalk Spam Protect to store referring IDs and prevent unauthorized spam from being sent from the website. |
| apbct_site_landing_ts | session | CleanTalk sets this cookie to prevent spam on comments and forms and act as a complete anti-spam solution and firewall for the site. |
| apbct_site_referer | 3 days | This cookie is placed by CleanTalk Spam Protect to prevent spam and to store the referrer page address which led the user to the website. |
| apbct_timestamp | session | CleanTalk sets this cookie to prevent spam on comments and forms and act as a complete anti-spam solution and firewall for the site. |
| apbct_urls | 3 days | This cookie is placed by CleanTalk Spam Protect to prevent spam and to store the addresses (urls) visited on the website. |
| AWSALBCORS | 7 days | This cookie is managed by Amazon Web Services and is used for load balancing. |
| cookielawinfo-checkbox-advertisement | 1 year | Set by the GDPR Cookie Consent plugin, this cookie is used to record the user consent for the cookies in the "Advertisement" category . |
| cookielawinfo-checkbox-analytics | 11 months | This cookie is set by GDPR Cookie Consent plugin. The cookie is used to store the user consent for the cookies in the category "Analytics". |
| cookielawinfo-checkbox-functional | 11 months | The cookie is set by GDPR cookie consent to record the user consent for the cookies in the category "Functional". |
| cookielawinfo-checkbox-necessary | 11 months | This cookie is set by GDPR Cookie Consent plugin. The cookies is used to store the user consent for the cookies in the category "Necessary". |
| cookielawinfo-checkbox-others | 11 months | This cookie is set by GDPR Cookie Consent plugin. The cookie is used to store the user consent for the cookies in the category "Other. |
| cookielawinfo-checkbox-performance | 11 months | This cookie is set by GDPR Cookie Consent plugin. The cookie is used to store the user consent for the cookies in the category "Performance". |
| ct_checkjs | session | CleanTalk–Used to prevent spam on our comments and forms and acts as a complete anti-spam solution and firewall for this site. |
| ct_fkp_timestamp | session | CleanTalk sets this cookie to prevent spam on the site's comments/forms, and to act as a complete anti-spam solution and firewall for the site. |
| ct_pointer_data | session | CleanTalk sets this cookie to prevent spam on the site's comments/forms, and to act as a complete anti-spam solution and firewall for the site. |
| ct_ps_timestamp | session | CleanTalk sets this cookie to prevent spam on the site's comments/forms, and to act as a complete anti-spam solution and firewall for the site. |
| ct_sfw_pass_key | 1 month | CleanTalk sets this cookie to prevent spam on comments and forms and act as a complete anti-spam solution and firewall for the site. |
| ct_timezone | session | CleanTalk–Used to prevent spam on our comments and forms and acts as a complete anti-spam solution and firewall for this site. |
| elementor | never | This cookie is used by the website's WordPress theme. It allows the website owner to implement or change the website's content in real-time. |
| viewed_cookie_policy | 11 months | The cookie is set by the GDPR Cookie Consent plugin and is used to store whether or not user has consented to the use of cookies. It does not store any personal data. |
Functional cookies help to perform certain functionalities like sharing the content of the website on social media platforms, collect feedbacks, and other third-party features.
| Cookie | Duration | Description |
|---|---|---|
| __zlcmid | 1 year | This cookie is used by Zendesk live chat and is used to store the live chat ID. |
| bcookie | 2 years | LinkedIn sets this cookie from LinkedIn share buttons and ad tags to recognize browser ID. |
| bscookie | 2 years | LinkedIn sets this cookie to store performed actions on the website. |
| lang | session | LinkedIn sets this cookie to remember a user's language setting. |
| lidc | 1 day | LinkedIn sets the lidc cookie to facilitate data center selection. |
| UserMatchHistory | 1 month | LinkedIn sets this cookie for LinkedIn Ads ID syncing. |
Performance cookies are used to understand and analyze the key performance indexes of the website which helps in delivering a better user experience for the visitors.
| Cookie | Duration | Description |
|---|---|---|
| __utma | 2 years | This cookie is set by Google Analytics and is used to distinguish users and sessions. The cookie is created when the JavaScript library executes and there are no existing __utma cookies. The cookie is updated every time data is sent to Google Analytics. |
| __utmb | 30 minutes | Google Analytics sets this cookie, to determine new sessions/visits. __utmb cookie is created when the JavaScript library executes and there are no existing __utma cookies. It is updated every time data is sent to Google Analytics. |
| __utmc | session | The cookie is set by Google Analytics and is deleted when the user closes the browser. It is used to enable interoperability with urchin.js, which is an older version of Google Analytics and is used in conjunction with the __utmb cookie to determine new sessions/visits. |
| __utmt | 10 minutes | Google Analytics sets this cookie to inhibit request rate. |
| __utmv | 2 years | The __utmv cookie is set on the user's device, to enable Google Analytics to classify the visitor. |
| __utmz | 6 months | Google Analytics sets this cookie to store the traffic source or campaign by which the visitor reached the site. |
| sib_cuid | 6 months | Purechat uses this cookie to send data to purechat.com, to connect visitors to the reservation team and track visitors to stay on portal. |
| SRM_B | 1 year 24 days | Used by Microsoft Advertising as a unique ID for visitors. |
Analytical cookies are used to understand how visitors interact with the website. These cookies help provide information on metrics the number of visitors, bounce rate, traffic source, etc.
| Cookie | Duration | Description |
|---|---|---|
| _ga | 2 years | The _ga cookie, installed by Google Analytics, calculates visitor, session and campaign data and also keeps track of site usage for the site's analytics report. The cookie stores information anonymously and assigns a randomly generated number to recognize unique visitors. |
| _gat_gtag_UA_61069204_2 | 1 minute | Set by Google to distinguish users. |
| _gat_UA-61069204-2 | 1 minute | A variation of the _gat cookie set by Google Analytics and Google Tag Manager to allow website owners to track visitor behaviour and measure site performance. The pattern element in the name contains the unique identity number of the account or website it relates to. |
| _gcl_au | 3 months | Provided by Google Tag Manager to experiment advertisement efficiency of websites using their services. |
| _gid | 1 day | Installed by Google Analytics, _gid cookie stores information on how visitors use a website, while also creating an analytics report of the website's performance. Some of the data that are collected include the number of visitors, their source, and the pages they visit anonymously. |
| _uetsid | 1 day | This cookies are used to collect analytical information about how visitors use the website. This information is used to compile report and improve site. |
| CONSENT | 2 years | YouTube sets this cookie via embedded youtube-videos and registers anonymous statistical data. |
Advertisement cookies are used to provide visitors with relevant ads and marketing campaigns. These cookies track visitors across websites and collect information to provide customized ads.
| Cookie | Duration | Description |
|---|---|---|
| _fbp | 3 months | This cookie is set by Facebook to display advertisements when either on Facebook or on a digital platform powered by Facebook advertising, after visiting the website. |
| ANONCHK | 10 minutes | The ANONCHK cookie, set by Bing, is used to store a user's session ID and also verify the clicks from ads on the Bing search engine. The cookie helps in reporting and personalization as well. |
| fr | 3 months | Facebook sets this cookie to show relevant advertisements to users by tracking user behaviour across the web, on sites that have Facebook pixel or Facebook social plugin. |
| MUID | 1 year 24 days | Bing sets this cookie to recognize unique web browsers visiting Microsoft sites. This cookie is used for advertising, site analytics, and other operations. |
| NID | 6 months | NID cookie, set by Google, is used for advertising purposes; to limit the number of times the user sees an ad, to mute unwanted ads, and to measure the effectiveness of ads. |
| test_cookie | 15 minutes | The test_cookie is set by doubleclick.net and is used to determine if the user's browser supports cookies. |
| uuid | 6 months | MediaMath sets this cookie to avoid the same ads from being shown repeatedly and for relevant advertising. |
| VISITOR_INFO1_LIVE | 5 months 27 days | A cookie set by YouTube to measure bandwidth that determines whether the user gets the new or old player interface. |
| YSC | session | YSC cookie is set by Youtube and is used to track the views of embedded videos on Youtube pages. |
| yt-remote-connected-devices | never | YouTube sets this cookie to store the video preferences of the user using embedded YouTube video. |
| yt-remote-device-id | never | YouTube sets this cookie to store the video preferences of the user using embedded YouTube video. |
| yt.innertube::nextId | never | This cookie, set by YouTube, registers a unique ID to store data on what videos from YouTube the user has seen. |
| yt.innertube::requests | never | This cookie, set by YouTube, registers a unique ID to store data on what videos from YouTube the user has seen. |
Other uncategorized cookies are those that are being analyzed and have not been classified into a category as yet.
| Cookie | Duration | Description |
|---|---|---|
| _clck | 1 year | No description |
| _clsk | 1 day | No description |
| _uetvid | 1 year 24 days | No description available. |
| AnalyticsSyncHistory | 1 month | No description |
| apbct_pixel_url | session | No description |
| apbct_visible_fields_0 | session | No description |
| apbct_visible_fields_1 | session | No description |
| apbct_visible_fields_10 | session | No description |
| apbct_visible_fields_2 | session | No description |
| apbct_visible_fields_3 | session | No description |
| apbct_visible_fields_4 | session | No description |
| apbct_visible_fields_5 | session | No description |
| apbct_visible_fields_6 | session | No description |
| apbct_visible_fields_7 | session | No description |
| apbct_visible_fields_8 | session | No description |
| apbct_visible_fields_9 | session | No description |
| ct_checked_emails | session | No description |
| ct_has_scrolled | session | No description |
| ct_mouse_moved | session | No description |
| ct_screen_info | session | No description |
| ictf_master | never | No description available. |
| li_gc | 2 years | No description |
| m | 2 years | No description available. |
| SM | session | No description available. |
| testinfinitycookie | session | No description |
| woocommerce_show_tax | 7 days | No description available. |
| wp_woocommerce_session_c5ac76b408021294cb56bcc27eddf8a1 | 2 days | No description |


