Different Types of Beading for Render/EWI systems
At EWI Store we offer many different types of beading, all designed to help strengthen specific areas of the render system or external wall system. You will notice many of our beads have mesh wings – these are designed to be embedded within the basecoat layer of thin-coat render systems.
Types of beading
Corner beading for Render/EWI systems
-
Anthracite Corner Bead – No Mesh
From £4.51 Incl. VATFrom £3.76 Excl. VAT
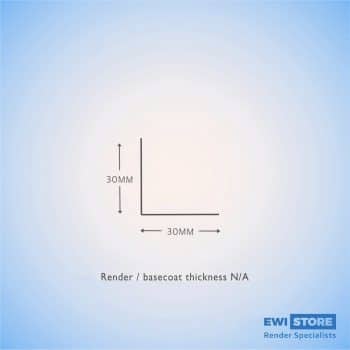
As the name suggests, corner beading provides additional strength to the corners of the building. Corners are more prone to knocks than other areas of the wall surface, so it is very important to provide extra reinforcement via this type of beading.
The corner bead also helps provide a perfect 90-degree corner, as well as ensuring a straight line up the corner, giving a more aesthetically pleasing finish once rendered.
This EWI-66520 bead is specifically for thin-coat render systems. The bead is covered by the basecoat adhesive and render, so once the job is finished you will not see any of this corner bead protruding out of the render system (unlike monocouche/scratch renders, where the corner bead is visible in the system).
Corner beads are not required in internal corners – only external corners!
While EWI-66520 is great for reinforcing 90-degree corners, it is unsuitable if there is any variation in angle. Our flexible corner bead allows you to reinforce angles that are not 90 degrees. The corner bead comes in long 25-metre strips and, when cut to size, helps provide additional strength in areas that tend to encounter more knocks than average.
The bead is to be used only with thin-coat systems and is fully embedded within the basecoat render system, so once installed, no beading will be visible.
Bellcast beading for Render/EWI systems
-
White Bellcast Bead
From £2.89 Incl. VATFrom £2.41 Excl. VAT
Our bellcast bead is only used in render-only systems. It is mesh-free and available in two variations: 6 mm and 10mm. The 6mm is used for thin-coat render systems, while the 10mm is used for scratch renders.
The bellcast bead is embedded within the basecoat layer at the bottom of the wall where you want the render to finish (normally above the DPC level). The bellcast allows you to generate a nice straight finish at the bottom of the render, but it also serves an important secondary function. The protruding lip also directs water away from the wall. This lip means water cannot run back along the bead to the wall, helping to prevent damp forming.
Reveal beading for Render/EWI systems
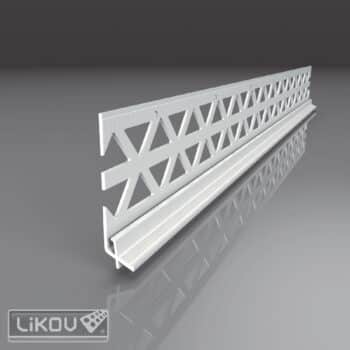
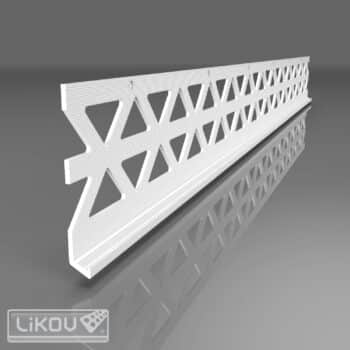
The reveal bead is used around windows to help provide a tidier finish. It also means that silicone is not required. The bead is used on vertical reveals and the top reveal and can be used on EWI systems (where the mesh is tied into the reveal using the basecoat adhesive) or the mesh can be cut and used on render-only systems.
The reveal bead has a removable tab, so once the final top coat has been applied, you can simply remove the tab, leaving a nice, crisp, clean finish.
This reveal bead is available in either white or grey (to match windows finished with RAL-7016). It comes with a rubber ‘O’ ring that sits on the window frame and compresses to give a waterproof seal when the bead is installed correctly.
This reveal bead is very like EWI-66458, although instead of using the compressible rubber ‘O’ ring, it uses a sponge to provide the seal. This reveal bead is only available in white.
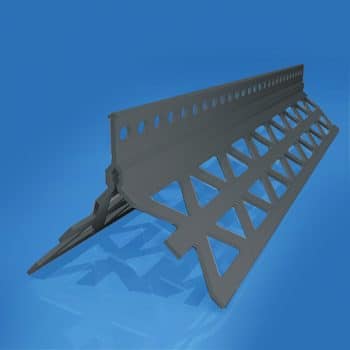
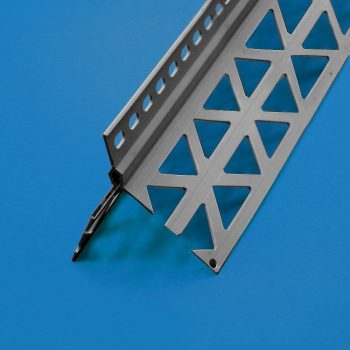
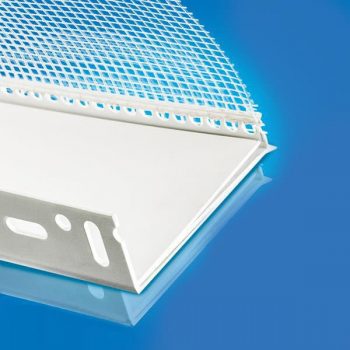
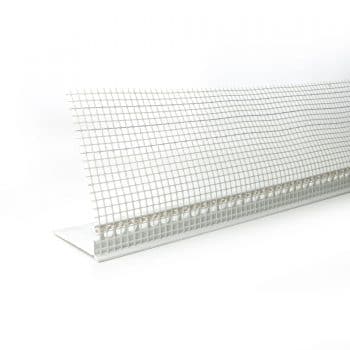
This bead resembles the EWI-66520 corner bead; however, when you look closely, there is a drip on the bead. This bead is used in EWI systems and prevents water from travelling back along the reveal at the top of window frames. The drip on the bead ensures that water travelling vertically down the wall towards a window will then be forced to drip down onto the window sill.
The bead has two mesh wings, which are embedded into the basecoat layer – ensure that you install the bead in the correct orientation as per the picture below.
Starter track
-
uPVC Starter Track 170mm-240mm (2m)
£35.11 Incl. VAT£29.26 Excl. VAT
This is our basic starter track, which forms a stable plinth on which you can build up the EWI systems. The aluminium starter track is available in a few different thicknesses as standard—50mm, 70mm, 90mm, and 100mm. However, other sizes are available to accommodate other thicknesses of insulation, but these are made to order (expect a delay of 5 working days if you want to order bespoke products).
The aluminium starter track is attached to the wall at 300mm centres using screws and rawl plugs. We recommend connecting aluminium starter tracks to adjacent pieces using starter track connectors to help increase strength.
This particular bead is normally bought in conjunction with the aluminium starter track. It is the mechanism with which the aluminium starter track is tied into the external wall insulation System. The bead clips onto the front edge of the aluminium starter track and then is embedded within the basecoat layer of the EWI system.
Our Premium Starter Track is made from high-strength uPVC. It consists of two parts – a female part that is attached to the wall using screws/rawlplugs at 300mm centres, and a male part.
The male part of the premium starter track slides into the female part of the starter track. The reason there are two different product numbers is that this starter track is designed to work with a range of different insulation thicknesses.
EWI-64206 is used for EPS thicknesses between 50-90mm
EWI-64216 is used for EPS thicknesses between 100 – 160mm
The premium starter track does not require the additional clip-on profile, since there is already a mesh wing connected to the leading edge of the male part of the starter track – and it is this that is that gets embedded within the basecoat layer of the EWI system.
Flexible arch beading for Render/EWI systems
-
Flexible uPVC Arch Bead (2.5m)
From £4.91 Incl. VATFrom £4.09 Excl. VAT -
Flexible uPVC Arch Bead with Mesh (2.5m)
From £6.35 Incl. VATFrom £5.29 Excl. VAT
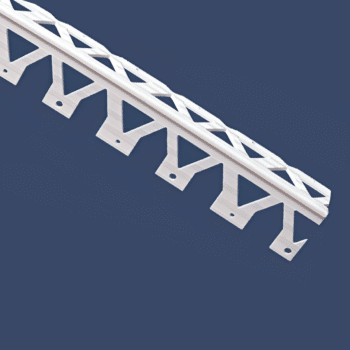
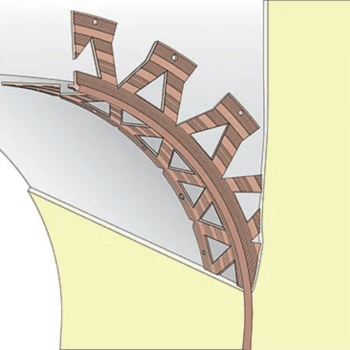
A flexible uPVC arch bead is used to form perfect arches, either internally or externally. The bead sits within the basecoat layer and provides sharp, clean edges while supporting the angles against accidental impacts.
The flexible arch bead has been constructed to match the contours of the arch and provide additional strength.
Once the bead has been embedded within the thin coat render system it is no longer visible.
Our stop bead is used at the edges of our thin-coat render systems to produce a clean, sharp finish. It comes with a 100mm wing of mesh embedded into the basecoat layer. The stop bead can be used in several situations, including stopping the render at window and door frames and making changes to the facade to produce a straight finish. It also helps provide some protection against impact.
Facebook
Twitter
LinkedIn
Your cart
Trade Account Login

We use cookies on our website to give you the most relevant experience by remembering your preferences and repeat visits. By clicking “Accept All”, you consent to the use of ALL the cookies. However, you may visit "Cookie Settings" to provide personalised consent.
Manage consent
Privacy Overview
This website uses cookies to improve your experience while you navigate through the website. Out of these, the cookies that are categorized as necessary are stored on your browser as they are essential for the working of basic functionalities of the website. We also use third-party cookies that help us analyze and understand how you use this website. These cookies will be stored in your browser only with your consent. You also have the option to opt-out of these cookies. But opting out of some of these cookies may affect your browsing experience.
Necessary cookies are absolutely essential for the website to function properly. These cookies ensure basic functionalities and security features of the website, anonymously.
| Cookie | Duration | Description |
|---|---|---|
| __stripe_mid | 1 year | This cookie is set by Stripe payment gateway. This cookie is used to enable payment on the website without storing any patment information on a server. |
| __stripe_sid | 30 minutes | This cookie is set by Stripe payment gateway. This cookie is used to enable payment on the website without storing any patment information on a server. |
| _GRECAPTCHA | 5 months 27 days | This cookie is set by the Google recaptcha service to identify bots to protect the website against malicious spam attacks. |
| apbct_cookies_test | session | CleanTalk sets this cookie to prevent spam on comments and forms and act as a complete anti-spam solution and firewall for the site. |
| apbct_page_hits | session | CleanTalk sets this cookie to prevent spam on comments and forms and act as a complete anti-spam solution and firewall for the site. |
| apbct_prev_referer | session | Functional cookie placed by CleanTalk Spam Protect to store referring IDs and prevent unauthorized spam from being sent from the website. |
| apbct_site_landing_ts | session | CleanTalk sets this cookie to prevent spam on comments and forms and act as a complete anti-spam solution and firewall for the site. |
| apbct_site_referer | 3 days | This cookie is placed by CleanTalk Spam Protect to prevent spam and to store the referrer page address which led the user to the website. |
| apbct_timestamp | session | CleanTalk sets this cookie to prevent spam on comments and forms and act as a complete anti-spam solution and firewall for the site. |
| apbct_urls | 3 days | This cookie is placed by CleanTalk Spam Protect to prevent spam and to store the addresses (urls) visited on the website. |
| AWSALBCORS | 7 days | This cookie is managed by Amazon Web Services and is used for load balancing. |
| cookielawinfo-checkbox-advertisement | 1 year | Set by the GDPR Cookie Consent plugin, this cookie is used to record the user consent for the cookies in the "Advertisement" category . |
| cookielawinfo-checkbox-analytics | 11 months | This cookie is set by GDPR Cookie Consent plugin. The cookie is used to store the user consent for the cookies in the category "Analytics". |
| cookielawinfo-checkbox-functional | 11 months | The cookie is set by GDPR cookie consent to record the user consent for the cookies in the category "Functional". |
| cookielawinfo-checkbox-necessary | 11 months | This cookie is set by GDPR Cookie Consent plugin. The cookies is used to store the user consent for the cookies in the category "Necessary". |
| cookielawinfo-checkbox-others | 11 months | This cookie is set by GDPR Cookie Consent plugin. The cookie is used to store the user consent for the cookies in the category "Other. |
| cookielawinfo-checkbox-performance | 11 months | This cookie is set by GDPR Cookie Consent plugin. The cookie is used to store the user consent for the cookies in the category "Performance". |
| ct_checkjs | session | CleanTalk–Used to prevent spam on our comments and forms and acts as a complete anti-spam solution and firewall for this site. |
| ct_fkp_timestamp | session | CleanTalk sets this cookie to prevent spam on the site's comments/forms, and to act as a complete anti-spam solution and firewall for the site. |
| ct_pointer_data | session | CleanTalk sets this cookie to prevent spam on the site's comments/forms, and to act as a complete anti-spam solution and firewall for the site. |
| ct_ps_timestamp | session | CleanTalk sets this cookie to prevent spam on the site's comments/forms, and to act as a complete anti-spam solution and firewall for the site. |
| ct_sfw_pass_key | 1 month | CleanTalk sets this cookie to prevent spam on comments and forms and act as a complete anti-spam solution and firewall for the site. |
| ct_timezone | session | CleanTalk–Used to prevent spam on our comments and forms and acts as a complete anti-spam solution and firewall for this site. |
| elementor | never | This cookie is used by the website's WordPress theme. It allows the website owner to implement or change the website's content in real-time. |
| viewed_cookie_policy | 11 months | The cookie is set by the GDPR Cookie Consent plugin and is used to store whether or not user has consented to the use of cookies. It does not store any personal data. |
Functional cookies help to perform certain functionalities like sharing the content of the website on social media platforms, collect feedbacks, and other third-party features.
| Cookie | Duration | Description |
|---|---|---|
| __zlcmid | 1 year | This cookie is used by Zendesk live chat and is used to store the live chat ID. |
| bcookie | 2 years | LinkedIn sets this cookie from LinkedIn share buttons and ad tags to recognize browser ID. |
| bscookie | 2 years | LinkedIn sets this cookie to store performed actions on the website. |
| lang | session | LinkedIn sets this cookie to remember a user's language setting. |
| lidc | 1 day | LinkedIn sets the lidc cookie to facilitate data center selection. |
| UserMatchHistory | 1 month | LinkedIn sets this cookie for LinkedIn Ads ID syncing. |
Performance cookies are used to understand and analyze the key performance indexes of the website which helps in delivering a better user experience for the visitors.
| Cookie | Duration | Description |
|---|---|---|
| __utma | 2 years | This cookie is set by Google Analytics and is used to distinguish users and sessions. The cookie is created when the JavaScript library executes and there are no existing __utma cookies. The cookie is updated every time data is sent to Google Analytics. |
| __utmb | 30 minutes | Google Analytics sets this cookie, to determine new sessions/visits. __utmb cookie is created when the JavaScript library executes and there are no existing __utma cookies. It is updated every time data is sent to Google Analytics. |
| __utmc | session | The cookie is set by Google Analytics and is deleted when the user closes the browser. It is used to enable interoperability with urchin.js, which is an older version of Google Analytics and is used in conjunction with the __utmb cookie to determine new sessions/visits. |
| __utmt | 10 minutes | Google Analytics sets this cookie to inhibit request rate. |
| __utmv | 2 years | The __utmv cookie is set on the user's device, to enable Google Analytics to classify the visitor. |
| __utmz | 6 months | Google Analytics sets this cookie to store the traffic source or campaign by which the visitor reached the site. |
| sib_cuid | 6 months | Purechat uses this cookie to send data to purechat.com, to connect visitors to the reservation team and track visitors to stay on portal. |
| SRM_B | 1 year 24 days | Used by Microsoft Advertising as a unique ID for visitors. |
Analytical cookies are used to understand how visitors interact with the website. These cookies help provide information on metrics the number of visitors, bounce rate, traffic source, etc.
| Cookie | Duration | Description |
|---|---|---|
| _ga | 2 years | The _ga cookie, installed by Google Analytics, calculates visitor, session and campaign data and also keeps track of site usage for the site's analytics report. The cookie stores information anonymously and assigns a randomly generated number to recognize unique visitors. |
| _gat_gtag_UA_61069204_2 | 1 minute | Set by Google to distinguish users. |
| _gat_UA-61069204-2 | 1 minute | A variation of the _gat cookie set by Google Analytics and Google Tag Manager to allow website owners to track visitor behaviour and measure site performance. The pattern element in the name contains the unique identity number of the account or website it relates to. |
| _gcl_au | 3 months | Provided by Google Tag Manager to experiment advertisement efficiency of websites using their services. |
| _gid | 1 day | Installed by Google Analytics, _gid cookie stores information on how visitors use a website, while also creating an analytics report of the website's performance. Some of the data that are collected include the number of visitors, their source, and the pages they visit anonymously. |
| _uetsid | 1 day | This cookies are used to collect analytical information about how visitors use the website. This information is used to compile report and improve site. |
| CONSENT | 2 years | YouTube sets this cookie via embedded youtube-videos and registers anonymous statistical data. |
Advertisement cookies are used to provide visitors with relevant ads and marketing campaigns. These cookies track visitors across websites and collect information to provide customized ads.
| Cookie | Duration | Description |
|---|---|---|
| _fbp | 3 months | This cookie is set by Facebook to display advertisements when either on Facebook or on a digital platform powered by Facebook advertising, after visiting the website. |
| ANONCHK | 10 minutes | The ANONCHK cookie, set by Bing, is used to store a user's session ID and also verify the clicks from ads on the Bing search engine. The cookie helps in reporting and personalization as well. |
| fr | 3 months | Facebook sets this cookie to show relevant advertisements to users by tracking user behaviour across the web, on sites that have Facebook pixel or Facebook social plugin. |
| MUID | 1 year 24 days | Bing sets this cookie to recognize unique web browsers visiting Microsoft sites. This cookie is used for advertising, site analytics, and other operations. |
| NID | 6 months | NID cookie, set by Google, is used for advertising purposes; to limit the number of times the user sees an ad, to mute unwanted ads, and to measure the effectiveness of ads. |
| test_cookie | 15 minutes | The test_cookie is set by doubleclick.net and is used to determine if the user's browser supports cookies. |
| uuid | 6 months | MediaMath sets this cookie to avoid the same ads from being shown repeatedly and for relevant advertising. |
| VISITOR_INFO1_LIVE | 5 months 27 days | A cookie set by YouTube to measure bandwidth that determines whether the user gets the new or old player interface. |
| YSC | session | YSC cookie is set by Youtube and is used to track the views of embedded videos on Youtube pages. |
| yt-remote-connected-devices | never | YouTube sets this cookie to store the video preferences of the user using embedded YouTube video. |
| yt-remote-device-id | never | YouTube sets this cookie to store the video preferences of the user using embedded YouTube video. |
| yt.innertube::nextId | never | This cookie, set by YouTube, registers a unique ID to store data on what videos from YouTube the user has seen. |
| yt.innertube::requests | never | This cookie, set by YouTube, registers a unique ID to store data on what videos from YouTube the user has seen. |
Other uncategorized cookies are those that are being analyzed and have not been classified into a category as yet.
| Cookie | Duration | Description |
|---|---|---|
| _clck | 1 year | No description |
| _clsk | 1 day | No description |
| _uetvid | 1 year 24 days | No description available. |
| AnalyticsSyncHistory | 1 month | No description |
| apbct_pixel_url | session | No description |
| apbct_visible_fields_0 | session | No description |
| apbct_visible_fields_1 | session | No description |
| apbct_visible_fields_10 | session | No description |
| apbct_visible_fields_2 | session | No description |
| apbct_visible_fields_3 | session | No description |
| apbct_visible_fields_4 | session | No description |
| apbct_visible_fields_5 | session | No description |
| apbct_visible_fields_6 | session | No description |
| apbct_visible_fields_7 | session | No description |
| apbct_visible_fields_8 | session | No description |
| apbct_visible_fields_9 | session | No description |
| ct_checked_emails | session | No description |
| ct_has_scrolled | session | No description |
| ct_mouse_moved | session | No description |
| ct_screen_info | session | No description |
| ictf_master | never | No description available. |
| li_gc | 2 years | No description |
| m | 2 years | No description available. |
| SM | session | No description available. |
| testinfinitycookie | session | No description |
| woocommerce_show_tax | 7 days | No description available. |
| wp_woocommerce_session_c5ac76b408021294cb56bcc27eddf8a1 | 2 days | No description |



10 thoughts on “Different Types of Beading for Render/EWI systems”
That is a useful way of detailing all the different types of beading available for the render and insulation systems. Very helpful!
Do you do a starter track that goes around bay windows? We have seen these things on other websites and we need it for our next job.
I really like the look of the window reveal bead, but I am wondering whether cutting the mesh really makes any difference. We are only adding 20mm insulation to the external walls, therefore the bead would be too long. I just want to make sure that if we were to cut the bead and use on our window reveals, there would be no issues. I.e. the bead would still be strongly binded within the system.
A great guide to get you started. The window reveal bead is often referred to as APU bead though 🙂
Haha – thanks for your comment Chris. We have tried to cover most of the beading here, but I am sure there are a couple of others we have missed to be honest! Do any stand out to you?
This is a great reference guide for renders and EWI installers. I always feel installers don’t use the correct beading in the correct place as one some of the more ‘exotic beading’ like reveal beads and windows header beads aren’t readily available and two that they haven’t been taught exactly where to use it. Render beading is an incredibly important component of render systems and solid wall insulation systems and it is great now that people can come to EWI Store and get what they need (and also in small quantities rather than having to buy boxes of the stuff). Well done and keep up the good work.
I need to do something at the bottom of 20mm eps board? What would you recommend as I can’t seem to get 20mm starter track from anywhere, but I think I need to somehow add a bit of extra protection to this area as it will likely get bashed a bit as it is on a main road. Basically I am imagining a bellcast bead (so there is a drip) but the bead also needs to protect the underneath of the insulation?
Hi Chris, Try window header bead, but cut the mesh off the bead where it goes back towards the wall. By cutting off the mesh, you will essentially have a reinforced angle on the bottom of the insulation with the drip you are looking for, but the lack of mesh means on the bottom part of the bead will allow it to sit easily in place. Just basecoat the whole of the render bead in and you will be good to go!
In your opinion what is best render board? We have a 150m2 job, and have been asked to spec a render board and we don’t know which to go for. I have used Aquapanel (knauf) in the past, but I know they are expensive, is there a cheaper board that has the same characteristics?
Hi
I have job that involves rendering and curved wall and unsure on what bead will be best for the curve