The Ultimate Guide to Winter Working
Winter working is certainly one of the construction industry’s biggest challenges. Rain, wind, and freezing temperatures can scupper work timeframes, especially in the insulation and rendering industry. However, there are many strategies you can employ to combat the elements. With help from the experts at EWI Pro, we’ve compiled the ultimate guide to winter working to get your project finished in time and to the highest quality.
1. Scaffolding protection
Scaffolding is an integral part of the insulation and rendering process. The process of installation naturally starts from the bottom. For a two-storey building, you’ll require scaffolding to safely access the rest of the building. The scaffolding will also act as a shell around the whole building; however, without the proper shielding, it will not keep out any of the elements and debris that come with winter work. Therefore, it’s imperative to install certain measures to your scaffolding to protect your basecoat and render stages and allow them to dry and cure properly.
Debris netting for winter working
Debris netting is a durable, flexible mesh material draped over scaffolding to contain loose debris, dust, and tools and prevent them from falling to the ground or neighbouring areas. It is commonly made from polyethene or other high-density materials that resist tearing and withstand varying weather conditions.
Benefits
- Enhanced Safety: Debris netting reduces the risk of injury to workers and the public from falling objects by containing debris and small objects.
- Dust Control: Netting helps limit dust dispersal, especially in urban areas where construction dust could impact air quality.
- Weather Protection: Certain types of netting can also serve as a wind or rain barrier, creating a safer working environment for construction teams.
- Privacy and Security: Debris netting also provides some privacy for construction projects and deters unauthorised access.
Types of Debris Netting
- Standard Netting: Often used for general debris containment, this type is suitable for smaller-scale projects with minimal debris.
- Flame-Retardant Netting: Used on sites where fire hazards are a concern, this netting is treated to resist flames, improving site safety.
- UV-Stabilised Netting: This netting is designed to withstand long-term sun exposure without degrading, which is ideal for projects that require extended use.
Mono flex cover
Mono flex is a robust, weather-resistant scaffold sheeting made from reinforced polyethene. It’s known for its strength and durability, thanks to a multi-layered structure that includes strong polyester grids within the plastic. These grids enhance tear resistance, even in high wind conditions, making them ideal for large-scale or long-term projects.
Benefits
- Weather Protection: Mono flex sheeting forms an effective barrier against wind, rain, and snow, allowing work to continue even in adverse weather. This protection can also prevent water ingress, helping safeguard partially completed structures and materials.
- Containment: Mono flex keeps dust, debris, and materials from escaping the construction site, minimising the risk of injury to people below and containing pollutants to comply with environmental regulations.
- Thermal Regulation: Certain mono flex covers offer insulating properties, which can help maintain a more controlled environment within the scaffold. This is useful for projects involving temperature-sensitive materials or processes.
- UV Stability and Fire Resistance: UV-treated mono flex can withstand long-term sun exposure without degrading, and many types are fire-retardant, essential for safety on high-risk sites.
2. Water management
Water management is crucial during the retrofitting stage, as pipes and gutters will often be moved and replaced. Effective treatment of these areas is imperative to the drying and curing of various materials. Ineffective water management can also lead to water leaking behind the insulation and travelling into the property.
Temporary fall/downpipes are flexible or semi-rigid drainage systems that attach to scaffolding or building structures. They are typically made of durable, weather-resistant materials like PVC or high-density polyethene (HDPE) and can be quickly installed and removed as needed. They often come in modular sections, allowing for easy length adjustments depending on the project’s height and specific needs. Temporary downpipes are usually installed at roof edges or scaffold platforms to catch and channel water downwards. They can be secured with adjustable clamps or ties, and sections are joined with flexible connectors to create a sealed, continuous system. The water is then directed to a designated drainage area or stormwater system.
Benefits of downpipes for winter working
- Controlled Water Management: These pipes direct water from the construction site, reducing the risk of flooding or water damage to scaffolding, materials, and partially completed structures.
- Site Safety: Temporary down pipes manage water runoff, keeping walkways, entry points, and work areas dry and minimising the risk of slips and falls.
- Protection of Building Facades: Redirecting water helps prevent excessive moisture from reaching walls and other structures, which can lead to staining, material damage, and mould growth.
- Environmental Compliance: Temporary drainage systems can help ensure water runoff complies with environmental regulations, particularly on sites with sensitive ground areas.
3. Freshly laid basecoat care
A freshly laid basecoat needs to dry and cure. If the moisture freezes in colder temperatures, the basecoat can fail. A hessian covering is an effective way of protecting the basecoat overnight.
Hessian covering to protect basecoat during winter working
Hessian (or burlap) covering is popular due to its breathability, insulation, and protective properties.
Benefits
- Moisture Retention: Hessian helps retain moisture within the basecoat, slowing drying. This controlled drying is especially beneficial in warm or windy conditions, preventing the basecoat from drying too quickly, which can lead to cracking or shrinking.
- Protection from Freezing: In cold weather, the basecoat can be susceptible to freezing, which weakens its structure. Hessian provides a layer of insulation that helps protect the basecoat from sudden temperature drops.
- Breathability: Unlike plastic sheeting, hessian allows moisture to escape gradually, preventing condensation build-up while offering a shield from direct sunlight, wind, and rain.
- Flexibility and Reusability: Hessian sheets are durable and can be reused across different project stages, making them a cost-effective option.
4. Drying techniques
With lower temperatures come extended drying times. Humidity will also play a part in this process. However, as a rule, moisture will naturally evaporate much slower at lower temperatures. This can significantly impact your project timeline. There are techniques you can employ for drying during your winter working.
Blow heaters for better winter working
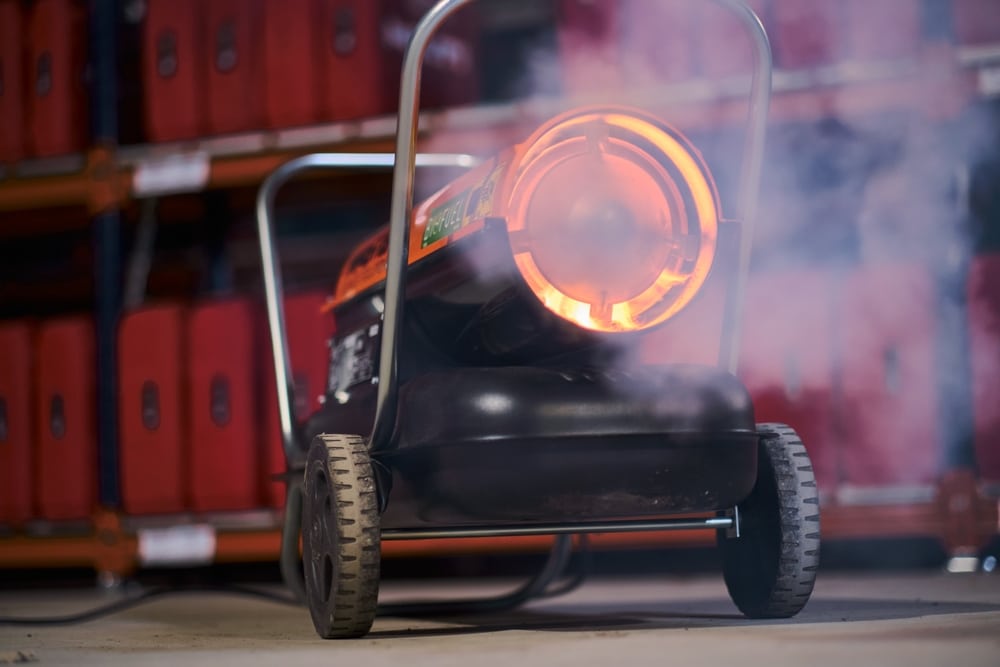
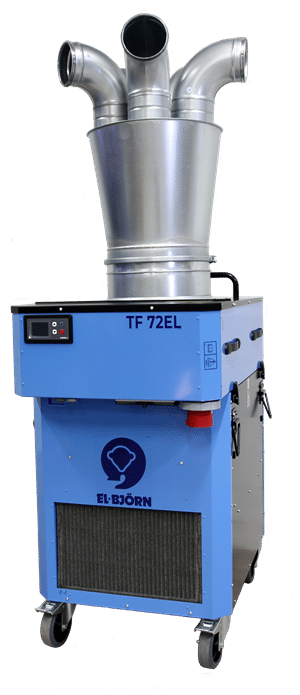
Both direct and indirect blow heaters can be invaluable on construction sites during cold weather to accelerate drying times for materials like plaster, render, and basecoats. Proper drying is essential to avoid issues like cracking, delamination, or weakened structural integrity
Direct blow heaters
These heaters combust fuel (like propane or diesel) and blow the heated air directly into the space. While they produce a high volume of warm air, they also emit moisture and combustion by-products such as CO₂ and some fumes. This method is highly effective in large, well-ventilated areas or outdoors where air circulation can disperse emissions.
Indirect fire heaters
These heaters separate the combustion process from the airflow, typically using a heat exchanger. Clean, dry, warm air is blown into the space, while combustion by-products are vented outside. This makes indirect heaters ideal for enclosed or sensitive work areas where the air needs to be clean and dry.
To employ these heaters effectively, you’ll also need to consider the positioning, ventilation, temperature control, and monitor humidity on site. Place the heater strategically to cover the entire surface area evenly. For direct heaters, position them to avoid directly blowing on fresh materials, as excessive heat may cause cracking. If using direct heaters, ensure adequate ventilation to disperse moisture and fumes. Maintain a consistent, moderate temperature. Excessive heat can cause the surface to dry too quickly while leaving inner layers damp. For materials that require low humidity to set, such as plaster, an indirect heater is best to avoid introducing additional moisture.
Completion timing
Timing is imperative to the successful protection of your basecoat. To allow for the initial set of most basecoats, you’ll need to finish by 1 p.m. If you work late into the afternoon, temperatures drop quickly, and the basecoat may not be set properly.
5. Storage conditions
Proper storage of materials on construction sites is crucial to maintaining their quality and ensuring optimal application.
Pasty Products
- Storage Location: Indoors, ideally in a dry, enclosed area to protect from external elements.
- Temperature: Maintain an ambient temperature of at least +10°C. This minimum temperature prevents the pasty products from becoming too thick, difficult to apply, or even freezing in very cold weather.
- Additional Tip: If storing for extended periods, avoid areas with direct sunlight or fluctuating temperatures to prevent changes in consistency.
Powder Products
- Storage Location: Also stored indoors to prevent exposure to moisture, as powder products can easily absorb humidity from the air, affecting their performance.
- Humidity Control: Choose a storage area with low humidity to avoid clumping or premature setting.
- Packaging Integrity: Ensure bags or containers remain sealed until ready for use. To minimise contact with dampness, avoid placing powder products directly on the ground; consider using pallets for storage.
6. Mixing and application
Following the right mixing and application practices is essential to ensuring that basecoats and topcoats cure properly in colder conditions. While our Silicone Render comes ready to use, we insist that it be mixed for a minimum of 5 minutes prior to application. This will ensure that the additives and aggregates are evenly distributed and the hydrophobic performance is optimal.
Using Heated Water for Mixing Basecoats
When preparing basecoats, use water heated to around 15°C. Warm water helps maintain an optimal consistency in colder conditions, supports a smoother application, and aids the initial curing process. Use a kettle to heat water, then allow it to cool slightly to reach the target temperature. Avoid boiling water, as excessively hot water can affect the basecoat’s consistency and cause premature setting.
Incorporating a Render Accelerator in Topcoats
Adding a rendering accelerator to the mix can shorten the drying time for topcoats, which is essential for projects in colder or humid conditions where drying is slower. Ensure the surface is fully dry and the basecoat has a moisture reading below 18% before applying the topcoat. Excess moisture in the basecoat can slow drying, weaken adhesion, and lead to issues like blistering or cracking. Use a moisture meter to confirm the basecoat’s readiness, ensuring it’s below the required 18% threshold before applying the topcoat.
How to use render accelerators to help winter working
Render accelerators are a renderer’s best friend in the winter period as they help to alleviate many of the issues that plague working times. Our render accelerator comes in 100ml bottles, and one bottle should be mixed into every bucket of silicone render prior to application. If you are spraying silicone render, you should pre-mix the accelerator into the bucket prior to pouring the mixture into the hopper.
- Curing Time: Accelerators speed up the curing time of coloured-through textured renders, enabling faster job completion.
- Layer Thickness: They create a thinner layer over the product’s finish, allowing it to dry normally without adverse effects from freezing temperatures.
- Drying Time Reduction: Render drying times can be reduced by up to 50%, ideal for applications in colder weather (from 1°C to +12°C).
- Aesthetic Integrity: No negative impact on the appearance of the dried
Facebook
Twitter
LinkedIn
Your cart
Trade Account Login

We use cookies on our website to give you the most relevant experience by remembering your preferences and repeat visits. By clicking “Accept All”, you consent to the use of ALL the cookies. However, you may visit "Cookie Settings" to provide personalised consent.
Manage consent
Privacy Overview
This website uses cookies to improve your experience while you navigate through the website. Out of these, the cookies that are categorized as necessary are stored on your browser as they are essential for the working of basic functionalities of the website. We also use third-party cookies that help us analyze and understand how you use this website. These cookies will be stored in your browser only with your consent. You also have the option to opt-out of these cookies. But opting out of some of these cookies may affect your browsing experience.
Necessary cookies are absolutely essential for the website to function properly. These cookies ensure basic functionalities and security features of the website, anonymously.
| Cookie | Duration | Description |
|---|---|---|
| __stripe_mid | 1 year | This cookie is set by Stripe payment gateway. This cookie is used to enable payment on the website without storing any patment information on a server. |
| __stripe_sid | 30 minutes | This cookie is set by Stripe payment gateway. This cookie is used to enable payment on the website without storing any patment information on a server. |
| _GRECAPTCHA | 5 months 27 days | This cookie is set by the Google recaptcha service to identify bots to protect the website against malicious spam attacks. |
| apbct_cookies_test | session | CleanTalk sets this cookie to prevent spam on comments and forms and act as a complete anti-spam solution and firewall for the site. |
| apbct_page_hits | session | CleanTalk sets this cookie to prevent spam on comments and forms and act as a complete anti-spam solution and firewall for the site. |
| apbct_prev_referer | session | Functional cookie placed by CleanTalk Spam Protect to store referring IDs and prevent unauthorized spam from being sent from the website. |
| apbct_site_landing_ts | session | CleanTalk sets this cookie to prevent spam on comments and forms and act as a complete anti-spam solution and firewall for the site. |
| apbct_site_referer | 3 days | This cookie is placed by CleanTalk Spam Protect to prevent spam and to store the referrer page address which led the user to the website. |
| apbct_timestamp | session | CleanTalk sets this cookie to prevent spam on comments and forms and act as a complete anti-spam solution and firewall for the site. |
| apbct_urls | 3 days | This cookie is placed by CleanTalk Spam Protect to prevent spam and to store the addresses (urls) visited on the website. |
| AWSALBCORS | 7 days | This cookie is managed by Amazon Web Services and is used for load balancing. |
| cookielawinfo-checkbox-advertisement | 1 year | Set by the GDPR Cookie Consent plugin, this cookie is used to record the user consent for the cookies in the "Advertisement" category . |
| cookielawinfo-checkbox-analytics | 11 months | This cookie is set by GDPR Cookie Consent plugin. The cookie is used to store the user consent for the cookies in the category "Analytics". |
| cookielawinfo-checkbox-functional | 11 months | The cookie is set by GDPR cookie consent to record the user consent for the cookies in the category "Functional". |
| cookielawinfo-checkbox-necessary | 11 months | This cookie is set by GDPR Cookie Consent plugin. The cookies is used to store the user consent for the cookies in the category "Necessary". |
| cookielawinfo-checkbox-others | 11 months | This cookie is set by GDPR Cookie Consent plugin. The cookie is used to store the user consent for the cookies in the category "Other. |
| cookielawinfo-checkbox-performance | 11 months | This cookie is set by GDPR Cookie Consent plugin. The cookie is used to store the user consent for the cookies in the category "Performance". |
| ct_checkjs | session | CleanTalk–Used to prevent spam on our comments and forms and acts as a complete anti-spam solution and firewall for this site. |
| ct_fkp_timestamp | session | CleanTalk sets this cookie to prevent spam on the site's comments/forms, and to act as a complete anti-spam solution and firewall for the site. |
| ct_pointer_data | session | CleanTalk sets this cookie to prevent spam on the site's comments/forms, and to act as a complete anti-spam solution and firewall for the site. |
| ct_ps_timestamp | session | CleanTalk sets this cookie to prevent spam on the site's comments/forms, and to act as a complete anti-spam solution and firewall for the site. |
| ct_sfw_pass_key | 1 month | CleanTalk sets this cookie to prevent spam on comments and forms and act as a complete anti-spam solution and firewall for the site. |
| ct_timezone | session | CleanTalk–Used to prevent spam on our comments and forms and acts as a complete anti-spam solution and firewall for this site. |
| elementor | never | This cookie is used by the website's WordPress theme. It allows the website owner to implement or change the website's content in real-time. |
| viewed_cookie_policy | 11 months | The cookie is set by the GDPR Cookie Consent plugin and is used to store whether or not user has consented to the use of cookies. It does not store any personal data. |
Functional cookies help to perform certain functionalities like sharing the content of the website on social media platforms, collect feedbacks, and other third-party features.
| Cookie | Duration | Description |
|---|---|---|
| __zlcmid | 1 year | This cookie is used by Zendesk live chat and is used to store the live chat ID. |
| bcookie | 2 years | LinkedIn sets this cookie from LinkedIn share buttons and ad tags to recognize browser ID. |
| bscookie | 2 years | LinkedIn sets this cookie to store performed actions on the website. |
| lang | session | LinkedIn sets this cookie to remember a user's language setting. |
| lidc | 1 day | LinkedIn sets the lidc cookie to facilitate data center selection. |
| UserMatchHistory | 1 month | LinkedIn sets this cookie for LinkedIn Ads ID syncing. |
Performance cookies are used to understand and analyze the key performance indexes of the website which helps in delivering a better user experience for the visitors.
| Cookie | Duration | Description |
|---|---|---|
| __utma | 2 years | This cookie is set by Google Analytics and is used to distinguish users and sessions. The cookie is created when the JavaScript library executes and there are no existing __utma cookies. The cookie is updated every time data is sent to Google Analytics. |
| __utmb | 30 minutes | Google Analytics sets this cookie, to determine new sessions/visits. __utmb cookie is created when the JavaScript library executes and there are no existing __utma cookies. It is updated every time data is sent to Google Analytics. |
| __utmc | session | The cookie is set by Google Analytics and is deleted when the user closes the browser. It is used to enable interoperability with urchin.js, which is an older version of Google Analytics and is used in conjunction with the __utmb cookie to determine new sessions/visits. |
| __utmt | 10 minutes | Google Analytics sets this cookie to inhibit request rate. |
| __utmv | 2 years | The __utmv cookie is set on the user's device, to enable Google Analytics to classify the visitor. |
| __utmz | 6 months | Google Analytics sets this cookie to store the traffic source or campaign by which the visitor reached the site. |
| sib_cuid | 6 months | Purechat uses this cookie to send data to purechat.com, to connect visitors to the reservation team and track visitors to stay on portal. |
| SRM_B | 1 year 24 days | Used by Microsoft Advertising as a unique ID for visitors. |
Analytical cookies are used to understand how visitors interact with the website. These cookies help provide information on metrics the number of visitors, bounce rate, traffic source, etc.
| Cookie | Duration | Description |
|---|---|---|
| _ga | 2 years | The _ga cookie, installed by Google Analytics, calculates visitor, session and campaign data and also keeps track of site usage for the site's analytics report. The cookie stores information anonymously and assigns a randomly generated number to recognize unique visitors. |
| _gat_gtag_UA_61069204_2 | 1 minute | Set by Google to distinguish users. |
| _gat_UA-61069204-2 | 1 minute | A variation of the _gat cookie set by Google Analytics and Google Tag Manager to allow website owners to track visitor behaviour and measure site performance. The pattern element in the name contains the unique identity number of the account or website it relates to. |
| _gcl_au | 3 months | Provided by Google Tag Manager to experiment advertisement efficiency of websites using their services. |
| _gid | 1 day | Installed by Google Analytics, _gid cookie stores information on how visitors use a website, while also creating an analytics report of the website's performance. Some of the data that are collected include the number of visitors, their source, and the pages they visit anonymously. |
| _uetsid | 1 day | This cookies are used to collect analytical information about how visitors use the website. This information is used to compile report and improve site. |
| CONSENT | 2 years | YouTube sets this cookie via embedded youtube-videos and registers anonymous statistical data. |
Advertisement cookies are used to provide visitors with relevant ads and marketing campaigns. These cookies track visitors across websites and collect information to provide customized ads.
| Cookie | Duration | Description |
|---|---|---|
| _fbp | 3 months | This cookie is set by Facebook to display advertisements when either on Facebook or on a digital platform powered by Facebook advertising, after visiting the website. |
| ANONCHK | 10 minutes | The ANONCHK cookie, set by Bing, is used to store a user's session ID and also verify the clicks from ads on the Bing search engine. The cookie helps in reporting and personalization as well. |
| fr | 3 months | Facebook sets this cookie to show relevant advertisements to users by tracking user behaviour across the web, on sites that have Facebook pixel or Facebook social plugin. |
| MUID | 1 year 24 days | Bing sets this cookie to recognize unique web browsers visiting Microsoft sites. This cookie is used for advertising, site analytics, and other operations. |
| NID | 6 months | NID cookie, set by Google, is used for advertising purposes; to limit the number of times the user sees an ad, to mute unwanted ads, and to measure the effectiveness of ads. |
| test_cookie | 15 minutes | The test_cookie is set by doubleclick.net and is used to determine if the user's browser supports cookies. |
| uuid | 6 months | MediaMath sets this cookie to avoid the same ads from being shown repeatedly and for relevant advertising. |
| VISITOR_INFO1_LIVE | 5 months 27 days | A cookie set by YouTube to measure bandwidth that determines whether the user gets the new or old player interface. |
| YSC | session | YSC cookie is set by Youtube and is used to track the views of embedded videos on Youtube pages. |
| yt-remote-connected-devices | never | YouTube sets this cookie to store the video preferences of the user using embedded YouTube video. |
| yt-remote-device-id | never | YouTube sets this cookie to store the video preferences of the user using embedded YouTube video. |
| yt.innertube::nextId | never | This cookie, set by YouTube, registers a unique ID to store data on what videos from YouTube the user has seen. |
| yt.innertube::requests | never | This cookie, set by YouTube, registers a unique ID to store data on what videos from YouTube the user has seen. |
Other uncategorized cookies are those that are being analyzed and have not been classified into a category as yet.
| Cookie | Duration | Description |
|---|---|---|
| _clck | 1 year | No description |
| _clsk | 1 day | No description |
| _uetvid | 1 year 24 days | No description available. |
| AnalyticsSyncHistory | 1 month | No description |
| apbct_pixel_url | session | No description |
| apbct_visible_fields_0 | session | No description |
| apbct_visible_fields_1 | session | No description |
| apbct_visible_fields_10 | session | No description |
| apbct_visible_fields_2 | session | No description |
| apbct_visible_fields_3 | session | No description |
| apbct_visible_fields_4 | session | No description |
| apbct_visible_fields_5 | session | No description |
| apbct_visible_fields_6 | session | No description |
| apbct_visible_fields_7 | session | No description |
| apbct_visible_fields_8 | session | No description |
| apbct_visible_fields_9 | session | No description |
| ct_checked_emails | session | No description |
| ct_has_scrolled | session | No description |
| ct_mouse_moved | session | No description |
| ct_screen_info | session | No description |
| ictf_master | never | No description available. |
| li_gc | 2 years | No description |
| m | 2 years | No description available. |
| SM | session | No description available. |
| testinfinitycookie | session | No description |
| woocommerce_show_tax | 7 days | No description available. |
| wp_woocommerce_session_c5ac76b408021294cb56bcc27eddf8a1 | 2 days | No description |


