Installing insulation in your home can be daunting, especially if you’re doing it for the first time. However, with the right tools and techniques, you can effectively insulate your space to improve energy efficiency and comfort. One essential tool in installing external wall insulation is the insulation starter track.
What is an insulation starter track?
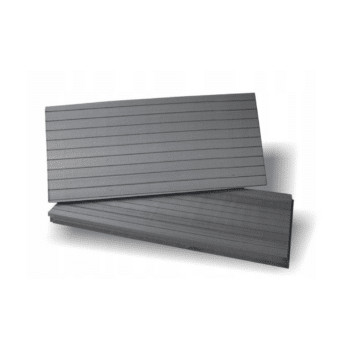
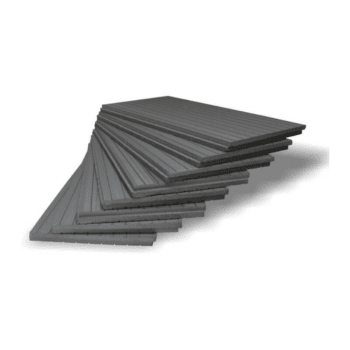
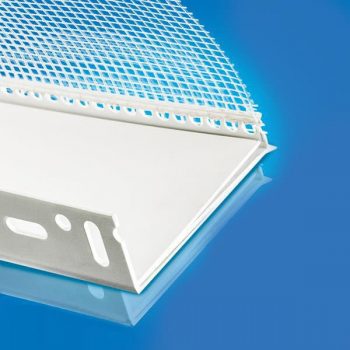
An insulation starter track is essential in installing external wall insulation systems. It provides a precise baseline and secure anchoring point for the insulation boards applied to a building’s exterior walls. Starter tracks ensure the insulation is installed correctly and performs effectively over time. Two primary materials commonly used for these tracks are uPVC and aluminium. Each offers distinct benefits depending on the specific requirements of the insulation project.
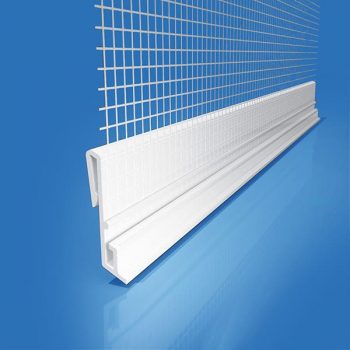
uPVC insulation starter tracks
uPVC, or unplasticised polyvinyl chloride, is a popular material for insulation starter tracks due to its durability and resistance to weather conditions. uPVC tracks are lightweight, making them easy to handle and install. They are also resistant to moisture and decay. This is particularly important in maintaining the integrity of the building’s insulation in damp climates.
One of the key advantages of uPVC starter tracks is their readiness. Unlike the aluminium starter tracks, they come with mesh, having a different overall profile. Therefore, they do not require a clip-on profile. Additionally, uPVC is not prone to corrosion. Corrosion can be an issue in coastal areas or places with high levels of air pollution.
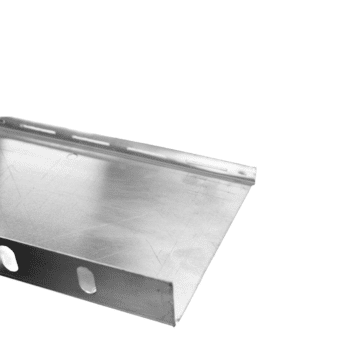
Aluminium insulation starter tracks
Aluminium starter tracks are favoured for their strength and rigidity, making them ideal for commercial projects or buildings requiring higher structural integrity. This lightweight metal offers excellent durability and is completely immune to rust and corrosion, ensuring a long lifespan even under harsh environmental conditions.
Aluminium tracks can bear heavier loads than uPVC, making them suitable for supporting thicker, denser insulation boards. This property is particularly beneficial in high-rise buildings or areas with extreme weather conditions where the insulation system must withstand significant wind loads.
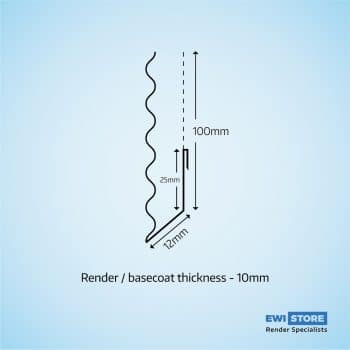
Clip-on profiles are designed to enhance and finish external wall insulation systems with aluminium starter tracks. These profiles are engineered to clip easily onto the aluminium tracks, providing a seamless and aesthetically pleasing finish at the base of the insulated wall.
The primary function of the clip-on profile is to ensure a neat edge where the insulation terminates. Still, it also incorporates a critical design feature, a drip nose. Therefore, the drip nose plays a vital role in moisture management by directing water away from the wall. As water runs down the surface of the render, the dripping nose ensures that it is channelled away from the wall. This significantly reduces the risk of water ingress and potentially damp issues.
This addition not only improves the visual continuity and neatness of the installation but also enhances the overall performance of the insulation system by preventing moisture-related complications. By integrating clip-on profiles with aluminium starter tracks, the system provides robust protection against the elements, ensuring durability and effectiveness in the insulation setup.

How to install insulation starter track
Step 1: Assess and prepare the substrate
Start by evaluating the substrate to ensure it can support the weight of the insulation and is suitable for installing a starter track. Consider the following:
- Weight Support: Check if the wall can support the weight of the insulation.
- Wall Condition: Determine if the wall is even as uneven walls can complicate the installation of a starter track. You can use shims and packers to create a level surface if the wall is uneven. Applying an EWI-260 Levelling Mortar might be necessary for more significant unevenness, which can address imperfections up to 50mm thick.
Step 2: Locate the Damp-Proof Course (DPC)
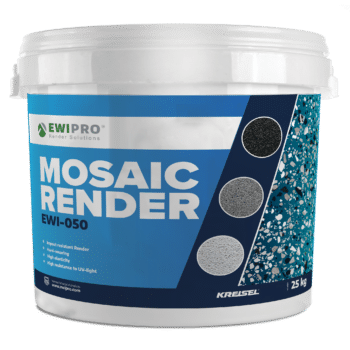
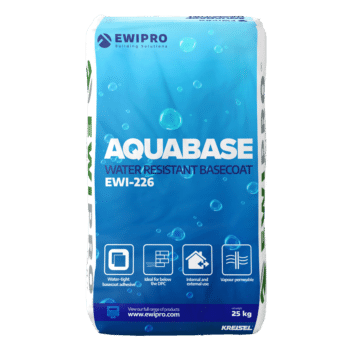
Identifying the DPC is vital to protecting your walls from moisture. The starter track should be mounted just above the DPC level to safeguard the underside of the insulation boards from moisture. If insulation extends below the DPC, use water-resistant boards like XPS and a waterproof basecoat like Aquabase. Finally, finish with a Mosaic Render on the outer layer for additional impermeability.
Step 3: Fixing the starter track
Properly securing the starter track is essential for a stable and effective installation:
- Fixings: To ensure a robust installation, use dedicated starter track fixings. These should be placed at no more than 30cm intervals to avoid bending or warping the track.
- Connector Clips: Connector clips seamlessly bridge gaps between track sections.
- Level Installation: Throughout the installation, consistently use a spirit level to maintain an even and precise alignment of the starter track.
- Corner Installation: When wrapping the starter track around corners, cut the track at 45-degree angles to ensure a tight and effective fit.
Insulating below the starter track – insulating the DPC
It’s crucial to install an uninterrupted thermal envelope. This includes the area below the DPC. However, different materials are required for this process due to the problems with moisture. The DPC is a critical barrier designed to prevent moisture from rising through the structure.
Step 1: Correct insulation material
For areas below the DPC, it’s advisable to use Extruded Polystyrene (XPS) insulation. XPS is known for its high moisture resistance and compressive strength, making it ideal for moisture-prone areas. Its rigid nature and ability to resist water uptake ensure that the insulation retains its thermal properties even in damp conditions.
Step 2: Apply a waterproof basecoat
After installing the XPS insulation boards, the next layer should be a waterproof basecoat. A recommended product for this purpose is EWI Pro Aquabase. This basecoat is specifically formulated to provide a robust waterproof layer over the insulation, effectively preventing any moisture penetration that could compromise the wall structure or the insulation itself.
Step 3: Finish with Mosaic Render
Apply a mosaic render as the outermost layer to protect the insulation and the basecoat while also providing an aesthetically pleasing finish. Mosaic Render is decorative and impermeable, creating an additional barrier against moisture ingress. This render type is durable and designed to withstand external weather conditions, offering further protection to the insulated area.