Why Has External Wall Insulation Made My Home Damp?
Traditionally built properties were designed to breathe in a way that allowed water vapour to escape through the walls. Wrapping this kind of house with insulation will cut down draughts, which should be a positive thing. But if it’s done poorly, this could also reduce ventilation and air movement, and may even form a barrier that locks moisture in the living spaces. The long-term result: damp and mould.
Where a property is adequately ventilated to allow moisture to escape, external insulation should help improve condensation issues. On a cold internal wall, moisture in the warm air can condense on the wall forming damp patches and eventually mould. When EWI is installed, these surfaces become warmer and therefore less condensation will form on them.
Damp After External Wall Insulation
External wall insulation is a great way to improve the energy efficiency of your home by reducing the rate of heat loss through your walls. The great thing about EWI is that it wraps around the entire exterior of your home, enveloping the heat inside.
EWI is much less likely to cause damp than other methods of insulating because there are far fewer breaks within the material. EWI is known as a continuous insulation method. Cavity Wall Insulation, for example, does not possess this quality. Read more about water ingress and damp here!
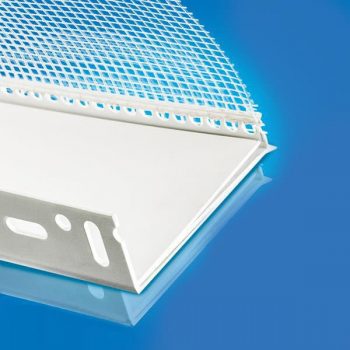
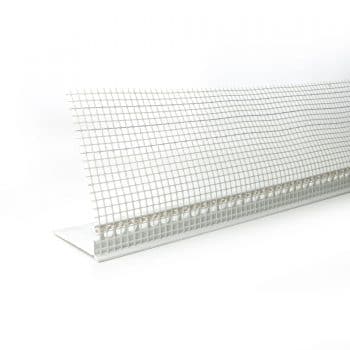
However, correct installation is key. External wall insulation consists of rigid insulation boards (as opposed to a foam) that are secured to the exterior walls of the building using adhesive and mechanical fixings. The important part here is that there are no gaps between the boards. In turn, this will prevent water ingress, which will be the main source of damp. Starter tracks are the ideal solution to preventing damp spreading from the DPC. Starter tracks also serve as structurally integral, straight guidelines.
-
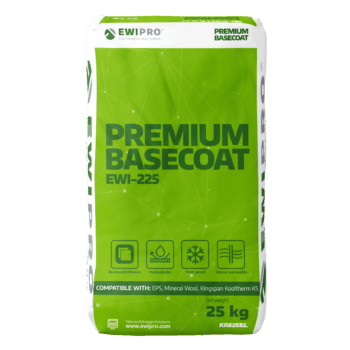
Premium Basecoat (EWI-225) – 25kg
Rated 5.00 out of 5£20.90 Incl. VAT£17.42 Excl. VAT£23.23 Incl. VAT£19.36 Excl. VAT -
uPVC Starter Track 60mm-90mm (2m)
£20.39 Incl. VAT£16.99 Excl. VAT -
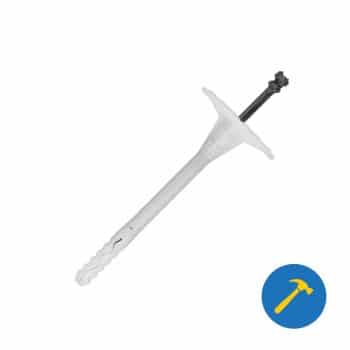
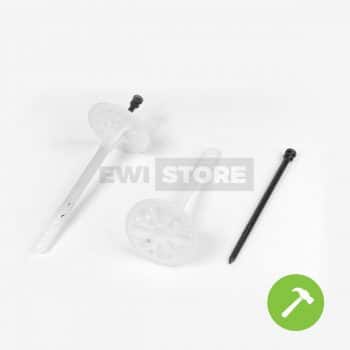
WKRET-MET – Plastic Pin Hammer Fixing (WKR-LTX)
From £28.01 Incl. VATFrom £23.34 Excl. VAT
Thermal Bridges
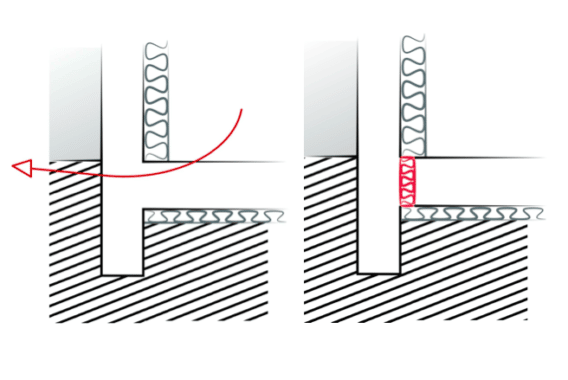
In the context of external wall insulation and damp, avoiding gaps is crucial. Gaps in the super insulation envelope are called thermal bridges. During installation, any gaps should be filled using a spray foam adhesive which will act as an insulator.
Thermal bridges are essentially places where there is a higher rate of heat transfer than the surrounding materials. They act as ‘heat highways’, resulting in an overall reduction in thermal insulation of construction. Thermal bridges are responsible for up to 35% of thermal losses and increased condensation and mould growth.
Take for example an insulation system where gaps have been left between the boards. The temperature within the gap is going to be a lot colder than the surrounding insulation boards. The condensation will gather in that area and damp will occur.
Poor Quality Insulation
Damp insulation means ineffective insulation. Not only this, but moisture gathering behind the insulation boards can lead to erosion of the adhesive, which can cause serious damage to the system.
If you start to notice damp on your internal walls, then this could be a sign that water is getting behind your EWI system. Signs of damp caused by external wall insulation should be an immediate cause for concern, and a professional should be called out to assess the situation promptly.
Facebook
Twitter
LinkedIn
Your cart
Trade Account Login

We use cookies on our website to give you the most relevant experience by remembering your preferences and repeat visits. By clicking “Accept All”, you consent to the use of ALL the cookies. However, you may visit "Cookie Settings" to provide personalised consent.
Manage consent
Privacy Overview
This website uses cookies to improve your experience while you navigate through the website. Out of these, the cookies that are categorized as necessary are stored on your browser as they are essential for the working of basic functionalities of the website. We also use third-party cookies that help us analyze and understand how you use this website. These cookies will be stored in your browser only with your consent. You also have the option to opt-out of these cookies. But opting out of some of these cookies may affect your browsing experience.
Necessary cookies are absolutely essential for the website to function properly. These cookies ensure basic functionalities and security features of the website, anonymously.
| Cookie | Duration | Description |
|---|---|---|
| __stripe_mid | 1 year | This cookie is set by Stripe payment gateway. This cookie is used to enable payment on the website without storing any patment information on a server. |
| __stripe_sid | 30 minutes | This cookie is set by Stripe payment gateway. This cookie is used to enable payment on the website without storing any patment information on a server. |
| _GRECAPTCHA | 5 months 27 days | This cookie is set by the Google recaptcha service to identify bots to protect the website against malicious spam attacks. |
| apbct_cookies_test | session | CleanTalk sets this cookie to prevent spam on comments and forms and act as a complete anti-spam solution and firewall for the site. |
| apbct_page_hits | session | CleanTalk sets this cookie to prevent spam on comments and forms and act as a complete anti-spam solution and firewall for the site. |
| apbct_prev_referer | session | Functional cookie placed by CleanTalk Spam Protect to store referring IDs and prevent unauthorized spam from being sent from the website. |
| apbct_site_landing_ts | session | CleanTalk sets this cookie to prevent spam on comments and forms and act as a complete anti-spam solution and firewall for the site. |
| apbct_site_referer | 3 days | This cookie is placed by CleanTalk Spam Protect to prevent spam and to store the referrer page address which led the user to the website. |
| apbct_timestamp | session | CleanTalk sets this cookie to prevent spam on comments and forms and act as a complete anti-spam solution and firewall for the site. |
| apbct_urls | 3 days | This cookie is placed by CleanTalk Spam Protect to prevent spam and to store the addresses (urls) visited on the website. |
| AWSALBCORS | 7 days | This cookie is managed by Amazon Web Services and is used for load balancing. |
| cookielawinfo-checkbox-advertisement | 1 year | Set by the GDPR Cookie Consent plugin, this cookie is used to record the user consent for the cookies in the "Advertisement" category . |
| cookielawinfo-checkbox-analytics | 11 months | This cookie is set by GDPR Cookie Consent plugin. The cookie is used to store the user consent for the cookies in the category "Analytics". |
| cookielawinfo-checkbox-functional | 11 months | The cookie is set by GDPR cookie consent to record the user consent for the cookies in the category "Functional". |
| cookielawinfo-checkbox-necessary | 11 months | This cookie is set by GDPR Cookie Consent plugin. The cookies is used to store the user consent for the cookies in the category "Necessary". |
| cookielawinfo-checkbox-others | 11 months | This cookie is set by GDPR Cookie Consent plugin. The cookie is used to store the user consent for the cookies in the category "Other. |
| cookielawinfo-checkbox-performance | 11 months | This cookie is set by GDPR Cookie Consent plugin. The cookie is used to store the user consent for the cookies in the category "Performance". |
| ct_checkjs | session | CleanTalk–Used to prevent spam on our comments and forms and acts as a complete anti-spam solution and firewall for this site. |
| ct_fkp_timestamp | session | CleanTalk sets this cookie to prevent spam on the site's comments/forms, and to act as a complete anti-spam solution and firewall for the site. |
| ct_pointer_data | session | CleanTalk sets this cookie to prevent spam on the site's comments/forms, and to act as a complete anti-spam solution and firewall for the site. |
| ct_ps_timestamp | session | CleanTalk sets this cookie to prevent spam on the site's comments/forms, and to act as a complete anti-spam solution and firewall for the site. |
| ct_sfw_pass_key | 1 month | CleanTalk sets this cookie to prevent spam on comments and forms and act as a complete anti-spam solution and firewall for the site. |
| ct_timezone | session | CleanTalk–Used to prevent spam on our comments and forms and acts as a complete anti-spam solution and firewall for this site. |
| elementor | never | This cookie is used by the website's WordPress theme. It allows the website owner to implement or change the website's content in real-time. |
| viewed_cookie_policy | 11 months | The cookie is set by the GDPR Cookie Consent plugin and is used to store whether or not user has consented to the use of cookies. It does not store any personal data. |
Functional cookies help to perform certain functionalities like sharing the content of the website on social media platforms, collect feedbacks, and other third-party features.
| Cookie | Duration | Description |
|---|---|---|
| __zlcmid | 1 year | This cookie is used by Zendesk live chat and is used to store the live chat ID. |
| bcookie | 2 years | LinkedIn sets this cookie from LinkedIn share buttons and ad tags to recognize browser ID. |
| bscookie | 2 years | LinkedIn sets this cookie to store performed actions on the website. |
| lang | session | LinkedIn sets this cookie to remember a user's language setting. |
| lidc | 1 day | LinkedIn sets the lidc cookie to facilitate data center selection. |
| UserMatchHistory | 1 month | LinkedIn sets this cookie for LinkedIn Ads ID syncing. |
Performance cookies are used to understand and analyze the key performance indexes of the website which helps in delivering a better user experience for the visitors.
| Cookie | Duration | Description |
|---|---|---|
| __utma | 2 years | This cookie is set by Google Analytics and is used to distinguish users and sessions. The cookie is created when the JavaScript library executes and there are no existing __utma cookies. The cookie is updated every time data is sent to Google Analytics. |
| __utmb | 30 minutes | Google Analytics sets this cookie, to determine new sessions/visits. __utmb cookie is created when the JavaScript library executes and there are no existing __utma cookies. It is updated every time data is sent to Google Analytics. |
| __utmc | session | The cookie is set by Google Analytics and is deleted when the user closes the browser. It is used to enable interoperability with urchin.js, which is an older version of Google Analytics and is used in conjunction with the __utmb cookie to determine new sessions/visits. |
| __utmt | 10 minutes | Google Analytics sets this cookie to inhibit request rate. |
| __utmv | 2 years | The __utmv cookie is set on the user's device, to enable Google Analytics to classify the visitor. |
| __utmz | 6 months | Google Analytics sets this cookie to store the traffic source or campaign by which the visitor reached the site. |
| sib_cuid | 6 months | Purechat uses this cookie to send data to purechat.com, to connect visitors to the reservation team and track visitors to stay on portal. |
| SRM_B | 1 year 24 days | Used by Microsoft Advertising as a unique ID for visitors. |
Analytical cookies are used to understand how visitors interact with the website. These cookies help provide information on metrics the number of visitors, bounce rate, traffic source, etc.
| Cookie | Duration | Description |
|---|---|---|
| _ga | 2 years | The _ga cookie, installed by Google Analytics, calculates visitor, session and campaign data and also keeps track of site usage for the site's analytics report. The cookie stores information anonymously and assigns a randomly generated number to recognize unique visitors. |
| _gat_gtag_UA_61069204_2 | 1 minute | Set by Google to distinguish users. |
| _gat_UA-61069204-2 | 1 minute | A variation of the _gat cookie set by Google Analytics and Google Tag Manager to allow website owners to track visitor behaviour and measure site performance. The pattern element in the name contains the unique identity number of the account or website it relates to. |
| _gcl_au | 3 months | Provided by Google Tag Manager to experiment advertisement efficiency of websites using their services. |
| _gid | 1 day | Installed by Google Analytics, _gid cookie stores information on how visitors use a website, while also creating an analytics report of the website's performance. Some of the data that are collected include the number of visitors, their source, and the pages they visit anonymously. |
| _uetsid | 1 day | This cookies are used to collect analytical information about how visitors use the website. This information is used to compile report and improve site. |
| CONSENT | 2 years | YouTube sets this cookie via embedded youtube-videos and registers anonymous statistical data. |
Advertisement cookies are used to provide visitors with relevant ads and marketing campaigns. These cookies track visitors across websites and collect information to provide customized ads.
| Cookie | Duration | Description |
|---|---|---|
| _fbp | 3 months | This cookie is set by Facebook to display advertisements when either on Facebook or on a digital platform powered by Facebook advertising, after visiting the website. |
| ANONCHK | 10 minutes | The ANONCHK cookie, set by Bing, is used to store a user's session ID and also verify the clicks from ads on the Bing search engine. The cookie helps in reporting and personalization as well. |
| fr | 3 months | Facebook sets this cookie to show relevant advertisements to users by tracking user behaviour across the web, on sites that have Facebook pixel or Facebook social plugin. |
| MUID | 1 year 24 days | Bing sets this cookie to recognize unique web browsers visiting Microsoft sites. This cookie is used for advertising, site analytics, and other operations. |
| NID | 6 months | NID cookie, set by Google, is used for advertising purposes; to limit the number of times the user sees an ad, to mute unwanted ads, and to measure the effectiveness of ads. |
| test_cookie | 15 minutes | The test_cookie is set by doubleclick.net and is used to determine if the user's browser supports cookies. |
| uuid | 6 months | MediaMath sets this cookie to avoid the same ads from being shown repeatedly and for relevant advertising. |
| VISITOR_INFO1_LIVE | 5 months 27 days | A cookie set by YouTube to measure bandwidth that determines whether the user gets the new or old player interface. |
| YSC | session | YSC cookie is set by Youtube and is used to track the views of embedded videos on Youtube pages. |
| yt-remote-connected-devices | never | YouTube sets this cookie to store the video preferences of the user using embedded YouTube video. |
| yt-remote-device-id | never | YouTube sets this cookie to store the video preferences of the user using embedded YouTube video. |
| yt.innertube::nextId | never | This cookie, set by YouTube, registers a unique ID to store data on what videos from YouTube the user has seen. |
| yt.innertube::requests | never | This cookie, set by YouTube, registers a unique ID to store data on what videos from YouTube the user has seen. |
Other uncategorized cookies are those that are being analyzed and have not been classified into a category as yet.
| Cookie | Duration | Description |
|---|---|---|
| _clck | 1 year | No description |
| _clsk | 1 day | No description |
| _uetvid | 1 year 24 days | No description available. |
| AnalyticsSyncHistory | 1 month | No description |
| apbct_pixel_url | session | No description |
| apbct_visible_fields_0 | session | No description |
| apbct_visible_fields_1 | session | No description |
| apbct_visible_fields_10 | session | No description |
| apbct_visible_fields_2 | session | No description |
| apbct_visible_fields_3 | session | No description |
| apbct_visible_fields_4 | session | No description |
| apbct_visible_fields_5 | session | No description |
| apbct_visible_fields_6 | session | No description |
| apbct_visible_fields_7 | session | No description |
| apbct_visible_fields_8 | session | No description |
| apbct_visible_fields_9 | session | No description |
| ct_checked_emails | session | No description |
| ct_has_scrolled | session | No description |
| ct_mouse_moved | session | No description |
| ct_screen_info | session | No description |
| ictf_master | never | No description available. |
| li_gc | 2 years | No description |
| m | 2 years | No description available. |
| SM | session | No description available. |
| testinfinitycookie | session | No description |
| woocommerce_show_tax | 7 days | No description available. |
| wp_woocommerce_session_c5ac76b408021294cb56bcc27eddf8a1 | 2 days | No description |


19 thoughts on “Why Has External Wall Insulation Made My Home Damp?”
Hi,
Since EWI was installed, damp patches have appeared on a closed off chimney breast on the ground floor. Is there a possible link?
Rest of the house is fine.
I don’t suppose there were any external air bricks/ vents that were covered? Chimney should remain ventilated.
I am going to use EWI on an old mixed material building. I’ve stepped back to the stone in one part to like render but was going to leave the bricks. However, they are looking really damp. Should I put up a barrier or will the external insulation get rid of the issues? I’m ALSO putting in MVHR.
If you’ve stripped the old render down, the wall should dry out fairly quickly, then you can proceed with insulation. Going forward, we’d definitely recommend any of our Silicone Renders for the finish, as they’re hydrophobic. If you’re looking for a bit more advice on what to do and which insulation and render to choose, give our sales team a call on 02045717492
Bedroom is smelling damp after external insulation a few weeks ago. Could this be damp in the walls coming out and will pass in future?
I have put exterior insulation on my outside walls, I am reading negative feedback, as it is bad and causing damp, I only just had it done I am extremely worried as its not an issue I would like to face, please advice me its the government schemes.
I am having EWI Fitted. They have almost completed the work. The top and sides have not been capped or sealed properly. There are obvious unfilled gaps in the boards and this can be seen at roof level. My roof has no felt and is not water tight and the guttering is failing.
Roof extenders were priced for and suppose to be installed to protect the insulation. This has not happened.
Push vents and air box vents have been installed to a very poor standard, ill fitting and not fit for purpose. I am very concerned and worried about this.
Hi Carol,
Can you give our sales team a call for some advice on this? (02045719589) All of this needs to be addressed correctly to prevent water ingress, especially the extension of the roof soffit. Thanks
Thank you for your reply.
I Will call tomorrow.
Hello,
I am intending to clad external walls of my house with cement board cladding. Part of my house was already cladded with same material as this was an extension which was constructed in accordance to new regs and fully insulated, however the rest of the house is fairly cold.
My plan was to fix vertical 25mm battens to the building, then fix a foil vapour barrier to the battens (so leaving a 25mm ventilation gap between the wall and the barrier, then fix double battens (25mm) and insert 25mm foam insulation boards between battens, then cover with another vapour foil barrier on top, and ultimately fix the cladding. However I have since discovered that the cladding also requires to breath and therefore needs to have a gap left too so I’m considering triple battens, however this pushes the total out by another 25mm, totalling to 75mm worth of battens plus cement board overlap.
In regards to exterior walls, I have read mixed feedbacks on whether I could apply the insulation board directly to the wall in between the first set of battens and then cover the lot with foil vapour barrier, before fixing double batten and then cladding onto those, or whether I should indeed leave a gap between the wall and insulation board, as well as between board and cladding, so effectively having 2 ventilation gaps?
Any thoughts on this please?
Hi Ed,
We would suggest applying render carrier boards to the first battens, and then applying the insulation on top of these boards (we stick the insulation on and then use supplementary fixings).
If you need some more help, give our Technical Team a call on 08001337072 and they can advise regarding this issue
Thanks
Thanks Adam, my problem is that I have already got the materials, so the Celotex, foil vapour barrier and cement board cladding for the whole project.
However if my understanding of your recommendation is correct, aside from using the render boards as an iterim layer between the first battens and the insulation, you would still then need to apply extra battens to the insulation as otherwise how would you fix the cement board cladding as a final finish?
Also your suggestion seems to go in line with my assumption that I need to have two ventilation gaps, one between wall and insulation, and one between insulation and cladding, so in essence still create a sort of sandwich wit 3 layers, but instead of 3 battens overlap as below:
1. wall
2. vertical batten
3. foil vapour barrier
4. horizontal batten-celotex filled gaps
5. foil vapour barrier
6. vertical batten
7. cement board
Have arender board added in?
1. wall
2. vertical batten
3. render board
4. celotex/insulation fixed to above
5. vertical batten
6. cement board
Hi Ed, just to clarify our first answer. What we are saying is you have your sheathing board (treated or wrapped OSB) that closes off your insulated stud work. Then you would install additional battens to create a drainage cavity. Another cement board can sit on these battens which can take the insulated render. The insulated render comprises of a non-combustive Rockwool Dual Density slab, which is then directly rendered. Hopefully this makes sense!
Hi, I’ve viewed a bungalow today which has damp problems and it was said a new damp proof course is required from outside only on all external walls.
The outside has external brick effect installation – will this be the cause and is an outside damp proof course all that’s required??
Any help you can advise would be much appreciated thanks…
Hi Kath, external brick effect insulation can sometimes contribute to damp issues, especially if it has been installed without proper consideration for moisture management. It can trap moisture against the wall or create a bridge for moisture to bypass existing damp proofing measures. However, this doesn’t automatically mean it’s the root cause of your damp problems. The first step would be to organise a comprehensive damp survey, and then assess the options. It’s likely that the DPC will need to be replaced.
…
>
Forums
>
Screwfix Community Forum
>
Builders’ Talk
>
Improving living conditions for my mum in damp and humid small bungalow.
Tags:
air gap
condensation
damp
humidity
insulation
polystyrene insulation
ventilation
Edit
Thread ToolsUnwatch Thread
MINTYMINTY
MINTYMINTY
New Member
My mum wants me to add a layer of insulation around the outside walls of her small bungalow and clad over it to improve her damp and unhealthy living conditions inside. However I want to understand the problem and make sure her idea is the solution.
The existing external cladding is wood with a breathable paint. Inside that is a 20mm layer of fibreglass wool packed tightly against a 30mm layer of polystyrene which is lined with a plastic non breathable sheet. The Internal cladding is wood and there is no air gap between any of these layers. These layers appear dry when I exposed a small area.
The roof is the same with thick bitumous felt on the outside which seems to be sound.
The floor is elevated off the ground with good ventilation underneath but there is no insulation – just a plastic sheet and a layer of underlay under the lino floor.
Inside she has double glazed windows with no vents in the frames. She has one air vent in the wall which is open and an extractor fan in the bathroom not the kitchen.
Her humidity inside is regularly in the 90s, heating is provided by plug in electrical heaters- it’s a small space. Basically a cabin. She lives with her dog.
The walls are mouldy and even the curtains and her clothes but there are no signs of leaks.
Even though she keeps a window open most of the time and her dehumidifier running; the high humidity presumably comes from the dog, cooking, etc etc and the plastic sheet inside the walls and lack of ventilation in the window frames prevents it escaping so condenses on the colder walls and floor where the insulation is insufficient- have I got this right?
Is it possible the felt roof let’s in moisture even though it’s not actually leaking?
If so then an extractor fan in the kitchen and one in the living space is needed plus floor insulation and a bit more roof and wall insulation.
Am I right so far?
If so then my next question is about installing the insulation and whether to start again by ripping down the existing external cladding and replacing the polystyrene OR rip out the internal cladding OR my mum’s idea which leave everything as it is and at another layer on top.
Thank you.
Hi Minty, this seems to be a multi-layered issue with damp. We’d recommend a chat with the Technical Team (0800 1337072, [email protected]) due to the complexity of the issues. However, your course of action is likely to be one of the following:
– Ripping Down External Cladding: This approach allows you to inspect the structure for any hidden issues, such as moisture damage or mould growth. It also provides an opportunity to install a more effective insulation solution and incorporate a breathable membrane that could help manage moisture more effectively. However, it’s likely to be the most disruptive and potentially the most expensive option.
Ripping Out the Internal Cladding: This could be less disruptive to the building’s exterior appearance and might provide a chance to add insulation from the inside. However, it could limit your insulation options and would not address any potential issues with the external cladding.
Adding Another Layer on Top: Adding another layer of insulation on top of the existing structure might be the least disruptive option and could improve thermal performance. However, without addressing the underlying issues of ventilation and moisture management, it might not fully resolve the problem. It’s also important to ensure that any additional layers don’t trap moisture within the walls.
The breakdown of potential causes, like trapped moisture or bridged damp-proofing, is super helpful for homeowners. I’m curious to know more about identifying existing damp problems before EWI installation. Are there any visual signs homeowners should watch out for, or is a professional inspection always recommended?
Hi Joey, there are several visual indicators, including discolouration/staining, mould, peeling paint/wallpaper, efflorescence, musty odour, cracked/damaged plaster, wet patches, and condensation. However, a professional inspection will help identify any underlying issues that could cause structural issues. They’ll also recommend the best course of action.