

- Tip 1 - Applying stress patches
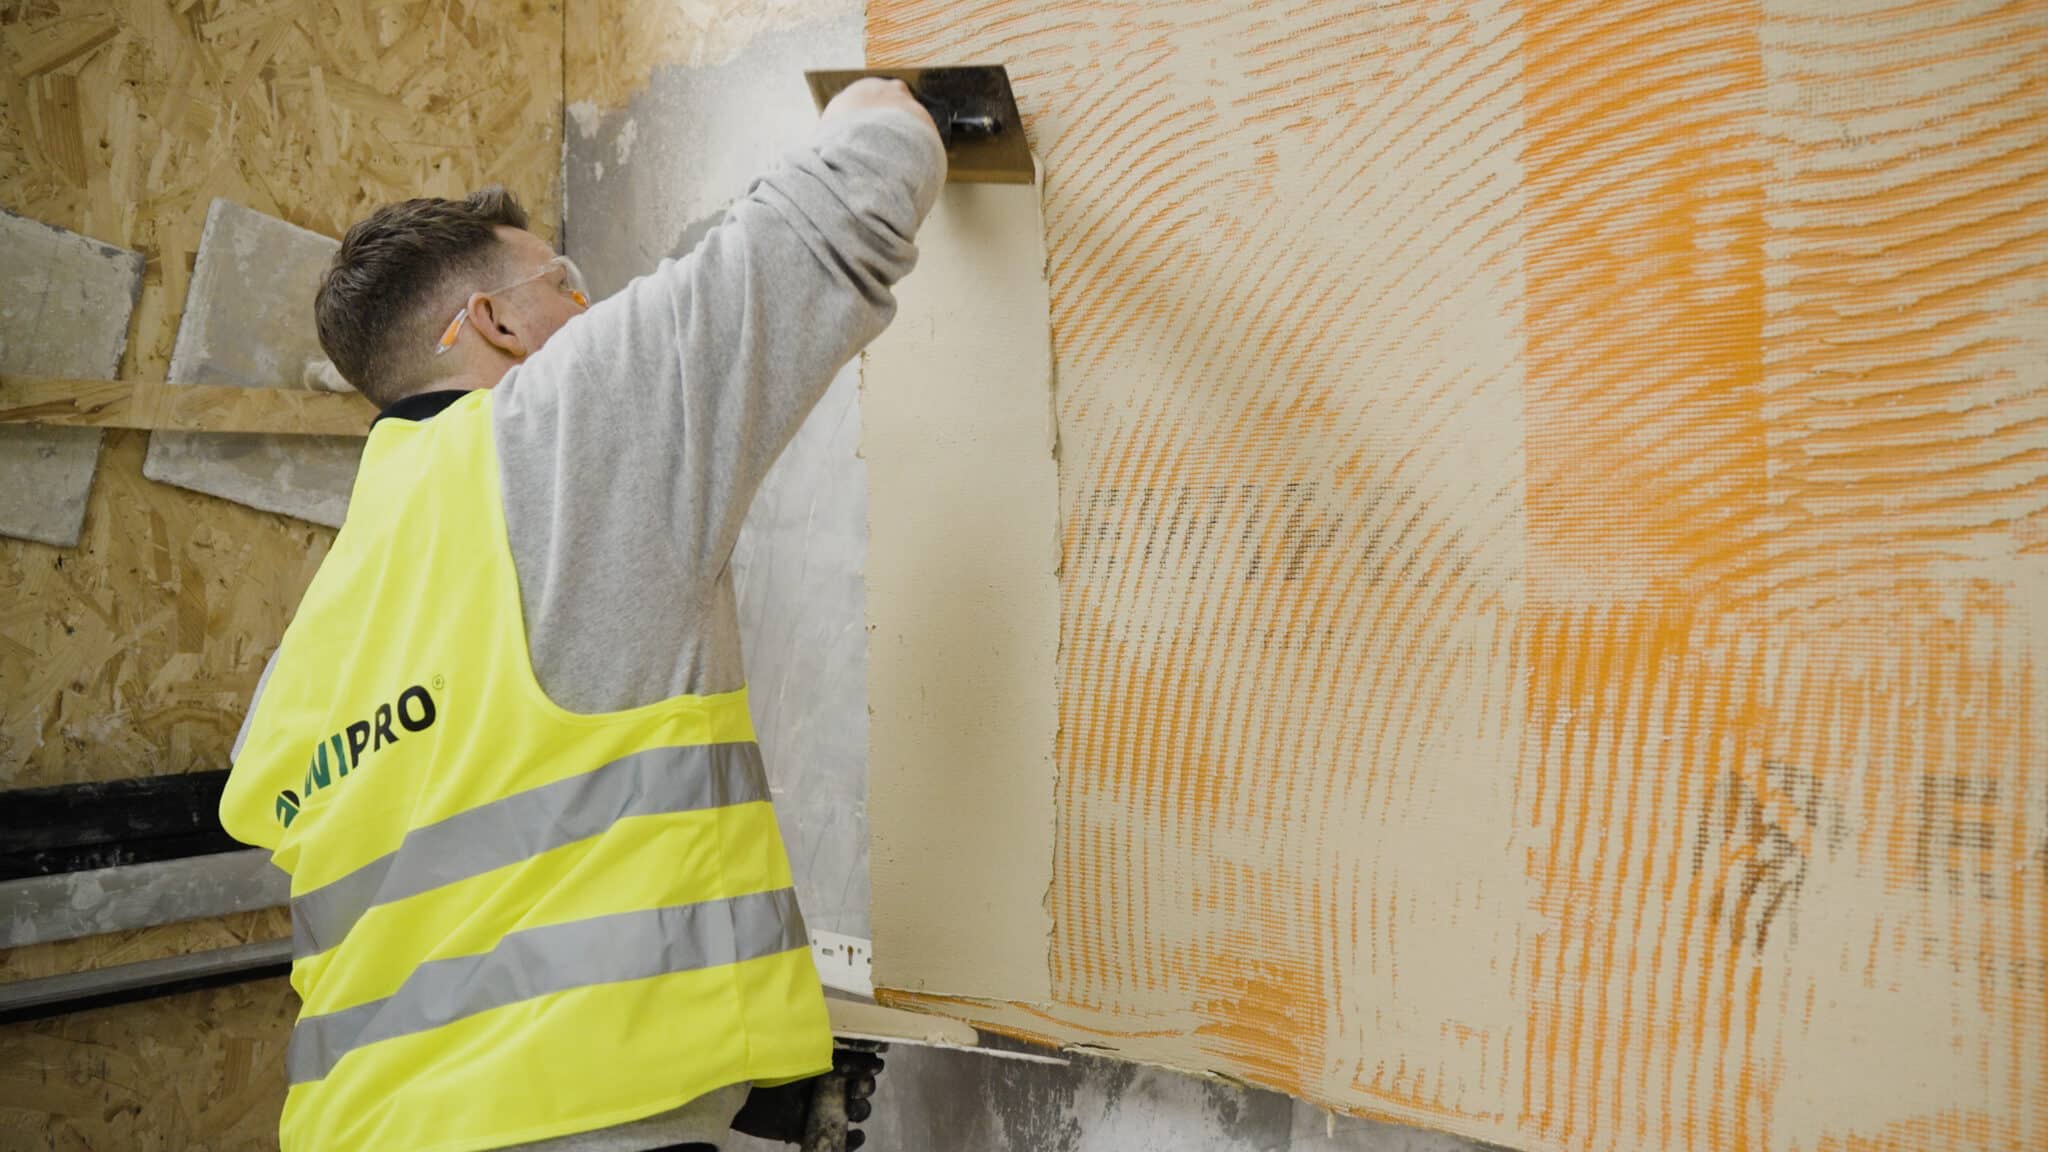
- Tip 2 - Embedding the mesh
- Tip 3 - Follow approved boarding patterns
- Tip 4 - Follow approved fixing patterns
- Tip 5 - Ensure a consistent finish
- What problems could occur if these tips are not followed?
- Applying stress patches incorrectly or not at all
- Improper embedding of the mesh
- Not following approved boarding patterns
- Disregarding approved fixing patterns
- Inconsistent finish
- EWI warranties - the benefits of a successful EWI install
- EWI warranties for a successful EWI install
A successful EWI install hinges on several steps running efficiently and correctly. It's very important to follow these steps to prevent any problems later on. However, you must also document and follow these steps to receive material warranties from EWI Store and EWI Pro. We will discuss those steps in today's blog, alongside the potential issues with not following them. The following tips presume that one has a working knowledge of a successful EWI install. The EWI Pro Training Academy teaches many of the skills required for the process. Some experienced retrofit installers will have their own way of doing things. However, as long as the finish and installation are consistent and tackle the correct issues, this is not a problem.
Tip 1 - Applying stress patches
Applying stress patches around windows and doors is crucial when installing External Wall Insulation. These areas are particularly vulnerable to cracking due to structural movement and thermal expansion. Stress patches, made from fibreglass mesh, are applied over the insulation before the basecoat. To properly install these patches, cut the mesh into 250mm x 350mm strips and then apply them directly on the corners of windows. Ensure the mesh is fully embedded into the basecoat to avoid air pockets, which can lead to insulation failure. This reinforcement helps to distribute stress and reduce the risk of cracks developing, ensuring the longevity of the insulation system.

Tip 2 - Embedding the mesh
Embedding the mesh in EWI systems is a step that must be executed with precision. The mesh acts as a reinforcing layer, helping to prevent cracks and adding strength to the insulation board. When applying the mesh, it should overlap by at least 100mm. Start from the bottom of the wall and work up to ensure proper coverage and overlap. Use a trowel to press the mesh into the wet basecoat, smoothing out any bubbles or wrinkles. It’s important to ensure the mesh is completely embedded; exposed areas can lead to weaknesses in the insulation system.
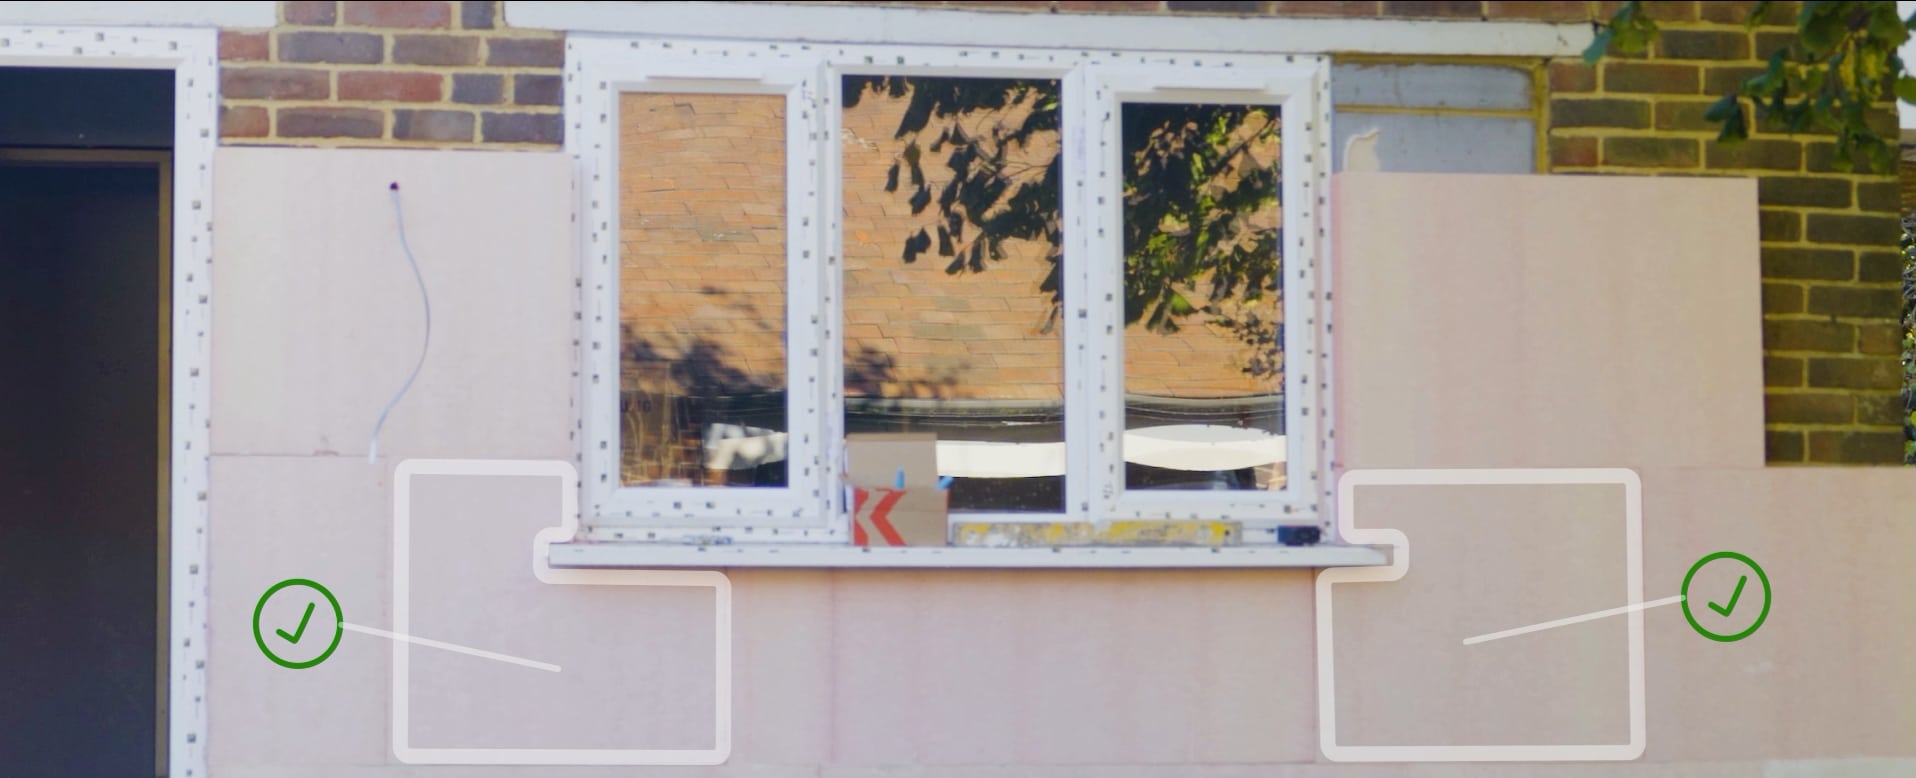
Tip 3 - Follow approved boarding patterns
Adhering to approved boarding patterns is essential for effective EWI installation. Patterns such as staggered and L-shaped cuts around windows enhance the insulation's structural integrity and thermal efficiency. Staggering the boards helps to distribute the load and reduce thermal bridging, while L-shaped cuts allow for a snug fit around architectural features, minimising gaps. Always ensure the boards do not line up edge-to-edge, as this can create weak points. Following these patterns helps achieve a seamless and effective insulation layer, which is essential for optimal energy efficiency.
Tip 4 - Follow approved fixing patterns
Correct fixing patterns are vital for securing EWI boards to the underlying structure. This typically involves placing fixings in a grid pattern, ensuring each board is firmly anchored. Pay special attention to the areas around corners and openings, where additional fixings may be necessary to combat increased wind load. Following these patterns ensures the insulation is securely attached and performs effectively for years.
[caption id="attachment_65163" align="aligncenter" width="1024"]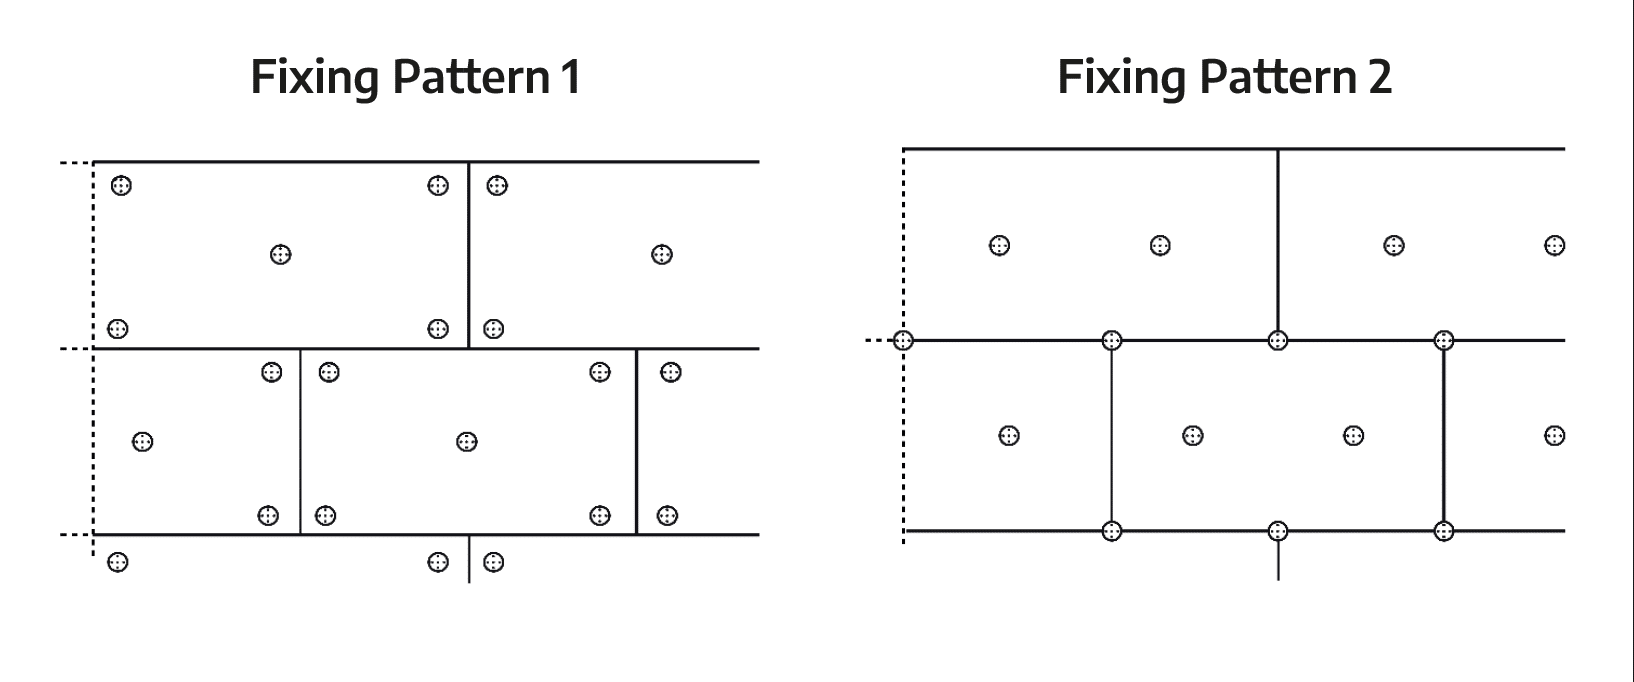 Fixing patterns for insulation fixings[/caption]
Tip 5 - Ensure a consistent finish
Achieving a consistent finish in EWI systems involves careful application of render and attention to detail. First, ensure the basecoat is smooth and level before applying the render. Use a long, straight float to help achieve a flat surface. When applying the render, work in manageable sections to maintain consistency in texture and thickness. Techniques such as floating (smoothing and levelling the surface of freshly applied plaster) and sponge finishing (creating a textured surface) should be executed uniformly across the wall. Consistency is key for aesthetic appeal and ensuring an even drying process, which is crucial for the system's durability.
[caption id="attachment_73885" align="aligncenter" width="1024"]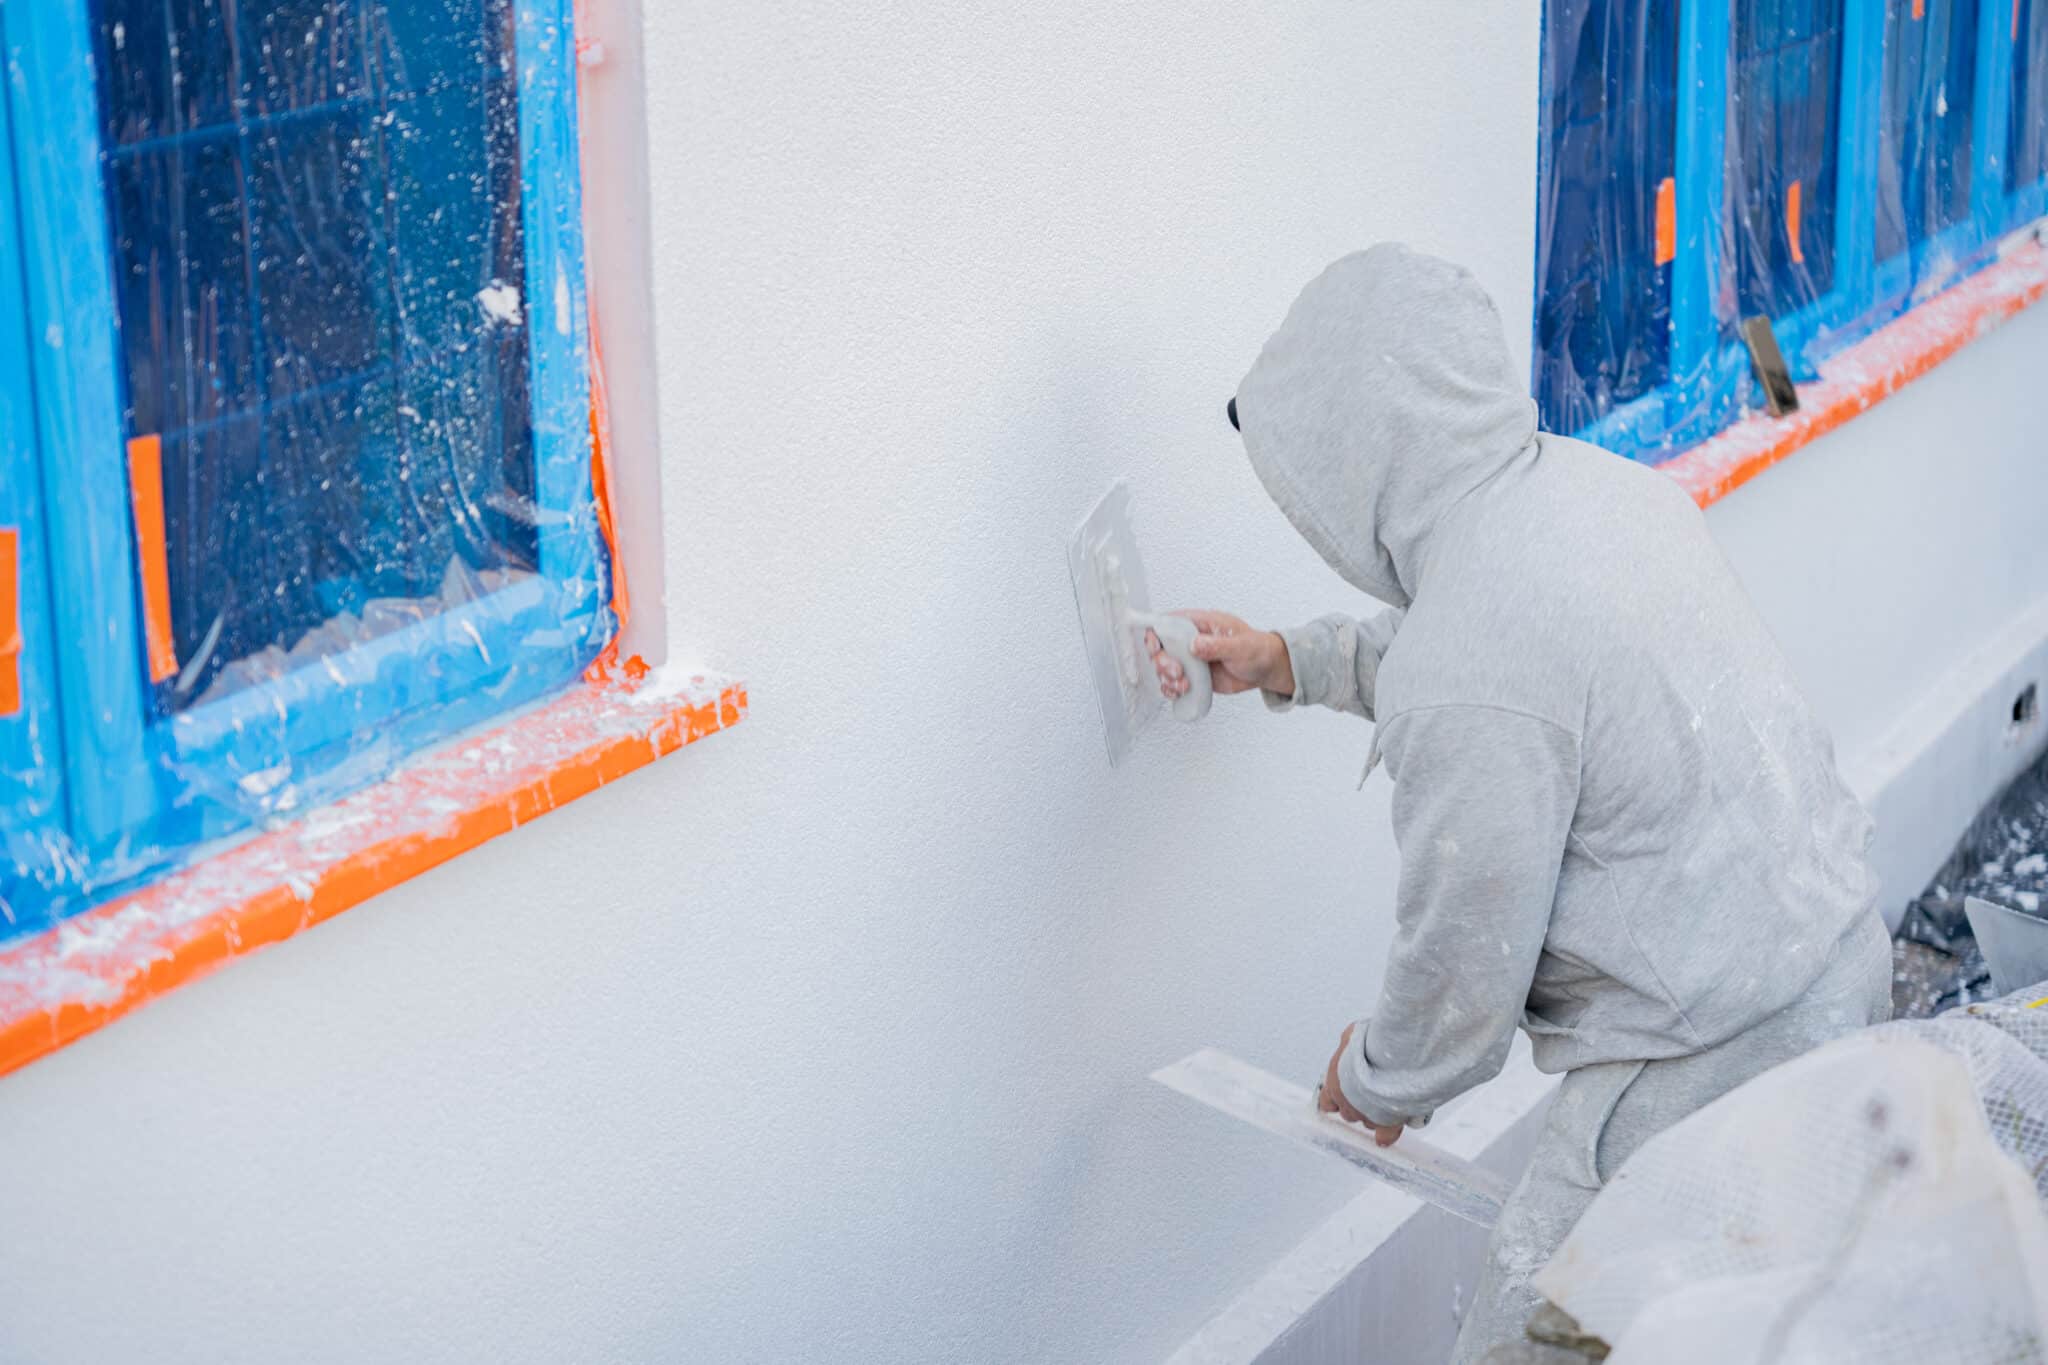 Silicone render being textured with a render float[/caption]
What problems could occur if these tips are not followed?
Applying stress patches incorrectly or not at all
- Cracking: Without stress patches around windows and doors, these areas are more susceptible to cracking due to thermal expansion and structural shifts. Cracks detract from the building's visual appeal and can lead to thermal bridging, where heat escapes more readily.
- Water ingress: Cracks may allow water to penetrate the insulation, leading to damp issues and potential deterioration of the building’s structure over time.
Improper embedding of the mesh
- Structural weakness: If the reinforcing mesh is not properly embedded within the base coat, it can leave parts of the insulation unsupported, increasing the risk of cracks and structural failure.
- Inconsistent insulation performance: Bubbles and gaps left by poorly embedded mesh can result in uneven insulation, leading to hot or cold spots on the wall surface.
Not following approved boarding patterns
- Thermal bridging and heat loss: Incorrectly aligned or poorly cut insulation boards can lead to gaps and overlaps, facilitating thermal bridging and increasing heat loss, reducing the building's energy efficiency.
- Structural compromise: Staggering boards and cutting them to fit snugly around features like windows ensures a more stable and uniform application. Ignoring these patterns can lead to weak points in the insulation layer.
Disregarding approved fixing patterns
- Insulation detachment: Insulation boards may not be securely attached without the correct fixing patterns, risking detachment during adverse weather conditions or over time due to the building’s natural movements.
- Increased maintenance costs: Insufficient fixings can lead to ongoing maintenance issues, as parts of the insulation system may need to be repeatedly secured or replaced.
Inconsistent finish
- Aesthetic issues: A lack of consistency in the final render can result in an unattractive appearance with visible seams and uneven surfaces, detracting from the property’s value.
- Durability concerns: Uneven application of the render layer can lead to varying drying times across the surface, potentially causing premature cracking and degradation of the render.
EWI warranties - the benefits of a successful EWI install
A successful EWI installation offers significant benefits, enhancing a property's functionality and value. By enveloping the exterior of a building in a continuous layer of insulation, EWI dramatically reduces heat loss. This improvement in thermal efficiency can significantly lower energy costs, saving on heating in the winter and cooling in the summer. EWI also enhances indoor comfort by eliminating cold spots and stabilising indoor temperatures, creating a more comfortable environment. This consistency reduces the need for frequent heating or cooling adjustments, further lowering energy consumption and prolonging the lifespan of HVAC systems. Additionally, EWI can dramatically improve the building’s façade. Various finishes and styles can refresh older buildings or maintain aesthetics in conservation areas, thereby boosting property value and appeal. This makes EWI a smart investment for property owners looking to sell or enhance their building's curb appeal. Structurally, EWI protects the building envelope from environmental stressors such as rain, wind, and temperature fluctuations, which can degrade materials over time. This protection extends the building's lifespan, lowers maintenance costs, and prevents issues like dampness and mould, improving the structure's integrity and occupant health. EWI also acts as a sound barrier, minimising external noise intrusion into the building. This feature is particularly beneficial in urban areas or near busy roads, where it can significantly enhance the acoustic environment.
EWI warranties for a successful EWI install
EWI Pro warranties are split between Government and privately funded, varying in length depending on the system. Once again, all the materials must come from EWI Pro and must include an approved build-up. Government-funded EWI systems can be certified and guaranteed for 25 years, whilst render-only systems can receive warranties for 10 years. Privately funded guarantees our systems for 10 years. The guidelines for EWI Pro dictate that we provide the material warranty, and the installer is liable for the labour. If a problem occurs, the installer will cover the labour. We will cover the material portion if the materials used are sourced from EWI Pro.