In the world of construction, it's often said that the final outcome is only as good as its foundation. When working with external wall insulation and render, this foundation is called the substrate. Ensuring the substrate is perfectly prepared is paramount to the longevity and aesthetics of the wall finish. This article sheds light on the critical steps to prepare a substrate, specifically focusing on repairing masonry and brick walls.
What is a substrate?
Before any repair or priming starts, the first step is always to remove any contaminants or imperfections. This includes:
- Dirt and Dust: Even a thin layer of dust can hinder adhesion. A clean substrate ensures the finishing material, whether it's paint or render, adheres perfectly.
- Old Finishes: Old paint, sealant, or any previous finish should be stripped away to expose the raw substrate.
- Organic Growth: Mould, algae, or moss can severely compromise adhesion and might lead to health issues. It's essential to ensure the substrate is free from any organic growth.
Imperfections, like cracks and holes, can compromise the final finish. Repairs ensure a smooth, even surface and can prevent underlying issues like moisture ingress. This stage includes:
- Filling Cracks and Holes: Small imperfections should be filled with the appropriate filler or mortar. EWI Levelling Mortar should be used to fill cracks in substrates.
- Levelling: For substrates with significant unevenness, levelling might be necessary. This provides a flat surface for the final finish.
This stage involves getting the substrate in the perfect condition to receive the finish. It includes:
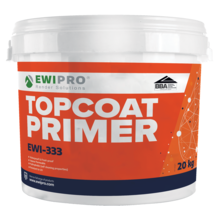
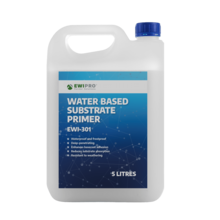
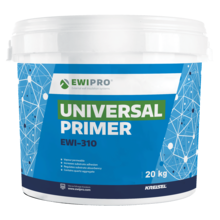
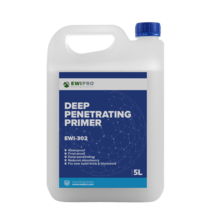
- Priming: Primers can improve adhesion, prevent substrate moisture, and ensure a consistent finish. Primers also regulate the absorptivity of the surface whilst allowing moisture to escape. When incorporated into a breathable system, any potential residual dampness in the substrate can escape.
- Texturing: In some cases, a particular texture might be needed on the substrate to ensure the final material adheres correctly. Aggregates in primers can provide a more tactile surface for adhesion.
[caption id="attachment_67966" align="aligncenter" width="1024"] EWI-310 Universal Primer is tinted red to clearly show where it has been applied.[/caption]
What impacts substrate preparation?
Every substrate, whether it's brick, masonry, concrete, or plasterboard, comes with its unique set of characteristics. For instance, a porous substrate like brick absorbs more moisture compared to a dense one like concrete. This inherent porosity can affect how a primer or sealer is applied. A porous surface might require multiple coats or a special type of primer to ensure that subsequent layers adhere correctly. On the other hand, plasterboard might need specific treatments to prevent moisture damage or to create a surface suitable for tiling or rendering. The ultimate goal of the finish significantly dictates the preparation process. Suppose you're planning to tile a surface. In that case, the substrate might need waterproofing or a more textured finish to ensure that the adhesive bonds effectively. On the other hand, if you're aiming for a painted or rendered finish, the emphasis would shift to creating a smooth, uniform surface. The choice of the finish material, be it tile adhesive, paint, or render, also comes with manufacturer-specific guidelines for substrate preparation. Adhering to these specifications is paramount to ensuring the longevity of the final finish. The environment in which the substrate exists plays a pivotal role in its preparation. In areas with high humidity or rainfall, moisture resistance becomes a primary concern. Preparing a substrate in such conditions might require added steps, such as using waterproofing agents or vapour barriers. The temperature is another vital consideration. Some materials have optimal temperature ranges for application, impacting when and how substrate preparation occurs. For instance, certain primers or fillers might require longer curing times in colder temperatures. Moreover, substrates in high-traffic areas or places exposed to chemicals might require additional reinforcement or specific treatments to ensure their durability.
Preparing a substrate - repairing small cracks
- Clean the Surface: Begin by brushing off loose particles, dirt, or old paint from the wall using a stiff bristle brush.
- Widen the Crack: For a more effective fix, use a chisel and hammer to slightly widen the crack. This provides a better grip for the filler.
- Apply Levelling Mortars or Basecoats: Choose a suitable mortar or basecoat for the substrate. Mix as directed and fill the cracks using a trowel or filling knife. Smooth it out, ensuring it's level with the wall surface.
- Allow to Dry: Different mortars have varying drying times. Always follow manufacturer recommendations.
Why is Priming Essential?
1. Improving Adhesion:Primers are specially formulated to create a bond between the substrate and the final finish. Without this intermediary layer, renders, paints, or insulation might not adhere effectively, which leads to potential flaking, peeling, or premature wear. 2. Reducing Substrate Absorbency: Substrates like brick or plaster can be quite porous. A primer seals these pores, ensuring that the finishing layer does not sink into the substrate or get absorbed unevenly. This is essential for a uniform appearance and preventing "hot spots" where the finish might dry too quickly. 3. Providing an Even Base: Imperfections, even after repairs, can impact the appearance and performance of the final finish. Therefore, primers help in creating an even, consistent surface, masking minor blemishes and ensuring a uniform application of the finishing material.
The Process of Priming:
1. Selecting the Right Primer:The type of substrate and the intended final finish play a crucial role in primer selection. For instance, a masonry primer would be best suited for brick or concrete substrates, while a drywall primer would be ideal for plasterboard. 2. Surface Cleaning: Before primer application, the substrate should be free of dust, dirt, and grease. This can be achieved through thorough brushing or wiping down the surface. 3. Application: Using a brush, roller, or spray equipment, evenly apply the primer to the substrate. It is also vital to maintain a consistent coat without over-applying, which can lead to drips or pooling. 4. Drying Time: Allow the primer to dry as per the manufacturer's recommendations. This can vary based on the type of primer and environmental conditions. A well-dried primer ensures optimal adhesion of the finishing layer. 5. Inspection: Before proceeding with the final finish, inspect the primed surface for any missed spots or inconsistencies. A uniformly primed substrate is the hallmark of a flawless final finish.
What happens if you don't prepare a substrate?
The most immediate consequence of this oversight is poor adhesion. A well-prepared substrate allows the finishing material, whether it's paint, render, or insulation, to cling effectively. In the absence of this preparation, uneven applications, unsightly air bubbles, or patchy regions emerge. As time advances, these imperfections evolve, manifesting as peeling, flaking, or blistering. Such disruptions not only tarnish the visual appeal but also usher in the need for often expensive and prolonged repairs.
Beyond adhesion, the visual impact of an improperly prepared substrate is quite stark. Blemishes distract from the overall appearance. Additionally, if a porous substrate isn't primed, it can unevenly drink up the finish. Discoloured patches that either darken or lighten, disrupting the uniformity of the application.
An unprepared substrate becomes an unwitting gateway for moisture. Tiny cracks or gaps, often overlooked, morph into entry points for water, especially during periods of heavy rain or elevated humidity. The constant assault of moisture can slowly chip away at the substrate's core strength, eroding its material, and jeopardising its structural integrity. Worse, this dampness becomes an inviting haven for mould and mildew. Their presence not only mars the aesthetics with their distinct black or green tinges but poses a significant health threat, especially for individuals with respiratory sensitivities.
 The repercussions of skipping substrate preparation also carry a hefty price tag. When complications arise post-finish due to an unprepared base, the rectification isn't straightforward. Repairing these after-effects is more labour-intensive and often costlier than if the substrate was prepped right from the outset. Furthermore, an inadequately prepared surface means the finish won't last as long as it's meant to, necessitating redoing the work much earlier. This, in turn, incurs additional material and labour expenditures.


