- How to measure the property for your insulation and colour render materials?
- Note down the positioning of auxiliary items for treatment with external wall insulation systems
- Getting coverage right for bags of materials and buckets of colour render
- Get your colour render right with the customer
- How can EWI Store help with your external insulation and colour render materials?
Before you start the job, we strongly advise carrying out a full and comprehensive survey of the property you are pricing the job for. Make sure you have the right equipment at the survey stage. We would recommend a clipboard, notepad, HB pencil, tape and a laser measuring device. Start the survey by getting your bearings around the property by taking photographs of each elevation of the property and generally have a good walk around. For example, if you are surveying a semi-detached property you will obviously be measuring the front, the side and the back of the property. The customer may well have other ideas about which elevations they want to insulate.
To price external wall insulation materials, you will need to measure the property, ensure correct coverage, and consider all your ancillary items.
How to measure the property for your insulation and colour render materials?
Using either the tape measurer or the laser tape-measuring device, measure each elevation of the property. For the height of the property, we will always recommend starting from ground level and then measuring up to the soffit level. For the width, take measurements edge to edge. Then, take your height value and carry out the multiplication to give your surface area of the wall.
You may have noticed that we have completely ignored the windows, doors and other openings from the overall square meterage or surface area calculation. This is because you will find out that the works around the openings take considerably longer to complete. This starts right from preparation, to beading installation, and overall finishing.
However, each window, door and opening should be measured separately. This is to provide the linear meterage for all the angles, corners and reveal beading. You may also want to install window head and under sill beads.
Ensure the perimeter of the property has been measured to work out the number of starter tracks and other fixings. If the property roof overhang is nearly enough flush with the external walls, then you will need to work out any verge trim cappings to use.
Finally, capture the rest of the corners of the property for your corner beads. Also, note down any stop bead or expansion bead profiles required.
On the thin-coat render system, the beading is embedded into the basecoat or adhesive layer of the system. So, unlike thick coat renders, the beading is hidden within the system. All these features feed into the pricing of external wall insulation materials.
Note down the positioning of auxiliary items for treatment with external wall insulation systems
When the elevation information has been captured, ensure that you take plenty of photos to map the external fixtures and fittings, noting down the positions of any ventilation, boiler flues, utility boxes and external cabling. You will need to spend a bit of time noting down all the positioning of the auxiliary items. They could have a material impact on the price of your materials (pipework, etc) and overall job.
Note: any BT, Virgin or other telephone boxes need to be worked around and left alone. The customer needs to separately agree with those utilities on any adaptations.
For example, boiler flues will have to be extended by a Gas Safe engineer. Likewise, any gas pipes that are externally visible should be dealt with appropriately. Downpipes and guttering will have to be extended outwards to meet the new profile of the wall. Subsequently, they will need to be reattached once the insulation installation process has been completed. Please don't bury any external cables as they will have to be appropriately dealt with, either by a qualified electrician or unattached from the existing substrate and then reattached appropriately once the external wall insulation installation process has been completed.
For additional reading on domestic combustion equipment, ventilation and cooling equipment, please refer to additional industry guidelines and or the manufacturer's specifications.
Getting coverage right for bags of materials and buckets of colour render
If you are unsure about the coverage of the base coat/scrim adhesive bags or the coverage of the render buckets, then please refer to the manufacturer's guidance and instructions on the recommended coverage areas for those materials. It is always best to try and order a little bit extra for the job (approximately 10%-15% more materials). This will ensure that you don't run out of materials during the key installation part of the job. Running out of materials can put you in a tricky situation with the client. It can also make the job take much longer than expected, and increase the price for the materials.
Get your colour render right with the customer
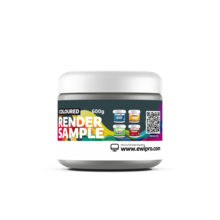
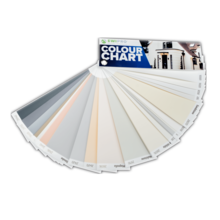
Great tip! Get the customer onside with the colour render selection nice and early in the installation process. Ideally, this could all take place during the quotation stage. Ensure this by simply having the right colour charts and render swatches with you.
Planning your external wall insulation materials and colour render tinting with the distributor and/or manufacturer will not only build in any lead times at the start of the installation process, but you can actually then plan for the delivery of those materials on the dates that you want them to. Waiting for additional deliveries can be frustrating for the fitter. They are nearly always beset by some sort of issue, and can also push up the material prices you are needing.
How can EWI Store help with your external insulation and colour render materials?
EWI Store has made the process of pricing your materials so much easier. Have you heard of our external wall insulation and render calculator? By doing all the necessary survey steps as mentioned previously and then pulling all the key figures, you can use our online calculator to quickly size the material requirements for your installation job. If you have issues with colour render selection – no problem at all! There are dozens of colours for your customer to choose from using our colour render tool. With the Materials Calculator in place, it is very simple to price external wall insulation materials.


