Lime render is a traditional building material used for centuries to protect and decorate external walls. Comprised of lime, water, and an aggregate such as sand, lime render allows buildings to breathe, reducing dampness and improving indoor air quality. Its flexibility makes it especially suitable for older buildings that may move or settle over time. As the new EWI Pro Heritage Lime Range recently landed at the EWI Store, we thought it would be a good time to discuss how to apply it. Therefore, if you’re considering applying lime render to a building, here’s a step-by-step guide to help you achieve the best results.
Modern lime render systems have evolved significantly from the traditional lime ranges that required onsite slaking. Traditional lime rendering involved quicklime, which had to be carefully slaked with water to create lime putty. This process could be hazardous due to the exothermic reaction of slaking. This lime putty would then be mixed with aggregates to create the mortar for rendering. The process demanded a deep understanding of the material characteristics and careful attention to achieve the right consistency and workability of the mortar for application.
In contrast, modern lime render systems, such as EWI-747 Lime Render and EWI-748 Lime Basecoat, offer pre-mixed solutions incorporating technological and material science advances. These modern systems often include hydraulic lime, which sets through hydration and can cure even in the presence of water, making them more versatile and easier to use compared to non-hydraulic lime, which is traditionally used. Modern lime renders can be directly applied without onsite slaking, reducing preparation time and making the application process safer and more efficient.
Before applying lime render, it’s crucial to prepare the surface properly. This involves removing any loose or damaged material, dust, and vegetation. If you’re applying render to a previously painted or rendered surface, you must strip it back to the bare wall. The surface should be dampened before application to ensure the render adheres properly and to reduce the risk of it drying too quickly, which can cause cracking.
Mixing your Lime Render
For both EWI-747 Lime Render and EWI-748 Lime Basecoat, precise mixing with water is crucial to achieve the desired consistency and performance. The EWI-747 Lime Render should be mixed exclusively with water at a rate of 4-5 litres per bag, ensuring a homogeneous consistency free of lumps for 3 to 5 minutes. Exceeding the recommended water quantity can compromise the mortar’s mechanical resistance and lead to cracking. The mixture must be used within 60 minutes of kneading.
Similarly, the EWI-748 Lime Basecoat requires mixing with water only at a rate of 4.5-5 litres per bag. Pour the water into a bucket and gradually add the product, mixing to achieve a lump-free, homogeneous consistency for 3 to 5 minutes. Over-watering the mix could result in a loss of mechanical strength and potential cracking. Once mixed, the basecoat has a longer working time, allowing for adjustments during application.
For both products, an electric or concrete mixer is recommended for large quantities to ensure an even mix. Proper mixing is essential for optimal application and durability of the lime render system.

Lime Render comes as a dry-mix and should be mixed with a paddle mixer
Applying the render
The application process for EWI-747 Lime Render and EWI-748 Lime Basecoat is designed to ensure optimal coverage and performance on various substrates. Understanding each product’s specific techniques and considerations will help achieve a durable, aesthetically pleasing finish.
EWI-747 Lime Render
The EWI-747 Lime Render can be applied manually using a trowel or sprayed with an automatic plastering machine, catering to traditional and modern application methods. Applying the render to a usual thickness of 4 to 10 mm is recommended for effective results. If a greater thickness is required, exceeding 10 mm, it should be applied in two or more layers, with each layer applied before the previous one has fully hardened. This method helps to avoid cracking and ensures a uniform thickness throughout the application area. Once applied, the surface should be floated to achieve the desired finish, be it smooth or textured, depending on the project requirements.
EWI-748 Lime Basecoat
The EWI-748 Lime Basecoat, designed for both interior and exterior masonry works, offers a flexible base layer for subsequent finishes or as a standalone application where a rustic or refined texture is desired. The basecoat should be spread to a thickness of 4 to 10 mm, and for applications requiring thicknesses greater than 10 mm, it’s advisable to apply in two or more coats. Like the lime render, each coat should be applied before the previous one has fully hardened to ensure proper adhesion and prevent delamination.
For the adhesion of insulation boards, a perimeter cordon of 6 to 10 cm width and 2.5 to 5 cm thickness should be applied on the plate, with the inside of the cordon filled with two or more sticks of 8 to 10 cm depending on the plate size. The mortar must cover at least 40% of the panel surface to ensure effective insulation adhesion. When working on supports with very good planimetry, it’s possible to apply the mortar directly on the support and the insulating panels using a 10mm x 10mm notched trowel, a method known as double glueing.
Regularisation of the insulating panels with mesh involves applying a combed coat with a 6-8 mm notched trowel, laying the mesh on top of the combed layer, and filling in the mesh until the groove and valley are evened out, followed by a final coat of regularising mortar. The mesh used should comply with specific characteristics for optimal performance.

A very thin layer of Lime Basecoat is used to level the “fluffy” surface of Rockwool
Curing
Achieving optimal results with EWI-747 Lime Render and EWI-748 Lime Basecoat extends beyond the application, with the curing phase playing a pivotal role. Proper curing ensures the render achieves its intended strength, durability, and aesthetic finish.
Moisture Management
The cornerstone of adequate curing is maintaining the correct moisture level. For EWI-748 Lime Basecoat, pre-dampening the substrate is crucial to prevent rapid drying and ensure robust adhesion and curing, mitigating the risk of cracking. Although specific details for EWI-747 Lime Render were not directly provided, similar moisture management principles apply. These principles emphasise the importance of avoiding overly quick drying, which can lead to cracking and compromised render integrity. Using a hessian sheet to manage moisture for lime-based products is crucial.
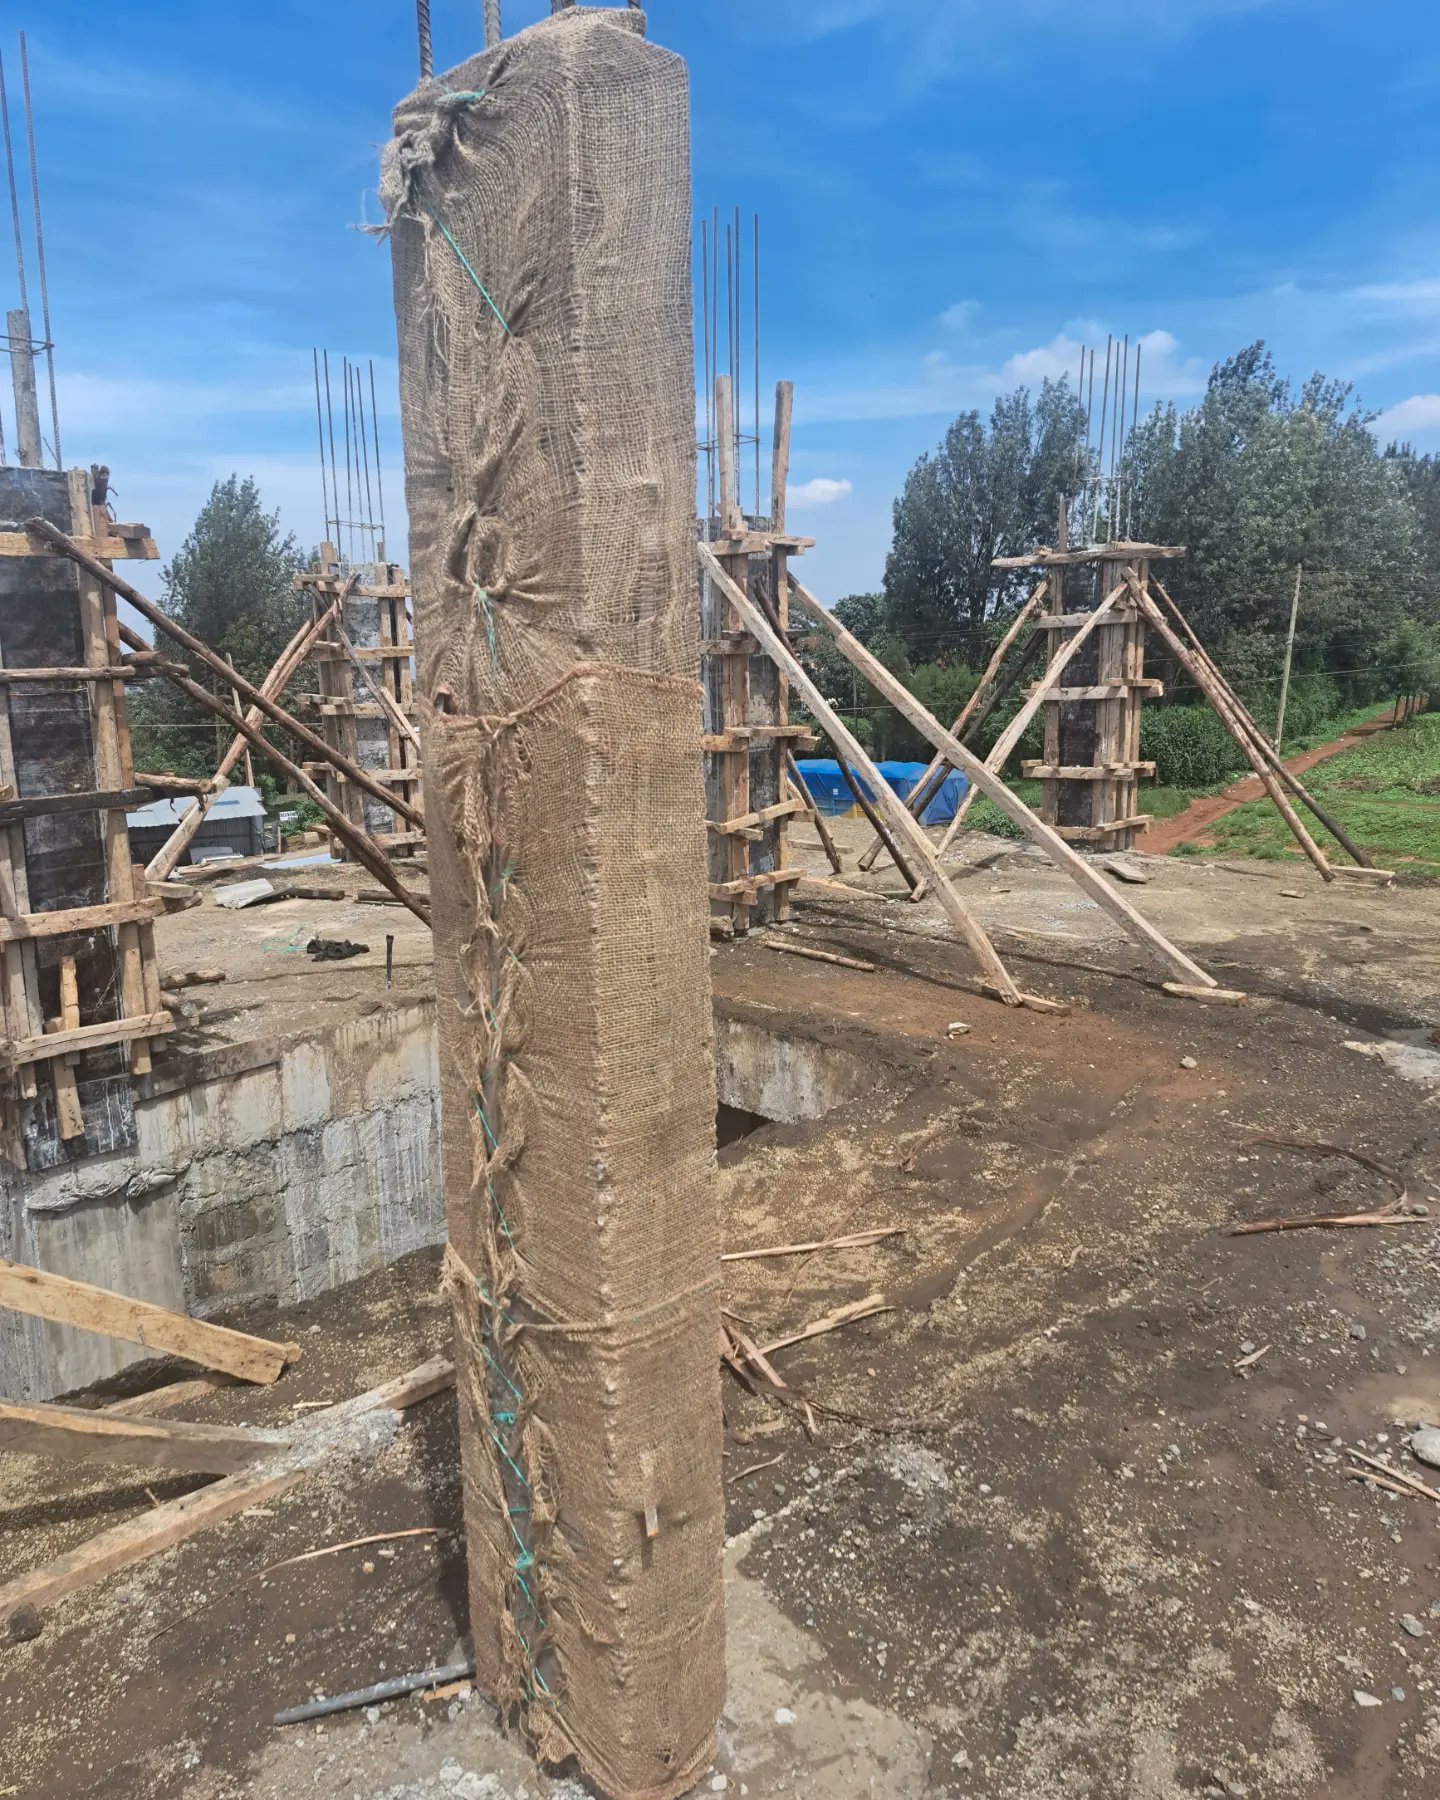
Hessian is used for curing in construction as it holds water and allows materials to cure more slowly in warm conditions


