4.8 out of 5 Stars on TrustPilot
TEXT US ON WHATSAPP - 0741 837 2281

What Insulation Fixings Do You Need?

Every external wall insulation project requires the correct insulation fixings. However, it is crucial to note that a bedding adhesive must supplement mechanical fixings. Insulation boards, like mineral wool, can be very heavy. If the substrate has minor degradation or is porous in nature, the insulation boards can peel and fall off. We refer to this as delamination. Depending on the desired system features, insulation fixings vary in size and composition, ranging from plastic to metal. We begin today’s blog by discussing the benefits of the aforementioned wet and dry fixing method.

Why do you need bedding adhesives alongside insulation fixings?

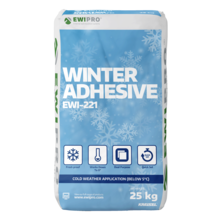
Bedding adhesives create a strong bond between the insulation board and the wall surface. This helps to distribute the load evenly across the board, reducing the risk of point loading where fixings alone might stress or damage the insulation material. Using bedding adhesives minimises air gaps between the insulation board and the wall. Air gaps can significantly reduce the insulation’s thermal efficiency by allowing heat transfer. The adhesive ensures a snug fit, enhancing the overall thermal barrier.

Adhesives provide additional structural support to the insulation boards. This is particularly important in areas with high wind loads or where the wall’s surface is uneven. The adhesive helps to keep the boards stable and prevents them from moving or rattling. Thermal bridging occurs when heat bypasses the insulation through more conductive materials, like fixings. Using an adhesive to secure the insulation reduces the reliance on mechanical fixings. Therefore, thermal bridging is minimised, improving overall insulation performance.

Properly applied bedding adhesive acts as a barrier against moisture ingress. This is crucial for preventing the degradation of the insulation material and the wall behind it, especially in damp or humid conditions.

Different types of insulation fixings

Metal Pin Hammer Fixings

These fixings are designed for quick installation. The metal pin is hammered into the insulation and masonry, providing a fast and secure connection. They are ideal when speed is crucial and the masonry is sufficiently soft to accommodate the hammer action without damaging the material.

Metal Pin Screw Fixings

These require a screwing action to secure the insulation to the wall. They offer a more controlled installation than hammer fixings and are suitable for harder masonry that might crack under hammer impacts. The screwing action allows for adjustable depth and tightness, which can be beneficial in uneven areas.

Hammer Fixings with Plastic Pin

These are lighter than their metal counterparts and primarily used for lighter insulation materials or where corrosion resistance is a priority. The plastic pin is hammered into place, which makes installation quick. However, they are not as strong as metal pin fixings and are better suited for less demanding applications.

Metal Fixing with Short Expansion Zone

These fixings are designed for use when the masonry is not deep or when the penetration depth is minimised to avoid affecting internal structures. The short expansion zone allows the fixing to expand and grip the wall without deep insertion, making them useful for thin walls or sensitive installations.

Metal Firebreak Fixings

These are specifically designed for areas where fire resistance is crucial. They are made from materials that can withstand high temperatures and will maintain their structural integrity longer in the event of a fire. These fixings are essential in fire-sensitive areas to prevent the spread of flames through the insulation system.

What factors impact the choice of mechanical fixings?

Type of insulation
  • Lightweight insulation: For less dense materials like expanded polystyrene or lightweight mineral wool, hammer fixings with plastic pins may suffice due to their ease of installation and minimal impact on the material.
  • Heavy or rigid insulation: For denser boards, like phenolic foam or rigid fibreglass, metal pin screw fixings or metal pin hammer fixings provide the necessary strength to hold these materials securely against the wall.
Characteristics of the wall
  • Soft masonry (like older brick or soft stone): Use hammer fixings with plastic pins or metal pin hammer fixings, as these can be inserted without excessive force that might damage the substrate.
  • Hard masonry (like concrete or modern brick): Metal pin screw fixings are better suited as they allow for controlled insertion and can handle the resistance of tougher materials without causing cracks or splits.
  • Thin or sensitive walls: Metal fixings with short expansion zones are ideal for thin or sensitive walls as they prevent deep penetration that could compromise the wall’s structural integrity.
Environmental factors
  • High wind areas: In locations with significant wind pressure, metal pin screw fixings provide the adjustable depth and secure hold needed to prevent movement or detachment of the insulation.
  • Moist or humid conditions: Plastic pin hammer fixings might be preferable due to their corrosion resistance. However, metal firebreak fixings are more appropriate if strength is needed to withstand the environment without degradation.
Specific project requirements
  • Fire safety concerns: Metal firebreak fixings are essential in fire-prone areas where regulations require fire-resistant materials. These fixings are designed to maintain their integrity at high temperatures and prevent fire from spreading through the insulation system.
  • Load-bearing capacity: For heavy insulation panels or when the insulation layer needs to support additional cladding or decorative elements, metal pin screw fixings or metal pin hammer fixings with a high load-bearing capacity are necessary to ensure the structure remains secure over time.
Ease of installation and long-term durability
  • Quick installation needs: Hammer fixings with either metal or plastic pins are the go-to for speed, making them suitable for large projects where time is of the essence.
  • Long-term stability: Metal pin screw fixings, especially those with corrosion-resistant coatings, offer the best mix of durability and adjustability for long-lasting installations.

Where do you apply the fixings on the insulation boards?

Fixing pattern 1

In this pattern, the fixings are placed:

  • At each corner of the insulation boards. Helps to secure the outer edges and ensure they are flush against the wall.
  • Additional fixings are placed along the vertical midline of each board. It provides extra support and reduces any flex or movement of the board.

This pattern is particularly effective for larger boards or where the wind load may cause the insulation to flex. The corner fixings ensure that the edges do not peel away from the wall, and the central fixings help distribute the load across the board, maintaining its integrity.

Fixing pattern 2

This pattern incorporates:

  • Like in Pattern 1, fixings at each corner include fixings along the horizontal midline.
  • Additional fixings are symmetrically distributed along the vertical joints between boards.

This arrangement provides additional support at the joints between boards, which can weaken the insulation system. The horizontal midline fixings help keep the board stable and tightly fitted against the wall, crucial in maintaining thermal efficiency and reducing thermal bridging.

Fixing patterns for insulation fixings

How does the bedding adhesive supplement this?

As discussed, we recommend a combination of bedding adhesive and insulation fixings. However, it is crucial to consider the application pattern of the bedding adhesive. Therefore, we recommend either full coverage or the perimeter and dot and dab method.

Full coverage has adhesive applied across the entire surface of the insulation board. This comprehensive coverage ensures maximum adhesion and reduces the risk of air gaps, significantly enhancing thermal performance.

Perimeter with dot and dab involves applying adhesive around the board’s perimeter, with additional ‘dot and dab’ spots of adhesive in the middle, covering at least 40% of the board’s surface. This pattern provides good adhesion while using less material than full coverage, making it cost-effective. It also helps align and level the boards during installation.


Perimeter of adhesive being applied to Rockwool
A full coverage layer of bedding adhesive being applied to Rockwool

What are some accessories that supplement insulation fixings?

Several accessories are designed to supplement insulation fixings to ensure a robust and effective insulation installation.

  1. Fixing spreader washers: These washers distribute the load over a larger area of the insulation board. This helps prevent the fixings from pulling through the insulation material, particularly with EPS or mineral wool. They are crucial for maintaining the integrity of the insulation panels, especially in areas subjected to high wind loads or where the insulation material is relatively fragile.
  2. Plastic EPS router: This tool is used to route or create recesses in EPS boards before the insertion of metal mechanical fixings. The fixings can be installed flush with the insulation’s surface by preparing a routed area, reducing thermal bridging and ensuring a smoother exterior finish. This is particularly important in systems where a finish (like render or cladding) will be applied over the insulation.
  3. Stainless steel washers for firebreak fixing: These washers are used with firebreak fixings to provide additional support and effectively spread the load. Made from stainless steel, they are durable and resistant to corrosion, which is vital in maintaining the structural integrity of the firebreak system under extreme conditions. The washers also help maintain the fixings’ position in high-temperature scenarios, ensuring that the firebreak continues to perform its function in case of a fire.
  4. Insulation dowel caps: Insulation dowel caps are designed to cover the heads of mechanical fixings in insulation systems. These caps play a crucial role in reducing thermal bridging, improving the overall thermal performance of the insulation, and enhancing the finish of external wall insulation systems.

Common mistakes to avoid when installing insulation fixings

Incorrect fixing selection

Choosing the wrong type of fixings can lead to ineffective installation. For instance, using fixings meant for soft masonry on very hard surfaces may not provide sufficient grip and could damage the wall. Selecting fixings appropriate for the specific insulation material and wall type is crucial.

Inadequate fixing density

Using too few fixings can cause insulation panels to sag or detach. Adhering to the manufacturer’s guidelines or standard fixing patterns ensures sufficient coverage and support.

Poor placement of fixings

Placing fixings too close to the edges of insulation boards can lead to cracking or breaking. Fixings should be evenly distributed to avoid creating stress points and to provide balanced support.

Overdriving and underdriving fixings

Driving fixings too deeply can compress the insulation excessively, reducing its thermal effectiveness and potentially damaging the wall or board. Conversely, underdriven fixings may not anchor securely, leading to loose panels that can rattle or detach, especially in windy conditions.

Ignoring the manufacturer’s instructions and environmental factors

Neglecting the specific installation instructions for each type of fixing and insulation material can lead to improper installation, reducing effectiveness and possibly voiding warranties. Additionally, not considering environmental factors like wind exposure or moisture can lead to inappropriate fixings or inadequate sealing.

Neglecting the use of adhesive

In some projects, especially external applications, combining mechanical fixings with adhesive is recommended to enhance bonding strength and reduce thermal bridging. Skipping adhesive can compromise the insulation performance.

Poor surface preparation and ignoring thermal bridging

Inadequate preparation of the wall surface before installation can impede the adhesion of adhesive and mechanical fixings. Moreover, failing to consider thermal bridging when placing fixings can result in significant energy losses. Strategic placement of fixings and potentially using specialised thermal break fixings are crucial for minimising these effects.

Facebook
Twitter
LinkedIn

Leave a Reply

Your email address will not be published. Required fields are marked *

Read more here!